Difference between revisions of "RISC FOTA"
From ESS-WIKI
| Line 111: | Line 111: | ||
:Use package tool to generate ota package file | :Use package tool to generate ota package file | ||
| − | ::Put update.zip | + | ::Put update.zip (generate by ota-package.sh) in the same folder. |
| + | |||
[[File:Oat1.png|600px|Oat1.png]] | [[File:Oat1.png|600px|Oat1.png]] | ||
| + | |||
::Set the relevant settings and generate ota package. | ::Set the relevant settings and generate ota package. | ||
| + | |||
[[File:Ota2.png|600px|Ota2.png]] | [[File:Ota2.png|600px|Ota2.png]] | ||
| Line 121: | Line 124: | ||
[[File:Ota3.png|600px|Ota3.png]] | [[File:Ota3.png|600px|Ota3.png]] | ||
| + | |||
::Push upload button to upload ota package | ::Push upload button to upload ota package | ||
| + | |||
[[File:Ota4.png|600px|Ota4.png]] | [[File:Ota4.png|600px|Ota4.png]] | ||
| Line 128: | Line 133: | ||
:Check whether the device has connected to server | :Check whether the device has connected to server | ||
::If the device connect to server, the host will show your device | ::If the device connect to server, the host will show your device | ||
| + | |||
[[File:Ota5.png|600px|Ota5.png]] | [[File:Ota5.png|600px|Ota5.png]] | ||
| Line 136: | Line 142: | ||
:Upgrade system | :Upgrade system | ||
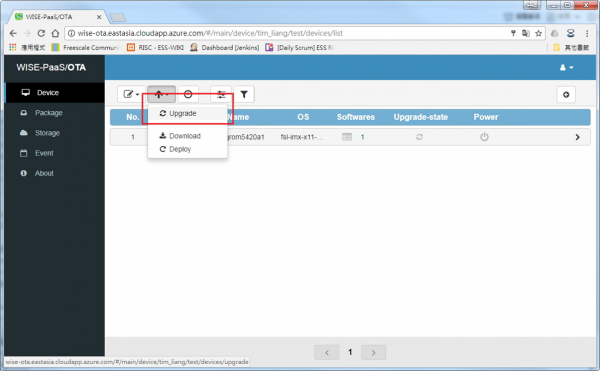
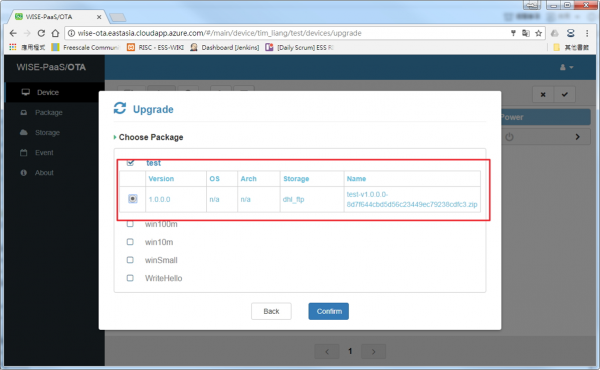
::Push upgrade button and select ota package | ::Push upgrade button and select ota package | ||
| + | |||
[[File:Ota7.png|600px|Ota7.png]] | [[File:Ota7.png|600px|Ota7.png]] | ||
| Line 141: | Line 148: | ||
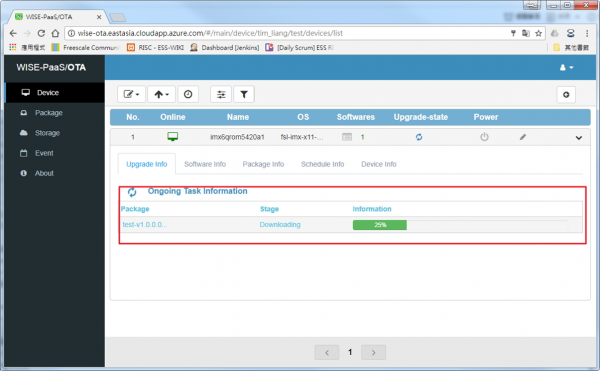
[[File:Ota9.png|600px|Ota9.png]] | [[File:Ota9.png|600px|Ota9.png]] | ||
| + | |||
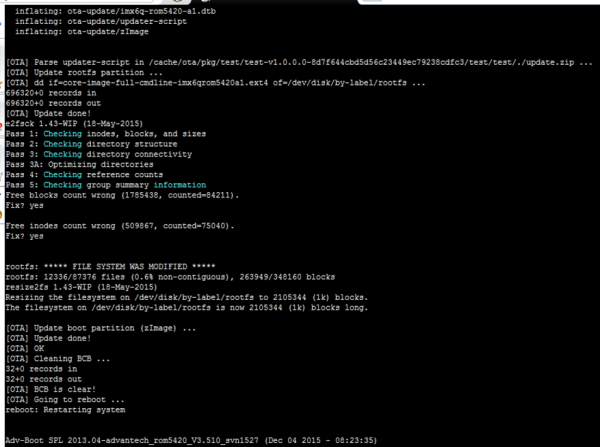
::We can see the message via debug port | ::We can see the message via debug port | ||
| + | |||
[[File:Ota10.png|600px|Ota10.png]] | [[File:Ota10.png|600px|Ota10.png]] | ||
=== Local Upgrade === | === Local Upgrade === | ||
| + | *Step 1 | ||
| + | :copy update.zip to cache | ||
| + | cp update.zip /cache/ | ||
| + | *Step 2 | ||
| + | :enter /cache/ | ||
| + | cd /cache | ||
| + | *Step 3 | ||
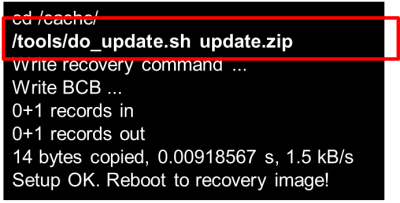
| + | :set flag and set recovery command | ||
| + | /tools/do_update.sh update.zip | ||
| + | [[File:local1.png|400px]] | ||
| + | *Step 4 | ||
| + | :reboot | ||
| + | *Step 5 | ||
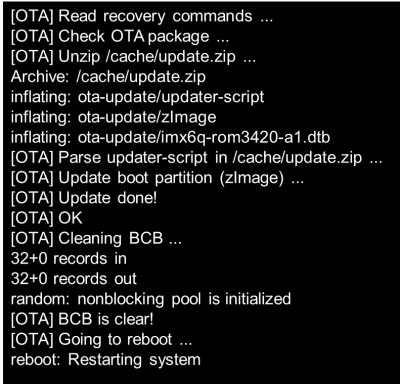
| + | :Enter recovery system and upgrade | ||
| + | [[File:local2.png|400px]] | ||
| + | *Step 6 | ||
| + | :Enter main system and check result | ||
| + | /toos/do_update.sh result | ||
| + | OK | ||
Revision as of 04:46, 13 July 2017
Contents
Introduction
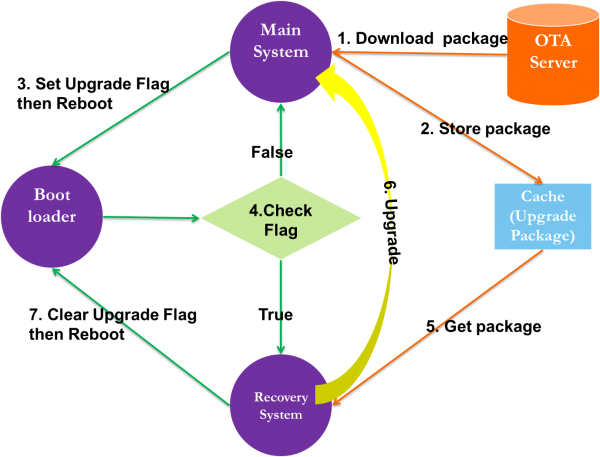
Our Workflow as below
WISE-OTA
Server
Here we can upload our update package and depoly to devices
http://wise-ota.eastasia.cloudapp.azure.com/
Agent
Our devices need to install OTA agent by default, so that devices can connect to OTA server.
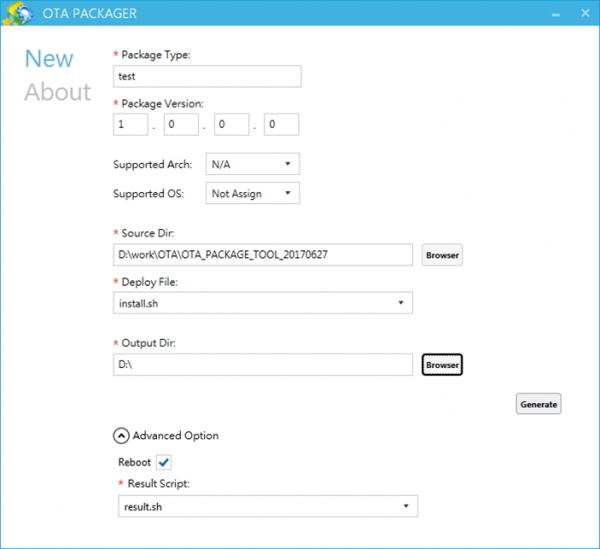
OTA PACKAGE TOOL
This software is a package tool for WISE-PaaS/OTA system. You can use this tool to generate an OTA package which can be identified by the WISE-PaaS/OTA system based on your original update resources.
Architecture
Bootloader
It can detect the Update Flag is enabled or not
- If flag is true ,it will enter Recovery System
- If flag is false,it will enter Main System
System
We need two systems in our image.
One is Main System , another is Recovery System.
Both Systems have a specific script for FOTA.
- Main System
- do_update.sh
- This script has three functions
- Record upgrade package file path
- Set Upgrade Flag
- Return OTA result
- This script has three functions
- do_update.sh
- Recovery system
- adv-ota.sh
- This script has two functions
- Parse upgrade package and upgrade main system
- Clear Upgrade Flag, and reboot
- This script has two functions
- adv-ota.sh
Cache
For storage of downloaded OTA upgrade packages
Upgrade Packages
ota-package.sh
- Generate package file to be used for OTA update on Yocto Linux
Usage: ota-package.sh [OPTIONS]

Generate package file to be used for OTA update on Yocto Linux

-b <file>  Bootloader image file
-k <file>  Kernel or Boot image file
-d <file>  DTB (device tree) file
-r <file>  Rootfs image file
-o <file>  Output file
-h         Show help
Platform
Depending on the platform, we have different modifications for FOTA
i.MX6
- Layout
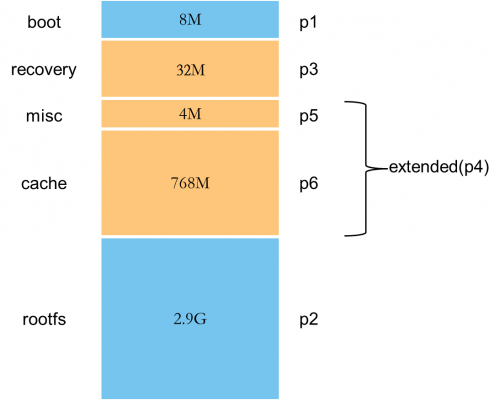
- Take 4G size as an example
- We add misc partition to store upgrade flag
- We can only upgrade boot and rootfs partition so far
- Kernel
- Device tree
- Root file-system
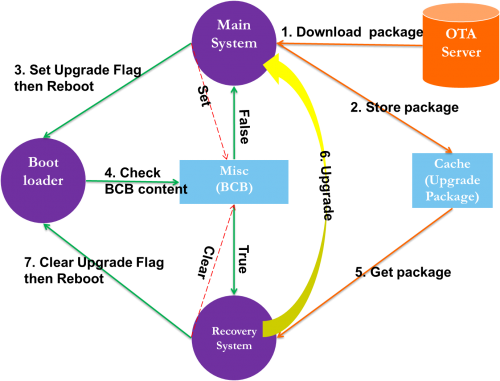
- Workflow
- The step for setting upgrade flag here is to write BCB to misc partition.
- Then bootloader will detect the content of BCB, if the content is "boot-recovery" then system will boot to recovery system.
Quark
QCOM
Upgrade Steps
Online Upgrade
- Step 1
- Use package tool to generate ota package file
- Put update.zip (generate by ota-package.sh) in the same folder.
- Set the relevant settings and generate ota package.
- Step 2
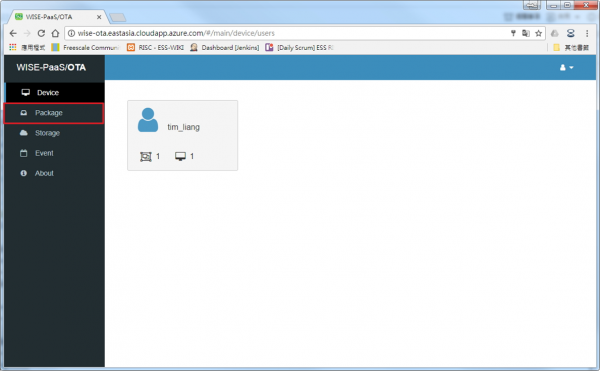
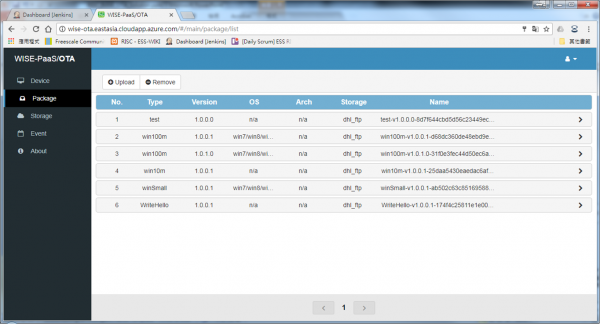
- Upload ota package
- Push upload button to upload ota package
- Step 3
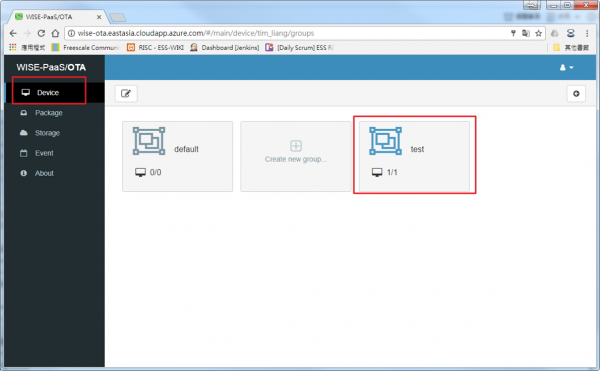
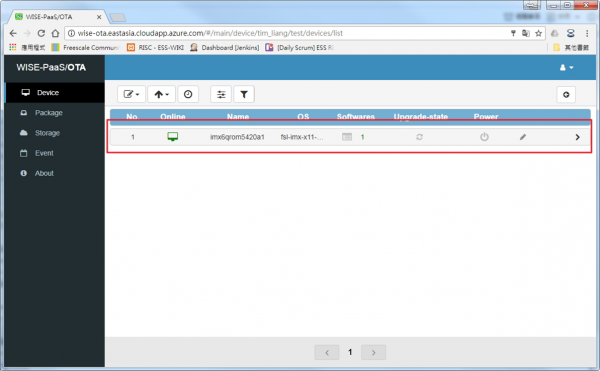
- Check whether the device has connected to server
- If the device connect to server, the host will show your device
- Step 4
- Upgrade system
- Push upgrade button and select ota package
- We can see the message via debug port
Local Upgrade
- Step 1
- copy update.zip to cache
cp update.zip /cache/
- Step 2
- enter /cache/
cd /cache
- Step 3
- set flag and set recovery command
/tools/do_update.sh update.zip
- Step 4
- reboot
- Step 5
- Enter recovery system and upgrade
- Step 6
- Enter main system and check result
/toos/do_update.sh result
OK
