Difference between revisions of "RISC FOTA"
Daniel.hung (talk | contribs) |
|||
| (11 intermediate revisions by 2 users not shown) | |||
| Line 75: | Line 75: | ||
== Platform == | == Platform == | ||
| + | |||
Depending on the platform, we have different modifications for FOTA | Depending on the platform, we have different modifications for FOTA | ||
| + | |||
=== i.MX6 === | === i.MX6 === | ||
| − | *Layout | + | *'''Layout''' |
:Take 4G size as an example | :Take 4G size as an example | ||
| − | [[File: | + | [[File:Imx6 layout.png|500px|imxayout.png]] |
:#We add misc partition to store upgrade flag | :#We add misc partition to store upgrade flag | ||
:#We can only upgrade '''boot''' and '''rootfs''' partition so far | :#We can only upgrade '''boot''' and '''rootfs''' partition so far | ||
| + | |||
:::*Kernel | :::*Kernel | ||
:::*Device tree | :::*Device tree | ||
:::*Root file-system | :::*Root file-system | ||
| − | + | *'''Workflow''' | |
| − | |||
| − | * | ||
[[File:Imxflow2.png|500px|Imxflow2.png]] | [[File:Imxflow2.png|500px|Imxflow2.png]] | ||
| Line 99: | Line 100: | ||
:Then bootloader will detect the content of BCB, if the content is '''"boot-recovery"''' then system will boot to recovery system. | :Then bootloader will detect the content of BCB, if the content is '''"boot-recovery"''' then system will boot to recovery system. | ||
| + | |||
| + | === Qualcomm APQ8016 (Dragdonboard 410c) === | ||
| + | |||
| + | The workflow on Qualcomm APQ8016 platform is the same with i.MX6. We also have an additional MISC partition for upgrade flag. The only one difference between APQ8016 & i.MX6 is '''partition layout'''. | ||
| + | |||
| + | *'''Layout''' | ||
| + | |||
| + | :Because we have 8GB eMMC in RSB-4760 project, we are able to have bigger /cache space for image upgrade. | ||
| + | :Besides the bigger size of storage, we use GPT (GUID partition table) for partitions. | ||
| + | |||
| + | : | ||
| + | |||
| + | :The partition layout is as below. The orange ones are new to added for OTA feature. | ||
| + | |||
| + | [[File:Db410c layout.png|320px|Db410c layout.png]] | ||
=== Quark === | === Quark === | ||
| − | |||
| − | |||
== Upgrade Steps == | == Upgrade Steps == | ||
| Line 111: | Line 125: | ||
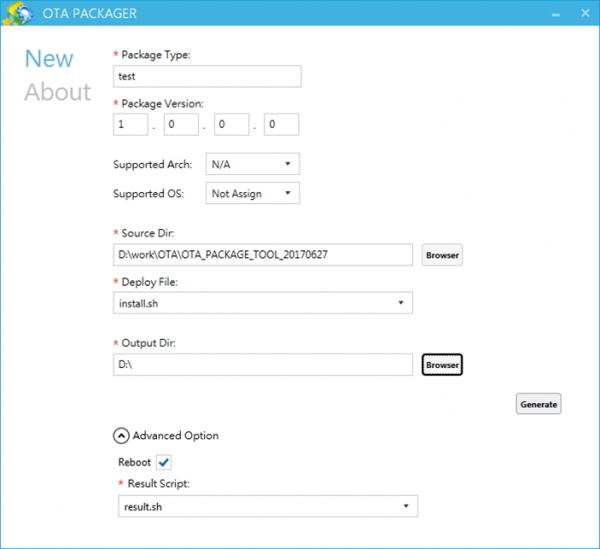
:Use package tool to generate ota package file | :Use package tool to generate ota package file | ||
| − | ::[ | + | ::[https://github.com/ADVANTECH-Corp/OTA_PACKAGE_TOOL/archive/master.zip OTA_PACKAGE_TOOL] |
::'''We must rename to update.zip''' | ::'''We must rename to update.zip''' | ||
::Put update.zip (generate by ota-package.sh) in the same folder. | ::Put update.zip (generate by ota-package.sh) in the same folder. | ||
Latest revision as of 07:40, 16 August 2018
Contents
Introduction
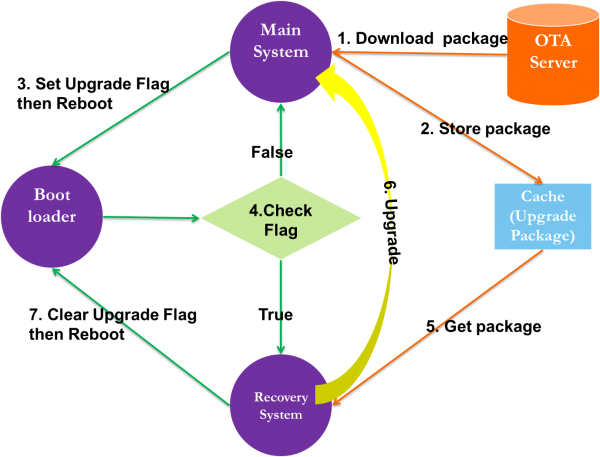
Our Workflow as below
WISE-OTA
Server
Here we can upload our update package and depoly to devices
http://wise-ota.eastasia.cloudapp.azure.com/
Agent
Our devices need to install OTA agent by default, so that devices can connect to OTA server.
OTA PACKAGE TOOL
This software is a package tool for WISE-PaaS/OTA system. You can use this tool to generate an OTA package which can be identified by the WISE-PaaS/OTA system based on your original update resources.
Architecture
Bootloader
It can detect the Update Flag is enabled or not
- If flag is true ,it will enter Recovery System
- If flag is false,it will enter Main System
System
We need two systems in our image.
One is Main System , another is Recovery System.
Both Systems have a specific script for FOTA.
- Main System
- do_update.sh
- This script has three functions
- Record upgrade package file path
- Set Upgrade Flag
- Return OTA result
- This script has three functions
- do_update.sh
- Recovery system
- adv-ota.sh
- This script has two functions
- Parse upgrade package and upgrade main system
- Clear Upgrade Flag, and reboot
- This script has two functions
- adv-ota.sh
Cache
For storage of downloaded OTA upgrade packages
Upgrade Packages
ota-package.sh
- Generate package file to be used for OTA update on Yocto Linux
Usage: ota-package.sh [OPTIONS]

Generate package file to be used for OTA update on Yocto Linux

-b <file>  Bootloader image file
-k <file>  Kernel or Boot image file
-d <file>  DTB (device tree) file
-r <file>  Rootfs image file
-o <file>  Output file
-h         Show help
Platform
Depending on the platform, we have different modifications for FOTA
i.MX6
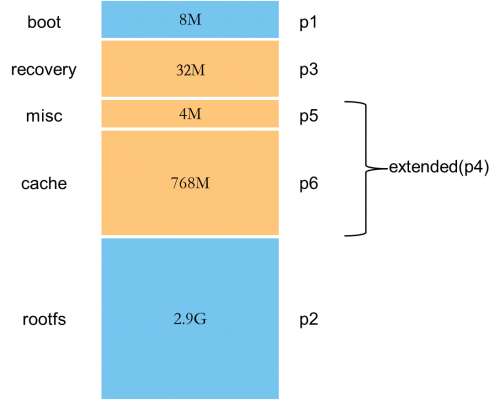
- Layout
- Take 4G size as an example
- We add misc partition to store upgrade flag
- We can only upgrade boot and rootfs partition so far
- Kernel
- Device tree
- Root file-system
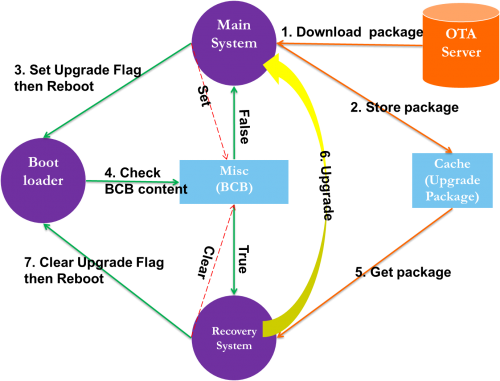
- Workflow
- The step for setting upgrade flag here is to write BCB to misc partition.
- Then bootloader will detect the content of BCB, if the content is "boot-recovery" then system will boot to recovery system.
Qualcomm APQ8016 (Dragdonboard 410c)
The workflow on Qualcomm APQ8016 platform is the same with i.MX6. We also have an additional MISC partition for upgrade flag. The only one difference between APQ8016 & i.MX6 is partition layout.
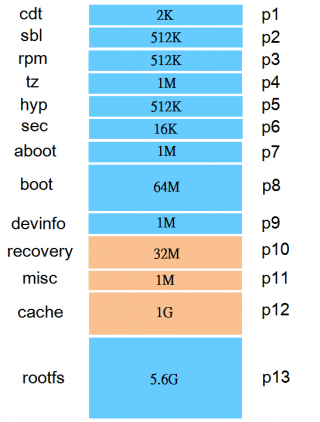
- Layout
- Because we have 8GB eMMC in RSB-4760 project, we are able to have bigger /cache space for image upgrade.
- Besides the bigger size of storage, we use GPT (GUID partition table) for partitions.
- The partition layout is as below. The orange ones are new to added for OTA feature.
Quark
Upgrade Steps
Online Upgrade
- Step 1
- Use package tool to generate ota package file
- OTA_PACKAGE_TOOL
- We must rename to update.zip
- Put update.zip (generate by ota-package.sh) in the same folder.
- Set the relevant settings and generate ota package.
- Step 2
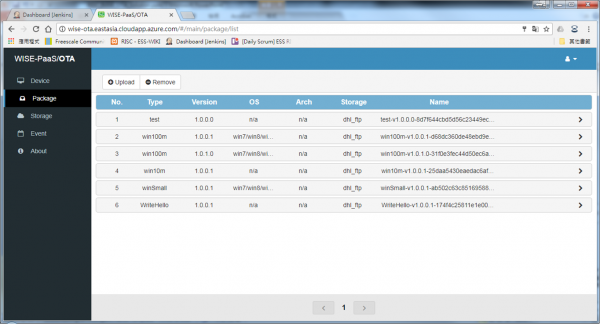
- Upload ota package
- Push upload button to upload ota package
- Step 3
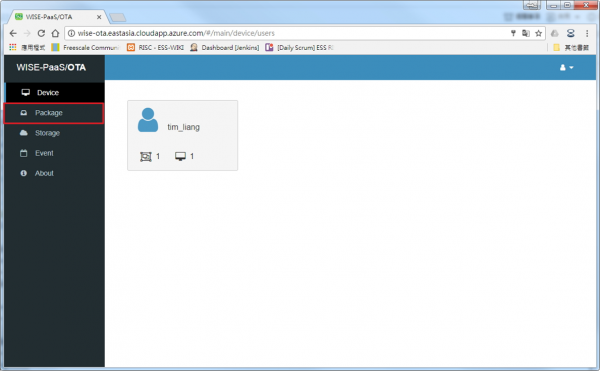
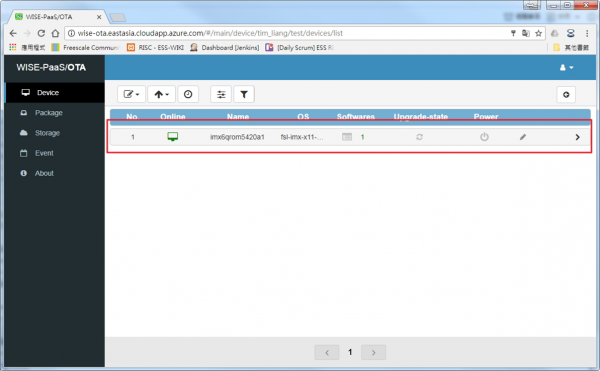
- Check whether the device has connected to server
- If this is your first to connect your device to sever, it will add to default group
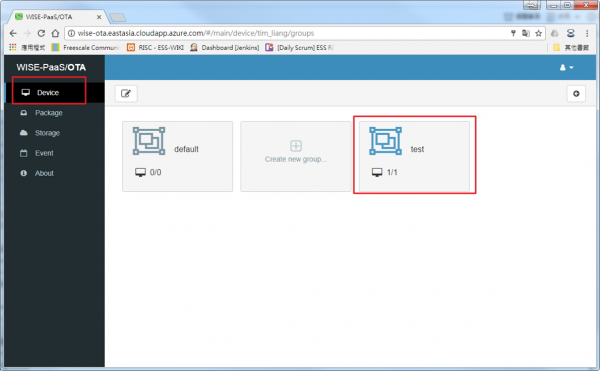
- You have to create new group for update , because default group can't use upgrade function
- If the device connect to server, the host will show your device
- Step 4
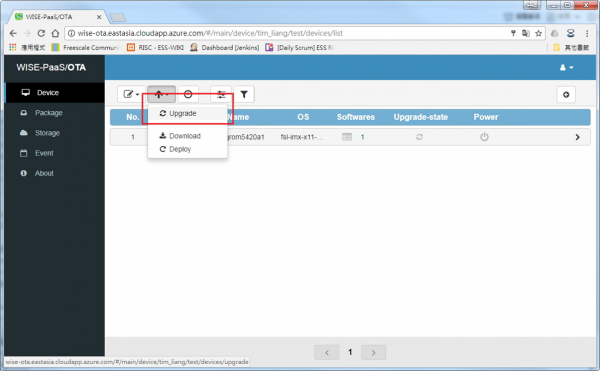
- Upgrade system
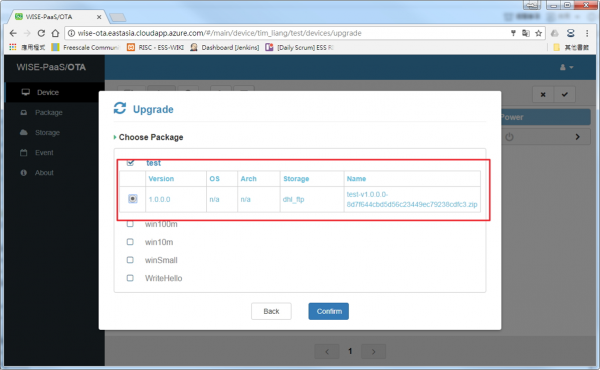
- Push upgrade button and select ota package
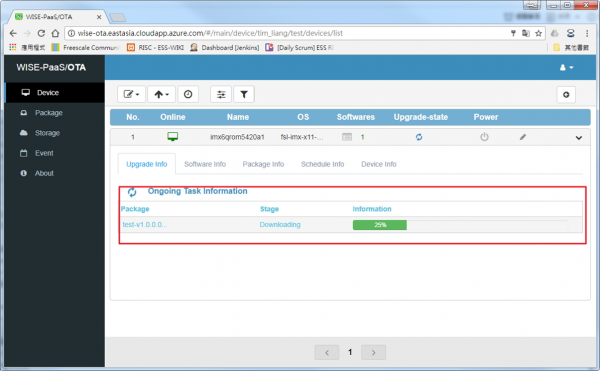
- We can see the message via debug port
Local Upgrade
- Step 1
- copy update.zip to cache
cp update.zip /cache/
- Step 2
- enter /cache/
cd /cache
- Step 3
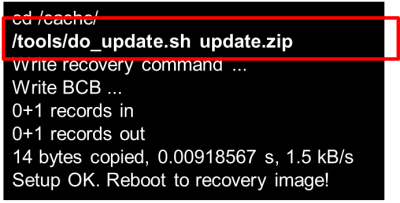
- set flag and set recovery command
/tools/do_update.sh update.zip
- Step 4
- reboot
- Step 5
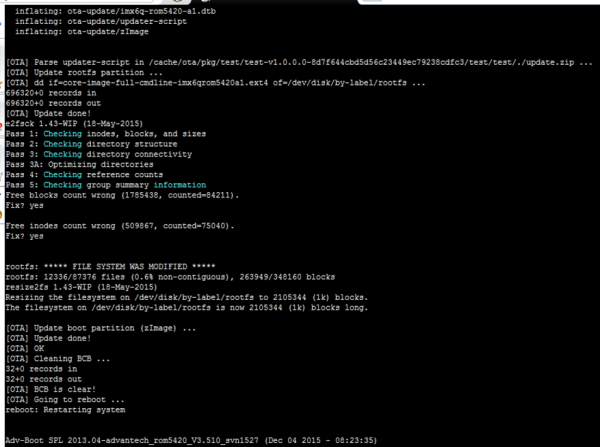
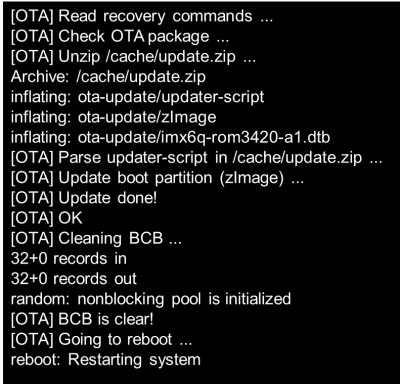
- Enter recovery system and upgrade
- Step 6
- Enter main system and check result
/toos/do_update.sh result
OK
