Difference between revisions of "DeviceOn ePaper Azure Marketplace"
From ESS-WIKI
Fabian.chung (talk | contribs) (first commit) |
Fabian.chung (talk | contribs) |
||
| Line 5: | Line 5: | ||
=== User Guide === | === User Guide === | ||
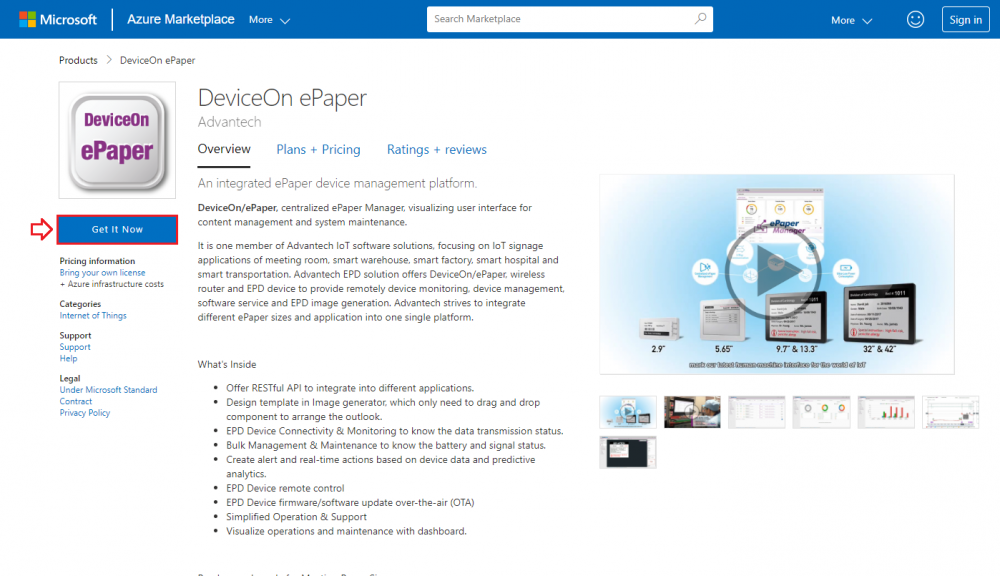
* Step 1: Please enter Azure Marketplace and click “'''GET IT NOW'''” | * Step 1: Please enter Azure Marketplace and click “'''GET IT NOW'''” | ||
| − | [[File:1-1.png]] | + | [[File:1-1.png|1000px]] |
| + | |||
| + | |||
* Step 2. You will enter to Azure portal and please click on Start with pre-set configuration to be quick deployment | * Step 2. You will enter to Azure portal and please click on Start with pre-set configuration to be quick deployment | ||
[[File:1-2.png]] | [[File:1-2.png]] | ||
| + | |||
| + | |||
* Step 3. This page includes our recommended configuration for DeviceOn/ePaper Server, you can click on Continue to create VM, following the default setting. | * Step 3. This page includes our recommended configuration for DeviceOn/ePaper Server, you can click on Continue to create VM, following the default setting. | ||
| + | |||
| + | |||
* Step 4. On this page, please fill in the following information. Please note that the red-star items are required. | * Step 4. On this page, please fill in the following information. Please note that the red-star items are required. | ||
| + | |||
| + | |||
* Step 5. On this page, you can choose the disk type on the virtual machine, or use the default disk Premium SSD instead. Then click Next to move on. | * Step 5. On this page, you can choose the disk type on the virtual machine, or use the default disk Premium SSD instead. Then click Next to move on. | ||
| + | |||
| + | |||
* Step 6. On this page, you can configure the network interface, or use the default setting instead. Then click Next to move on. | * Step 6. On this page, you can configure the network interface, or use the default setting instead. Then click Next to move on. | ||
| + | |||
| + | |||
* Step 7. On this page, you can schedule the power management of the virtual machine for reducing unnecessary costs, or use the default setting instead. Then click Review + create to move on. | * Step 7. On this page, you can schedule the power management of the virtual machine for reducing unnecessary costs, or use the default setting instead. Then click Review + create to move on. | ||
| + | |||
| + | |||
* Step 8. On this page, Azure will validate your virtual machine ( within 5 minutes) and summarize your product details including the prices and legal terms. Please click Create to move on. | * Step 8. On this page, Azure will validate your virtual machine ( within 5 minutes) and summarize your product details including the prices and legal terms. Please click Create to move on. | ||
| + | |||
| + | |||
* Step 9. A few minutes later, you can see below the picture that your virtual machine has been created. | * Step 9. A few minutes later, you can see below the picture that your virtual machine has been created. | ||
| Line 21: | Line 37: | ||
=== User Guide === | === User Guide === | ||
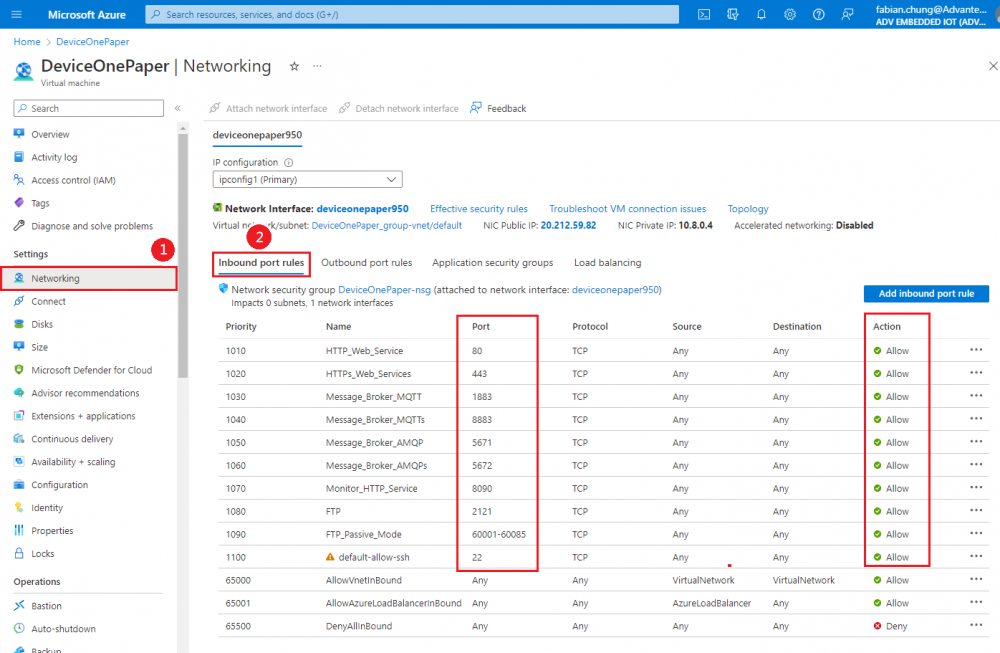
* Step 1: Please go to the Networking blade under Settings | * Step 1: Please go to the Networking blade under Settings | ||
| − | [[File:2-1.png]] | + | [[File:2-1.png|1000px]] |
| + | |||
| + | |||
* Step 2. Please add the following inbound port rules in the network interface to make DeviceOn/ePaper functional | * Step 2. Please add the following inbound port rules in the network interface to make DeviceOn/ePaper functional | ||
| − | |||
{| class="wikitable" | {| class="wikitable" | ||
|- | |- | ||
| Line 87: | Line 104: | ||
|} | |} | ||
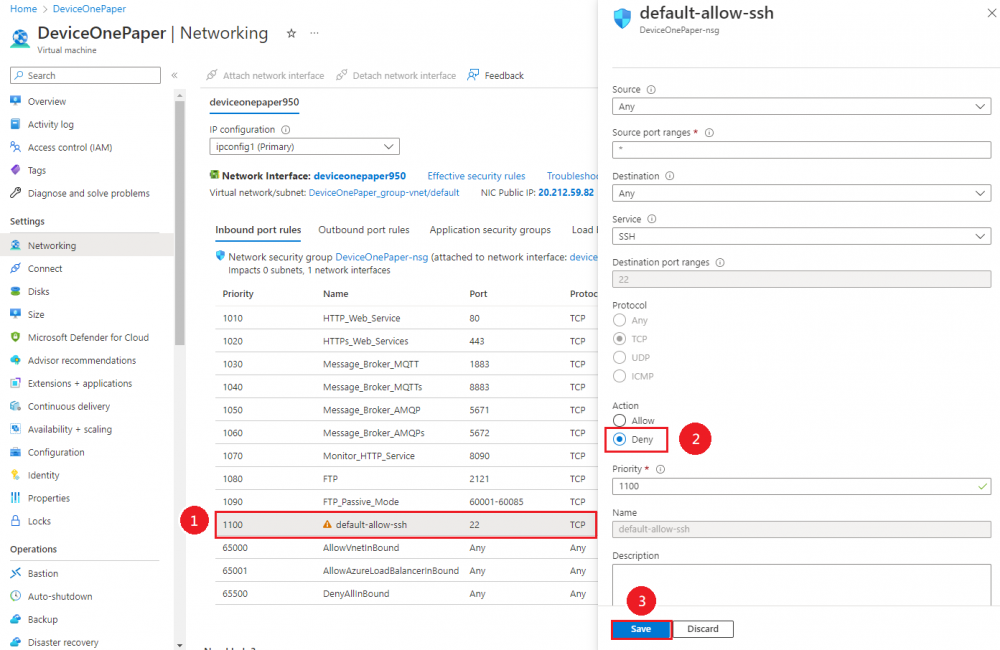
| − | + | * Step 2-1. Add an inbound port rule | |
| − | [[File:2-2.png | + | [[File:2-2.png|1000px]] |
| − | |||
| − | |||
| − | + | * Step 2-2. Enter a port in the above table and click Add | |
| + | [[File:2-3.png|400px]] | ||
| + | |||
== Activate DeviceOn/ePaper server == | == Activate DeviceOn/ePaper server == | ||
=== User Guide === | === User Guide === | ||
* Step 1: Go to Overview blade and find the server IP for your virtual machine | * Step 1: Go to Overview blade and find the server IP for your virtual machine | ||
| − | [[File:3-1.png]] | + | [[File:3-1.png|1000px]] |
| + | |||
| + | |||
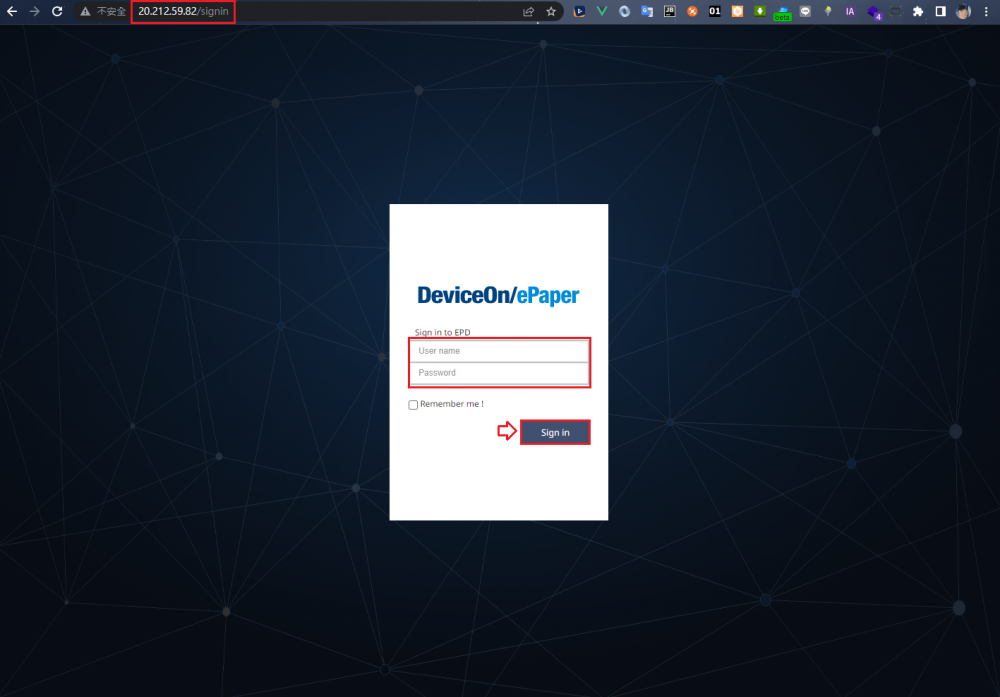
* Step 2. Open a browser and enter the URL with the server IP to access DeviceOn/ePaper server. Please enter your default account and password (Please get in touch with Advantech provider to get one) and click the Sign In button to sign in | * Step 2. Open a browser and enter the URL with the server IP to access DeviceOn/ePaper server. Please enter your default account and password (Please get in touch with Advantech provider to get one) and click the Sign In button to sign in | ||
| − | [[File:3-2.png]] | + | [[File:3-2.png|1000px]] |
| + | |||
| + | |||
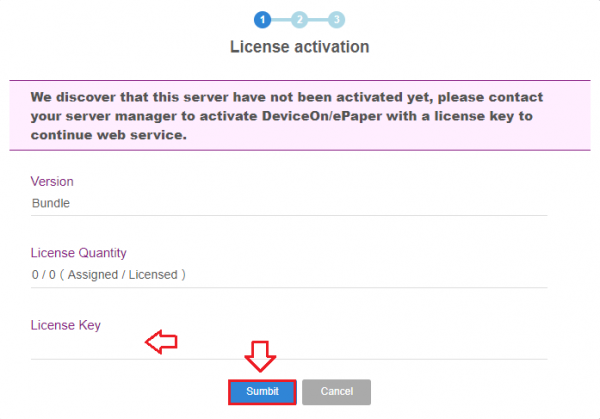
* Step 3. If you access the server for the first time, you need to activate the server with a license key (Please get in touch with Advantech provider to get one). Then click submit button to move on | * Step 3. If you access the server for the first time, you need to activate the server with a license key (Please get in touch with Advantech provider to get one). Then click submit button to move on | ||
| − | [[File:3-3.png]] | + | [[File:3-3.png|600px]] |
| + | |||
| + | |||
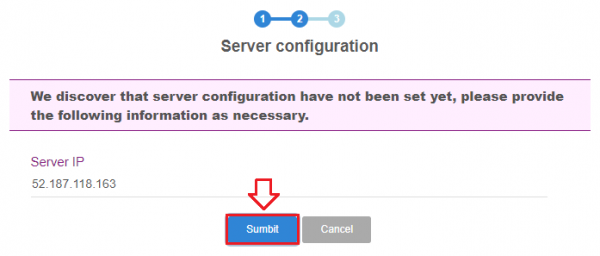
* Step 4. Please assign Server IP to the server configuration for FTP usage (which should be the same as the server IP). Then click submit button to move on. | * Step 4. Please assign Server IP to the server configuration for FTP usage (which should be the same as the server IP). Then click submit button to move on. | ||
| − | [[File:3-4.png]] | + | [[File:3-4.png|600px]] |
| + | |||
| + | |||
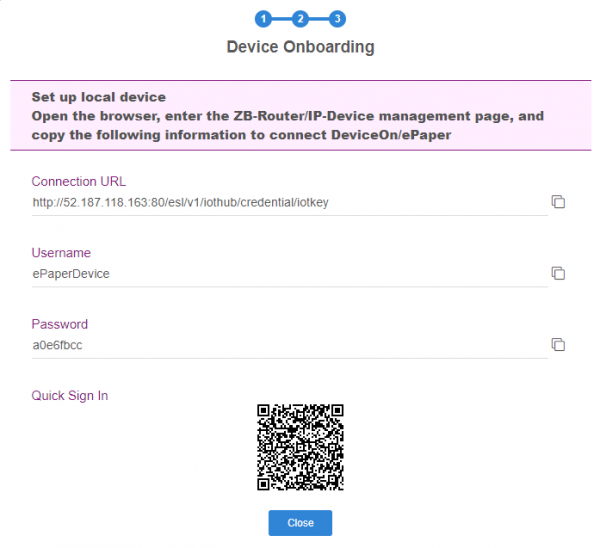
* Step 5. Server activation is done. Now you can connect your devices to the server | * Step 5. Server activation is done. Now you can connect your devices to the server | ||
| − | [[File:3-5.png]] | + | [[File:3-5.png|600px]] |
Revision as of 08:27, 10 November 2022
Contents
Deploy DeviceOn/ePaper from Azure Marketplace
User Guide
- Step 1: Please enter Azure Marketplace and click “GET IT NOW”
- Step 2. You will enter to Azure portal and please click on Start with pre-set configuration to be quick deployment
- Step 3. This page includes our recommended configuration for DeviceOn/ePaper Server, you can click on Continue to create VM, following the default setting.
- Step 4. On this page, please fill in the following information. Please note that the red-star items are required.
- Step 5. On this page, you can choose the disk type on the virtual machine, or use the default disk Premium SSD instead. Then click Next to move on.
- Step 6. On this page, you can configure the network interface, or use the default setting instead. Then click Next to move on.
- Step 7. On this page, you can schedule the power management of the virtual machine for reducing unnecessary costs, or use the default setting instead. Then click Review + create to move on.
- Step 8. On this page, Azure will validate your virtual machine ( within 5 minutes) and summarize your product details including the prices and legal terms. Please click Create to move on.
- Step 9. A few minutes later, you can see below the picture that your virtual machine has been created.
Set up the firewall on Azure VM
User Guide
- Step 1: Please go to the Networking blade under Settings
- Step 2. Please add the following inbound port rules in the network interface to make DeviceOn/ePaper functional
| Port | Inbound rule | Service |
|---|---|---|
| 22 | Disable | SSH* |
| 80 | Enable | HTTP |
| 443 | Enable | HTTPS |
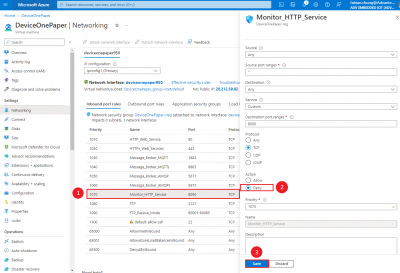
| 8090 | Disable | Service Monitor* |
| 1883 | Enable | MQTT |
| 8883 | Enable | TLS/SSL encrypted MQTT |
| 5672 | Enable | AMQP |
| 5671 | Enable | TLS/SSL encrypted AMQP |
| 2121 | Enable | FTP |
| 60001-60100 | Enable | FTP Passive Mode |
| 5853 | Enable | EPD_Hub |
| 5854 | Enable | EPD_Hub |
| 69 | Enable | EPD_Hub |
| 30000-30120 | Enable | EPD_Hub |
- Step 2-1. Add an inbound port rule
- Step 2-2. Enter a port in the above table and click Add
Activate DeviceOn/ePaper server
User Guide
- Step 1: Go to Overview blade and find the server IP for your virtual machine
- Step 2. Open a browser and enter the URL with the server IP to access DeviceOn/ePaper server. Please enter your default account and password (Please get in touch with Advantech provider to get one) and click the Sign In button to sign in
- Step 3. If you access the server for the first time, you need to activate the server with a license key (Please get in touch with Advantech provider to get one). Then click submit button to move on
- Step 4. Please assign Server IP to the server configuration for FTP usage (which should be the same as the server IP). Then click submit button to move on.
- Step 5. Server activation is done. Now you can connect your devices to the server
