Difference between revisions of "Create and configure the DNS server"
Yinghui.yin (talk | contribs) |
Yinghui.yin (talk | contribs) |
||
| (4 intermediate revisions by the same user not shown) | |||
| Line 1: | Line 1: | ||
| + | In ths article, we will introduce how to create your own DNS server in the LAN environment. | ||
| + | |||
You can reference the following link to create and configure the DNS server. | You can reference the following link to create and configure the DNS server. | ||
| Line 9: | Line 11: | ||
Windows Server 2012 R2 | Windows Server 2012 R2 | ||
| − | [[File:System2012.png| | + | [[File:System2012.png|center|667x456px|System2012.png]] |
= Install DNS server = | = Install DNS server = | ||
| Line 15: | Line 17: | ||
1. Configure the static IP Address, WorkGroup or Domain Environment | 1. Configure the static IP Address, WorkGroup or Domain Environment | ||
| − | [[File:Ipv4.png|center|ipv4.png]] | + | [[File:Ipv4.png|center|344x360px|ipv4.png]] |
2. Open service manager, and select "Add roles and features" | 2. Open service manager, and select "Add roles and features" | ||
| + | |||
| + | [[File:Add roles features.png|center|814x523px|add_roles_features.png]] [[File:Before you begin.png|center|642x402px|before_you_begin.png]] [[File:Installation type.png|center|641x423px|Installation_type.png]] | ||
3. Choose "DNS Server" and add the features for DNS server. | 3. Choose "DNS Server" and add the features for DNS server. | ||
| − | 4. | + | [[File:Dns server.png|center|637x384px|dns_server.png]] |
| + | |||
| + | 4. Installed | ||
| + | |||
| + | [[File:Dns server1.png|center|dns_server1.png]] | ||
= Configure the OTA Server to DNS = | = Configure the OTA Server to DNS = | ||
| Line 29: | Line 37: | ||
1. Create Forword Lookup Zones | 1. Create Forword Lookup Zones | ||
| − | 2 | + | [[File:Forword lookup zones.png|center|616x417px|forword_lookup_zones.png]] |
| + | |||
| + | 2. Reverse Lookup Zones | ||
| + | |||
| + | [[File:Reverse lookup zones.png|center|618x430px|reverse_lookup_zones.png]] | ||
3. Configure the Client IP | 3. Configure the Client IP | ||
| + | |||
| + | [[File:ClientIP.png|center|376x450px|clientIP.png]] | ||
4. Try to access the domain name. | 4. Try to access the domain name. | ||
| + | |||
| + | [[File:Pingdomain.png|center|644x169px|pingdomain.png]] | ||
= Access the OTA system = | = Access the OTA system = | ||
| Line 39: | Line 55: | ||
1. Configure the OTA Client to connect to server | 1. Configure the OTA Client to connect to server | ||
| − | 2 | + | [[File:Otaserver.png|center|751x380px|otaserver.png]] |
| + | |||
| + | 2. Access the OTA Server from Browser | ||
| + | |||
| + | [[File:Clientsetting.png|center|353x241px|clientsetting.png]] | ||
| | ||
| | ||
Latest revision as of 08:27, 28 December 2016
In ths article, we will introduce how to create your own DNS server in the LAN environment.
You can reference the following link to create and configure the DNS server.
Mastering Windows server 2012 of DNS (author: nick_zp)
http://nickzp.blog.51cto.com/12728/1169181
Contents
Tool / Source
Windows Server 2012 R2
Install DNS server
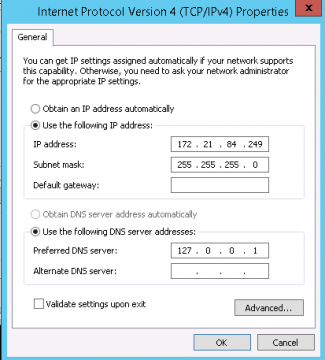
1. Configure the static IP Address, WorkGroup or Domain Environment
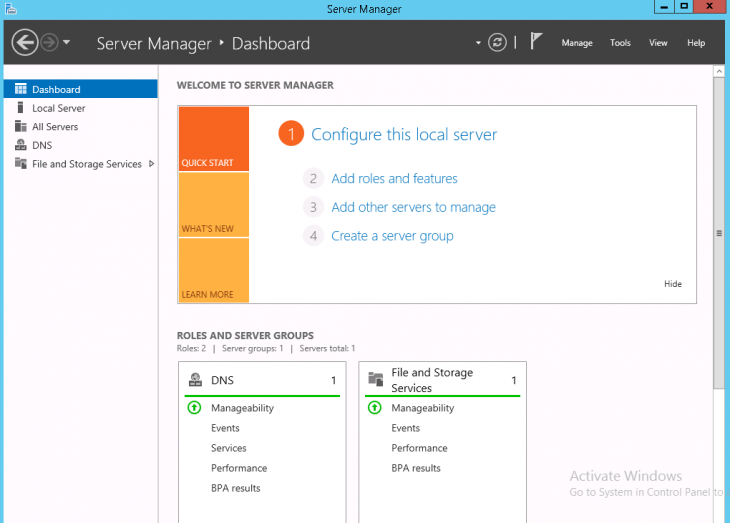
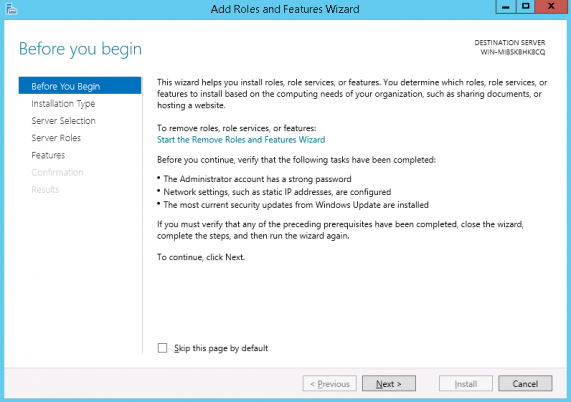
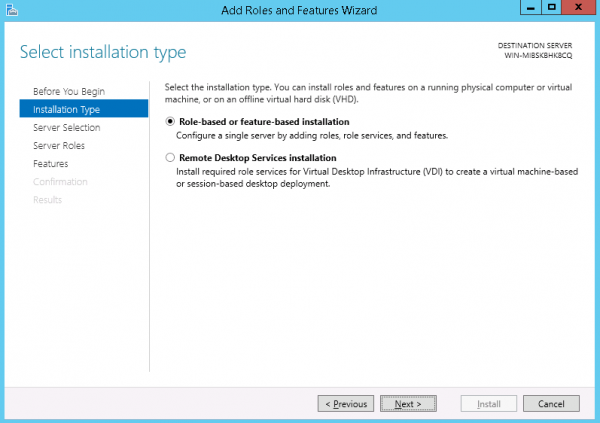
2. Open service manager, and select "Add roles and features"
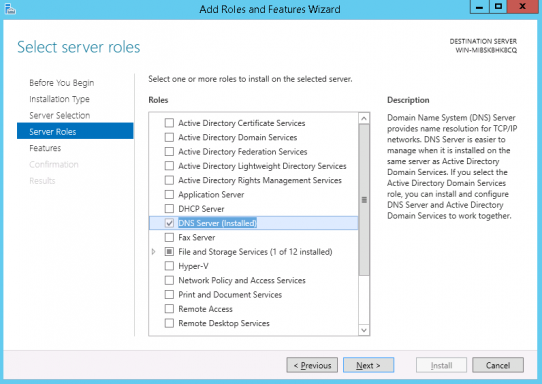
3. Choose "DNS Server" and add the features for DNS server.
4. Installed
Configure the OTA Server to DNS
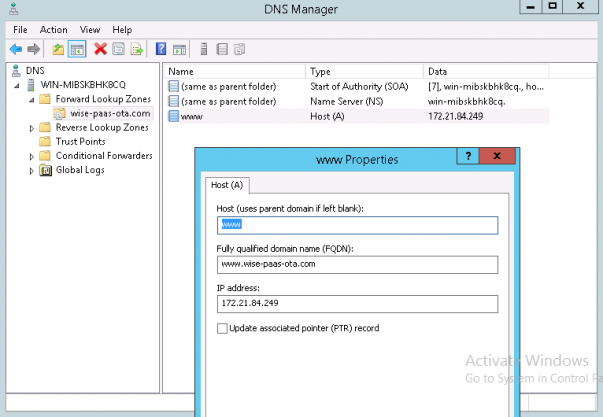
You can add the IP address of OTA server to Forword Lookup Zones
1. Create Forword Lookup Zones
2. Reverse Lookup Zones
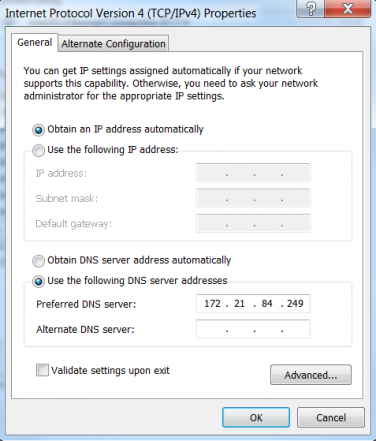
3. Configure the Client IP
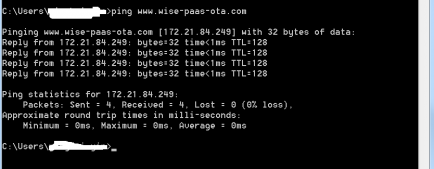
4. Try to access the domain name.
Access the OTA system
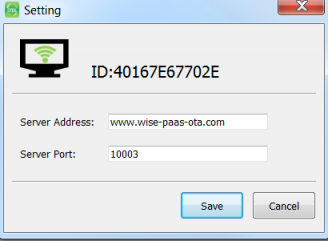
1. Configure the OTA Client to connect to server
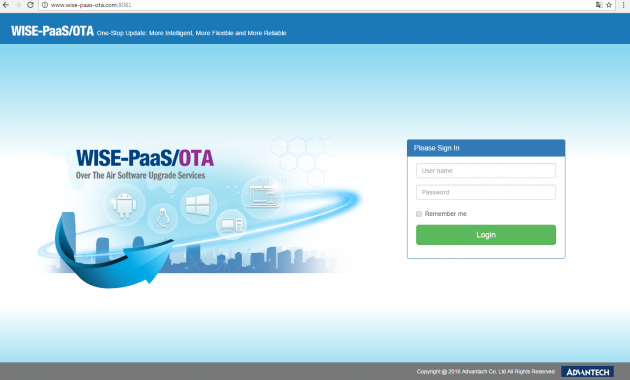
2. Access the OTA Server from Browser

