Difference between revisions of "IoTGateway/Features/Android/Peripheral"
From ESS-WIKI
(→To Update system) |
|||
| Line 1: | Line 1: | ||
{{DISPLAYTITLE:Android Peripheral Features}} | {{DISPLAYTITLE:Android Peripheral Features}} | ||
| − | ==Serial Port== | + | |
| + | == Serial Port == | ||
| + | |||
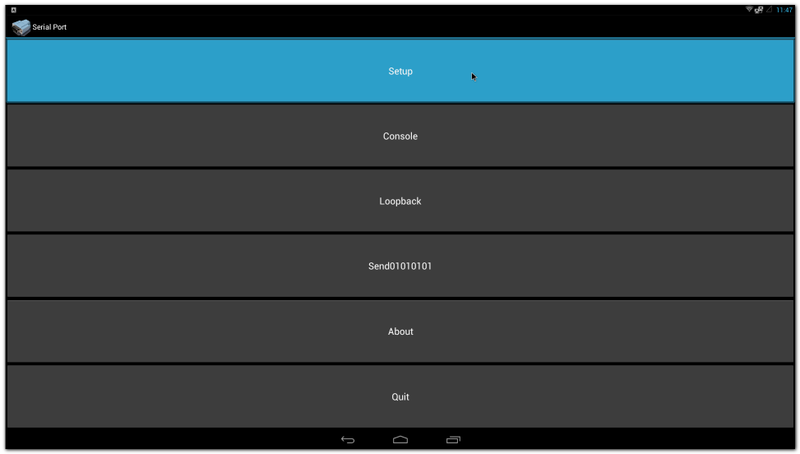
#Click "Serial Port" | #Click "Serial Port" | ||
| − | #:[[File: | + | #:[[File:Imx6ABV1 APP serialport.png|800px|Imx6ABV1 APP serialport.png]] |
#Click "Setup" | #Click "Setup" | ||
| − | #:[[File: | + | #:[[File:Imx6ABV1 serialport setup.png|800px|Imx6ABV1 serialport setup.png]] |
#Click "Device" , and choose the used device(e.g. ttymxc1) | #Click "Device" , and choose the used device(e.g. ttymxc1) | ||
| − | #:[[File: | + | #:[[File:Imx6ABV1 serialport setup device 1.png|RTENOTITLE]] |
#Click "Baud rate" , and choose the used baudrate(e.g. 115200) | #Click "Baud rate" , and choose the used baudrate(e.g. 115200) | ||
| − | #:[[File: | + | #:[[File:Imx6ABV1 serialport setup device 2.png|RTENOTITLE]] |
| − | ==Wi-Fi== | + | |
| + | == Wi-Fi == | ||
| + | |||
#Click "Settings" | #Click "Settings" | ||
| − | #:[[File: | + | #:[[File:Imx6ABV1 APP settings.png|800px|Imx6ABV1 APP settings.png]] |
#Turn Wi-Fi on | #Turn Wi-Fi on | ||
| − | #:[[File: | + | #:[[File:Imx6ABV1 settings wifi on.png|800px|Imx6ABV1 settings wifi on.png]] |
| − | #Choose ESSID (e.g. ESSD Testing ) | + | #Choose ESSID (e.g. ESSD Testing ) |
| − | #:[[File: | + | #:[[File:Imx6ABV1 settings wifi choose ESSID.png|800px|Imx6ABV1 settings wifi choose ESSID.png]] |
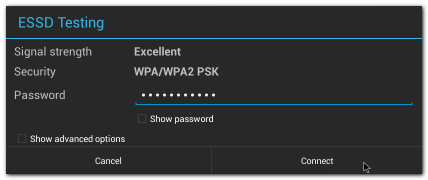
#Input correct password | #Input correct password | ||
| − | #:[[File: | + | #:[[File:Imx6ABV1 settings wifi password.png|RTENOTITLE]] |
#Wi-Fi Authenticating/Connecting/Obtaining IP address | #Wi-Fi Authenticating/Connecting/Obtaining IP address | ||
| − | #:[[File: | + | #:[[File:Imx6ABV1 settings wifi authenticating.png|800px|Imx6ABV1 settings wifi authenticating.png]] |
| − | #:[[File: | + | #:[[File:Imx6ABV1 settings wifi connecting.png|800px|Imx6ABV1 settings wifi connecting.png]] |
| − | #:[[File: | + | #:[[File:Imx6ABV1 settings wifi obtaining ip.png|800px|Imx6ABV1 settings wifi obtaining ip.png]] |
#Wi-Fi connected | #Wi-Fi connected | ||
| − | #:[[File: | + | #:[[File:Imx6ABV1 settings wifi connected.png|800px|Imx6ABV1 settings wifi connected.png]] |
| − | ==Ethernet== | + | == Ethernet == |
| − | #Click "Settings" / "Ethernet configuration" , then Turn on Ethernet | + | |
| − | #:[[File: | + | #Click "Settings" / "Ethernet configuration" , then Turn on Ethernet |
| + | #:[[File:Imx6ABV1 settings ethernet config.png|800px|Imx6ABV1 settings ethernet config.png]] | ||
#Click "Ethernet configuration" | #Click "Ethernet configuration" | ||
| − | #:[[File: | + | #:[[File:Imx6ABV1 settings ethernet config next level.png|800px|Imx6ABV1 settings ethernet config next level.png]] |
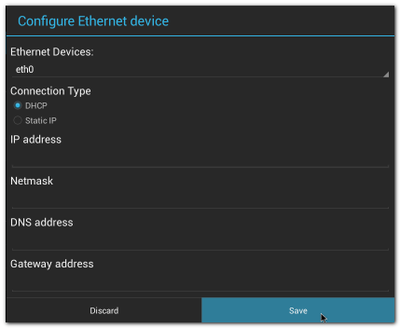
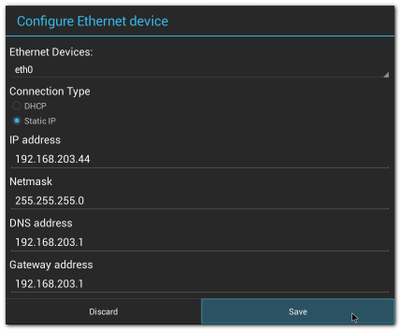
#Choose Connection Type (DHCP or Static IP) | #Choose Connection Type (DHCP or Static IP) | ||
| − | #:[[File: | + | #:[[File:Imx6ABV1 settings ethernet config dhcp.png|400px|Imx6ABV1 settings ethernet config dhcp.png]][[File:Imx6ABV1 settings ethernet config static.png|400px|Imx6ABV1 settings ethernet config static.png]] |
| + | |||
| + | == Update System == | ||
| − | |||
#Refer to 1.4.6 to build OTA package. | #Refer to 1.4.6 to build OTA package. | ||
| − | #Plug SD card that contains OTA package(update.zip) into SD slot. | + | #Plug SD card that contains OTA package(update.zip) into SD slot. |
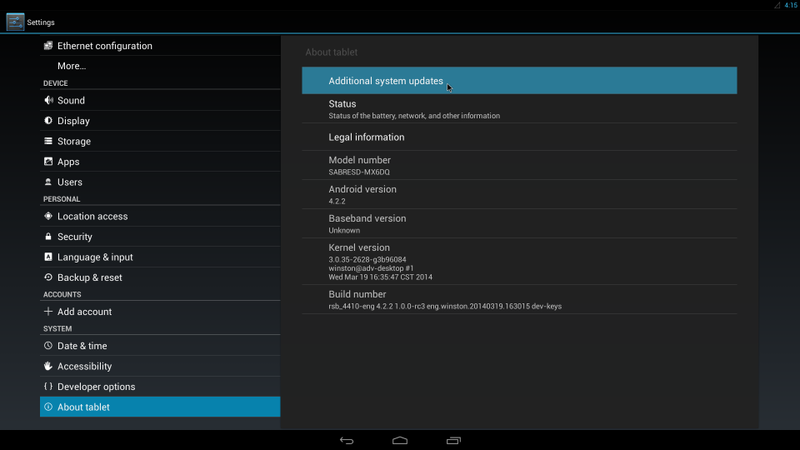
| − | #Click "Settings" / "About tablet" / "Addition system updates" : | + | #Click "Settings" / "About tablet" / "Addition system updates" : |
| − | #:[[File: | + | #:[[File:Imx6ABV1 settings addition system updates.png|800px|Imx6ABV1 settings addition system updates.png]] |
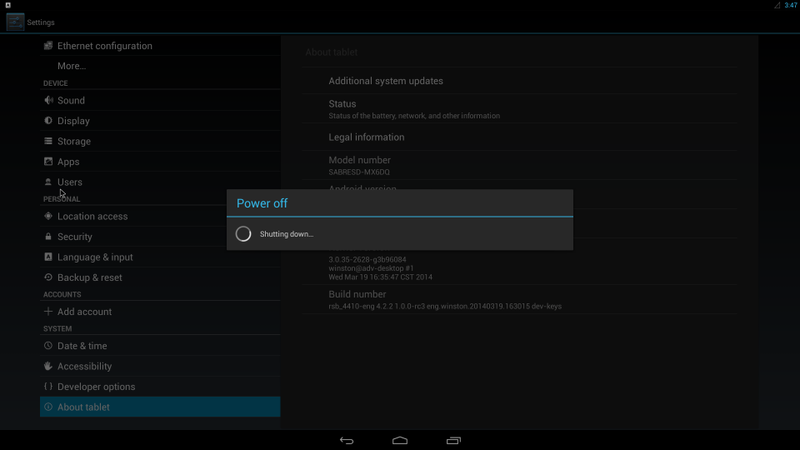
#Wait for one moment, system will reboot for updating | #Wait for one moment, system will reboot for updating | ||
| − | #:[[File: | + | #:[[File:Imx6ABV1 poweroff.png|800px|Imx6ABV1 poweroff.png]] |
#It will take some time to update. | #It will take some time to update. | ||
| − | ==Watchdog== | + | == Watchdog == |
| + | |||
Example | Example | ||
| + | |||
| + | == Fastboot == | ||
| + | |||
| + | #Fastboot is a feature which can be used to download images from a computer running either Windows OS or Linux OS to the | ||
| + | |||
| + | target storage device.. | ||
| + | |||
| + | #[Target side] | ||
| + | |||
| + | 1. Power on the board with USB OTG connected. 2. Press any key to enter the U-Boot shell. | ||
| + | |||
| + | #Select the correct device to do fastboot image download by command: | ||
Revision as of 09:36, 14 March 2017
Serial Port
- Click "Serial Port"
- Click "Setup"
- Click "Device" , and choose the used device(e.g. ttymxc1)
- Click "Baud rate" , and choose the used baudrate(e.g. 115200)
Wi-Fi
- Click "Settings"
- Turn Wi-Fi on
- Choose ESSID (e.g. ESSD Testing )
- Input correct password
- Wi-Fi Authenticating/Connecting/Obtaining IP address
- Wi-Fi connected
Ethernet
- Click "Settings" / "Ethernet configuration" , then Turn on Ethernet
- Click "Ethernet configuration"
- Choose Connection Type (DHCP or Static IP)
Update System
- Refer to 1.4.6 to build OTA package.
- Plug SD card that contains OTA package(update.zip) into SD slot.
- Click "Settings" / "About tablet" / "Addition system updates" :
- Wait for one moment, system will reboot for updating
- It will take some time to update.
Watchdog
Example
Fastboot
- Fastboot is a feature which can be used to download images from a computer running either Windows OS or Linux OS to the
target storage device..
- [Target side]
1. Power on the board with USB OTG connected. 2. Press any key to enter the U-Boot shell.
- Select the correct device to do fastboot image download by command:

