Difference between revisions of "Using bootup sd disk made by SDDiskTool for ROM-5880"
From ESS-WIKI
Xingxing.li (talk | contribs) (Created page with " === '''Step1 Using DebianTool to create update.img''' === 1. Put image to DebianTool\rockdev\image File:ROM-5880 Debian image.png 2. Double click mkupdate.bat. in...") |
Xingxing.li (talk | contribs) |
||
| (9 intermediate revisions by the same user not shown) | |||
| Line 4: | Line 4: | ||
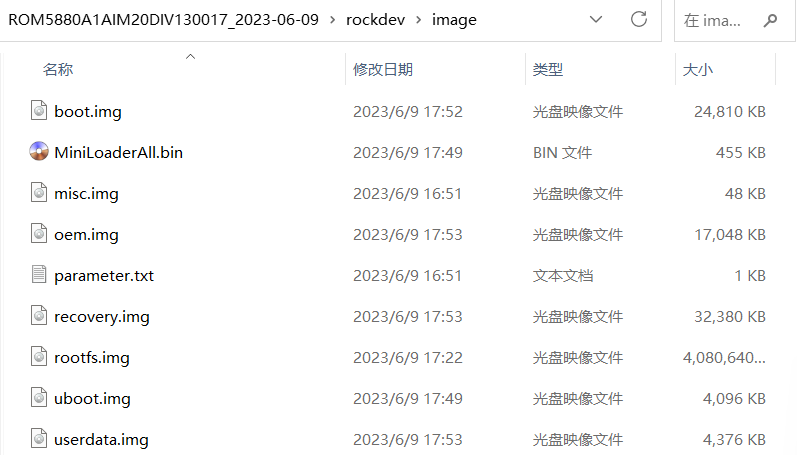
1. Put image to DebianTool\rockdev\image | 1. Put image to DebianTool\rockdev\image | ||
| − | [[File:ROM-5880 Debian image.png]] | + | [[File:ROM-5880 Debian image.png|RTENOTITLE]] |
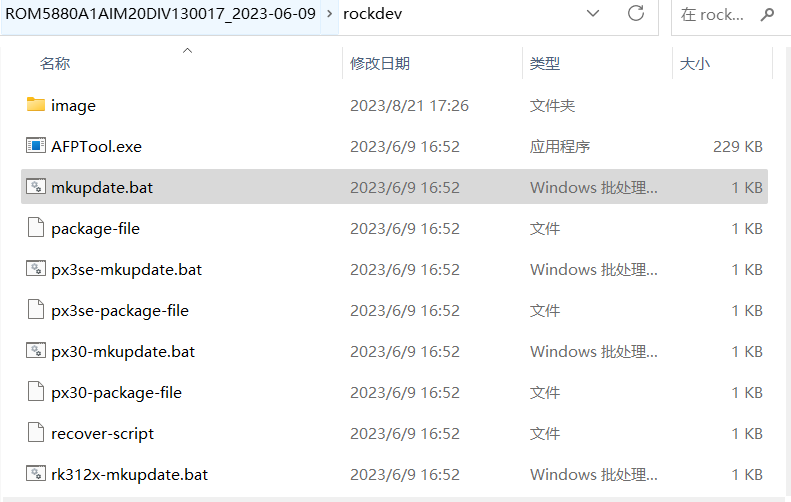
2. Double click mkupdate.bat. in DebianTool\rockdev | 2. Double click mkupdate.bat. in DebianTool\rockdev | ||
| − | [[File:ROM-5880 mkupdate.png]] | + | [[File:ROM-5880 mkupdate.png|RTENOTITLE]] |
| − | [[File:ROM-5880 mkupdate.bat 1.png]] | + | [[File:ROM-5880 mkupdate.bat 1.png|800x800px|ROM-5880 mkupdate.bat 1.png]] |
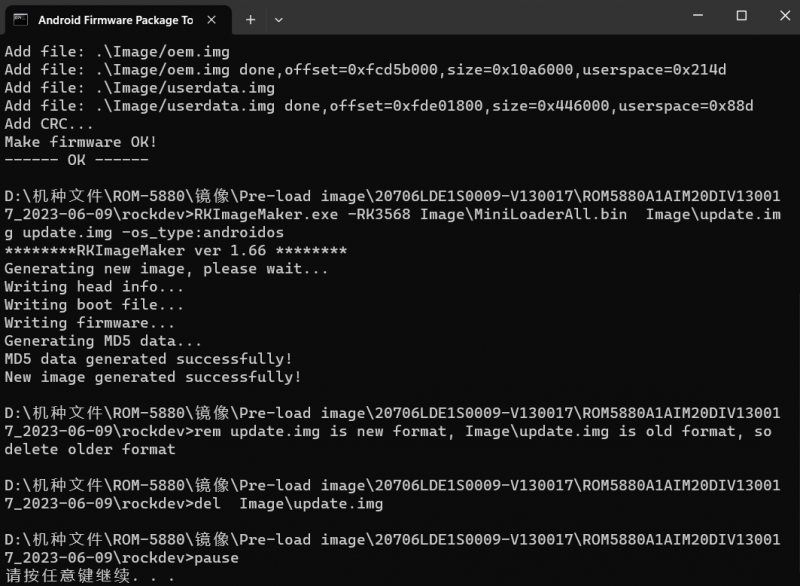
Then you can find update.img in DebianTool\rockdev | Then you can find update.img in DebianTool\rockdev | ||
| Line 16: | Line 16: | ||
=== '''Step 2 : '''Create update SD (Red word). === | === '''Step 2 : '''Create update SD (Red word). === | ||
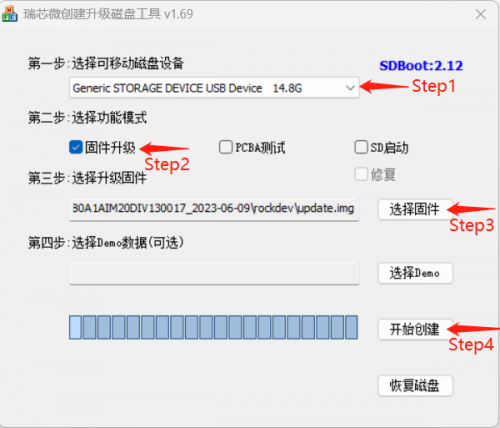
| − | <span style="background:white"><span style="line-height:normal"><span lang="EN-US" style="font-size:10.5pt"><span style="font-family: | + | <span style="background:white"><span style="line-height:normal"><span lang="EN-US" style="font-size:10.5pt"><span style="font-family:"><span style="color:#252525">1</span></span></span><span style="font-size:10.5pt"><span style="font-family:宋体"><span style="color:#252525">.</span></span></span><span lang="EN-US" style="font-size:10.5pt"><span style="font-family:"><span style="color:#252525">Choose the SD device.</span></span></span></span></span> |
| − | <span style="background:white"><span style="line-height:normal"><span lang="EN-US" style="font-size:10.5pt"><span style="font-family: | + | <span style="background:white"><span style="line-height:normal"><span lang="EN-US" style="font-size:10.5pt"><span style="font-family:"><span style="color:#252525">2</span></span></span><span style="font-size:10.5pt"><span style="font-family:宋体"><span style="color:#252525">.</span></span></span><span lang="EN-US" style="font-size:10.5pt"><span style="font-family:"><span style="color:#252525">Choose the "firmware update"</span></span></span></span></span> |
| − | <span style="background:white"><span style="line-height:normal"><span lang="EN-US" style="font-size:10.5pt"><span style="font-family: | + | <span style="background:white"><span style="line-height:normal"><span lang="EN-US" style="font-size:10.5pt"><span style="font-family:"><span style="color:#252525">3</span></span></span><span style="font-size:10.5pt"><span style="font-family:宋体"><span style="color:#252525">.</span></span></span><span lang="EN-US" style="font-size:10.5pt"><span style="font-family:"><span style="color:#252525">Choose the update.img path</span></span></span></span></span> |
| − | <span style="background:white"><span style="line-height:normal"><span lang="EN-US" style="font-size:10.5pt"><span style="font-family: | + | <span style="background:white"><span style="line-height:normal"><span lang="EN-US" style="font-size:10.5pt"><span style="font-family:"><span style="color:#252525">4</span></span></span><span style="font-size:10.5pt"><span style="font-family:宋体"><span style="color:#252525">.</span></span></span><span lang="EN-US" style="font-size:10.5pt"><span style="font-family:"><span style="color:#252525">Create the update SD</span></span></span></span></span> |
| − | | + | [[File:ROM-5880 ruixinwei sd.png|500x500px|ROM-5880 ruixinwei sd.png]] |
| + | |||
| + | Create the Update SD card Success | ||
| + | |||
| + | [[File:ROM-5880 ruixinwei sd 1.png|500x500px]] | ||
| + | |||
| + | === '''Step 3 : '''Please power off in SOM-DB2510 === | ||
| + | |||
| + | === '''Step 4 : '''Insert the SD card for ROM-5880 === | ||
| + | |||
| + | [[File:ROM-5880 for SOM-DB2510 SD.png|500x500px|ROM-5880 for SOM-DB2510 SD.png]] | ||
| + | |||
| + | === '''Step 5 : '''Power on in SOM-DB2510 === | ||
| + | |||
| + | === '''Step 6 : '''Installing system update === | ||
| + | |||
| + | [[File:ROM-5880 update imgae.png|500x500px|ROM-5880 update imgae.png]] | ||
| + | |||
| + | |||
| + | |||
| + | === '''Step 7 : '''Please remove the SD card from the ROM-5880!!! === | ||
| + | |||
| + | [[File:ROM-5880 remove.png|RTENOTITLE]] | ||
Latest revision as of 07:27, 11 September 2023
Contents
Step1 Using DebianTool to create update.img
1. Put image to DebianTool\rockdev\image
2. Double click mkupdate.bat. in DebianTool\rockdev
Then you can find update.img in DebianTool\rockdev
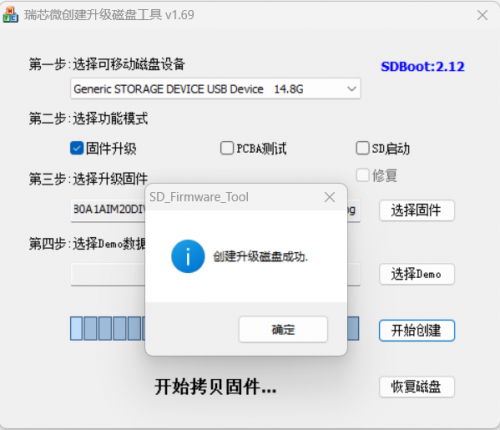
Step 2 : Create update SD (Red word).
1.Choose the SD device.
2.Choose the "firmware update"
3.Choose the update.img path
4.Create the update SD
Create the Update SD card Success
Step 3 : Please power off in SOM-DB2510
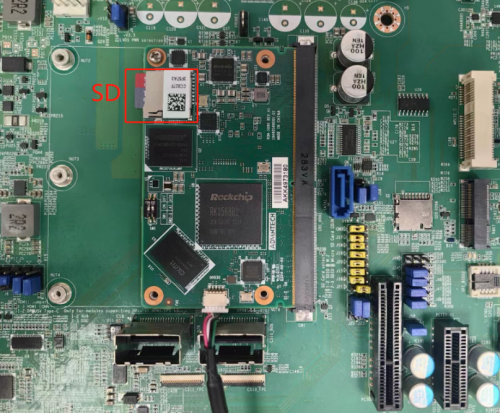
Step 4 : Insert the SD card for ROM-5880
Step 5 : Power on in SOM-DB2510
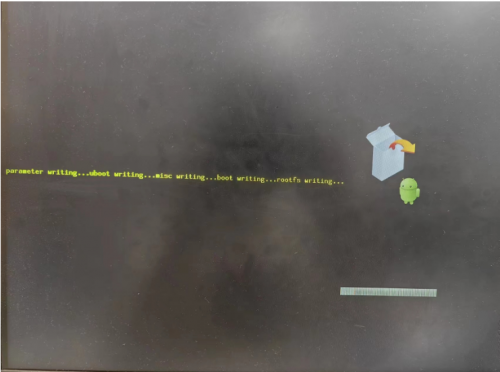
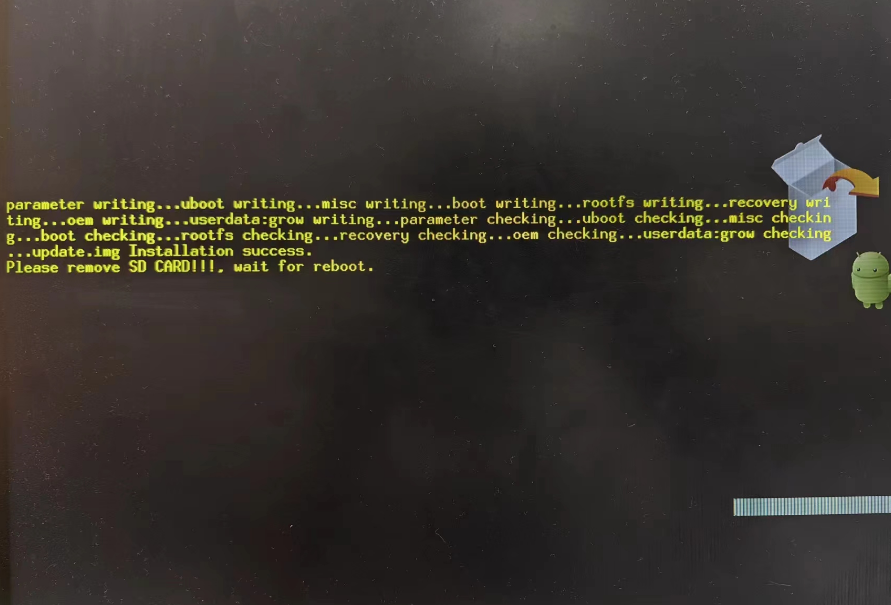
Step 6 : Installing system update
