Difference between revisions of "IoT Data Ingestion"
(add first version about AWS IoT Data Ingestion) |
Allen.chao (talk | contribs) (add introduction of Azure part) |
||
| Line 1: | Line 1: | ||
= Azure = | = Azure = | ||
| + | In this section, we will introduce steps to insert data from an Azure IoT hub to different Azure data stores. We assume that device messages are already received by an Azure IoT hub. If not, you can refer to Protocol converter with Node-Red section, which is designed to ingest IoT data from edge devices to Azure IoT hubs. | ||
| + | |||
| + | When an Azure IoT hub receives messages, we use Azure stream analytics job to dispatch the received data to other Azure services. In this case we will send data to Azure CosmosDB and Azure blob storage. | ||
= AWS = | = AWS = | ||
Revision as of 11:46, 11 March 2018
Azure
In this section, we will introduce steps to insert data from an Azure IoT hub to different Azure data stores. We assume that device messages are already received by an Azure IoT hub. If not, you can refer to Protocol converter with Node-Red section, which is designed to ingest IoT data from edge devices to Azure IoT hubs.
When an Azure IoT hub receives messages, we use Azure stream analytics job to dispatch the received data to other Azure services. In this case we will send data to Azure CosmosDB and Azure blob storage.
AWS
In this section, you can get experience about AWS IoT rule engine to insert data to different AWS storage. You can refer to Protocol converter with Node-Red which is designed to ingest IoT data to AWS IoT.
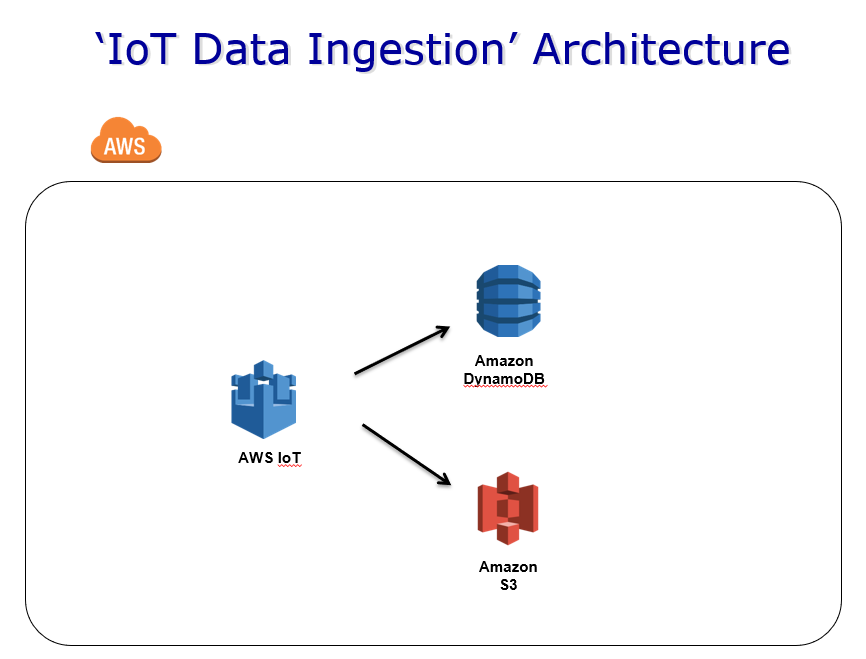
When you receive IoT data from AWS IoT. You can use rule engine to connect to another AWS service. In this case we will send IoT data to AWS S3 and DynamoDB
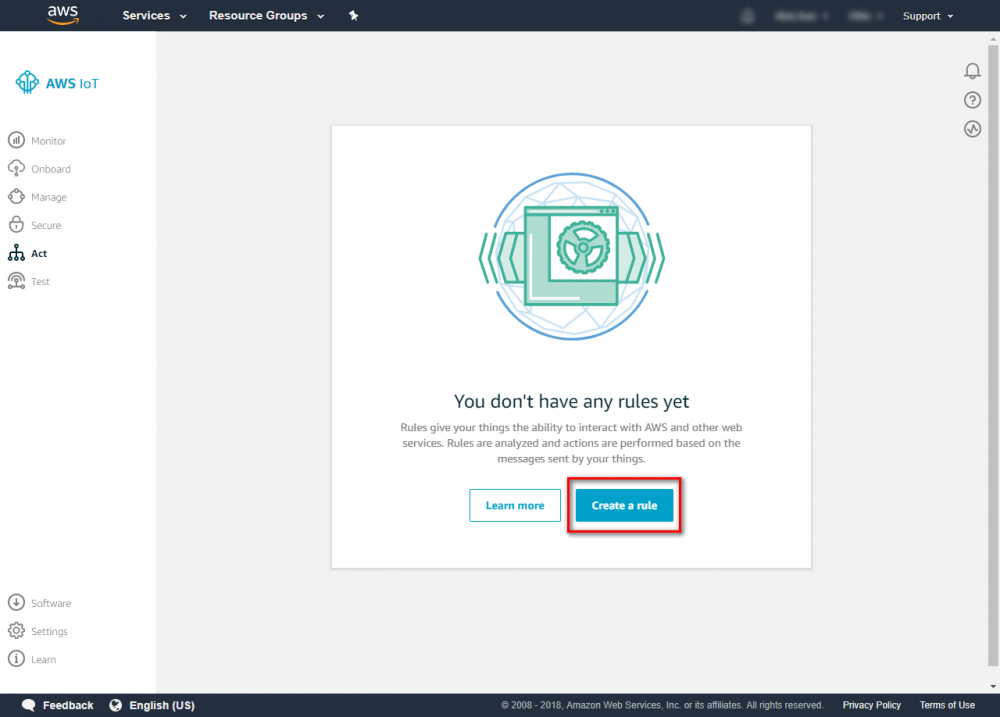
Step 1. Go to the AWS IoT console and click Act and click create rule.
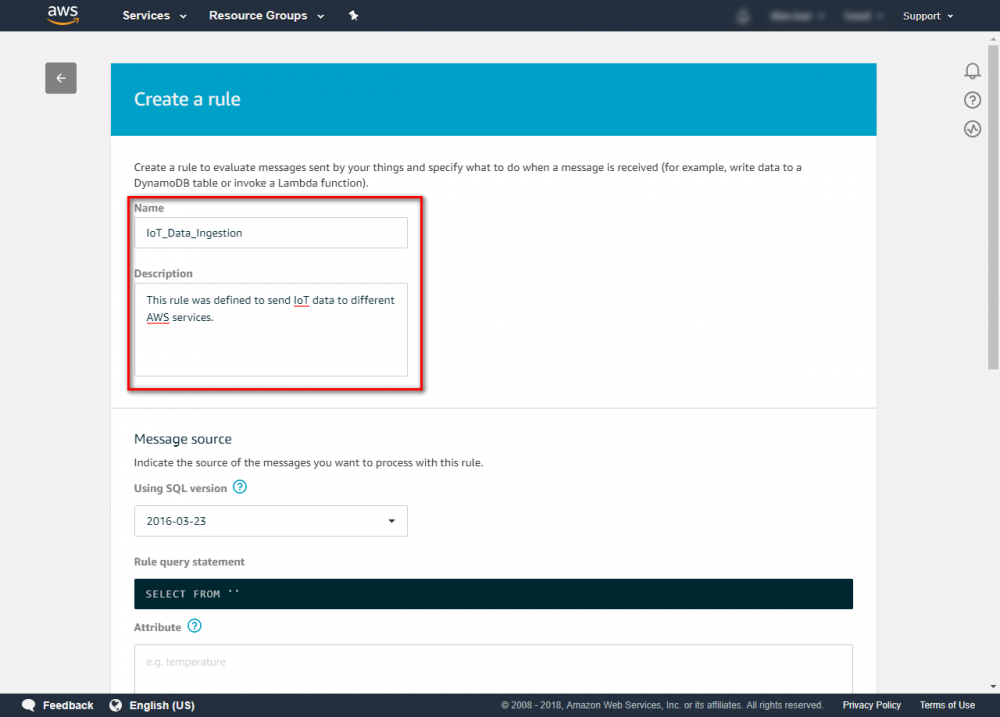
Step 2. Enter {your rule name} and {description}
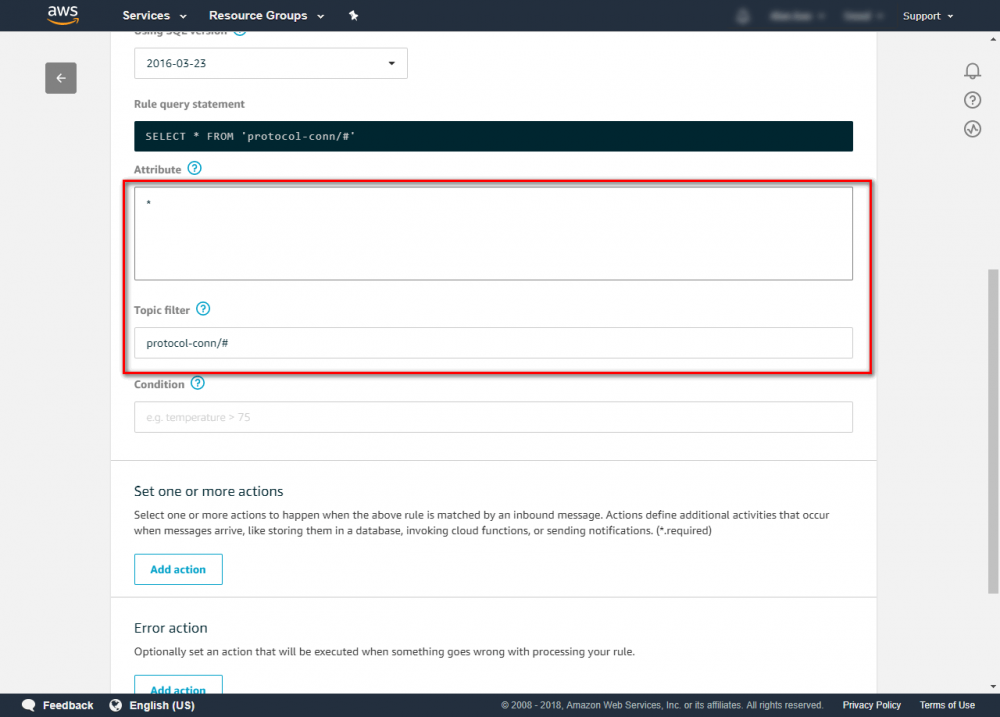
Step 3. Configure the rule as follows: Attribute : * Topic Filter: {your AWS IoT publish Topic}. The topic which used in protocol converter is “protocol-conn/{Device Name}/{Handler Name}”. In this case, we use wildcard # to get all message More Topic information can be found at
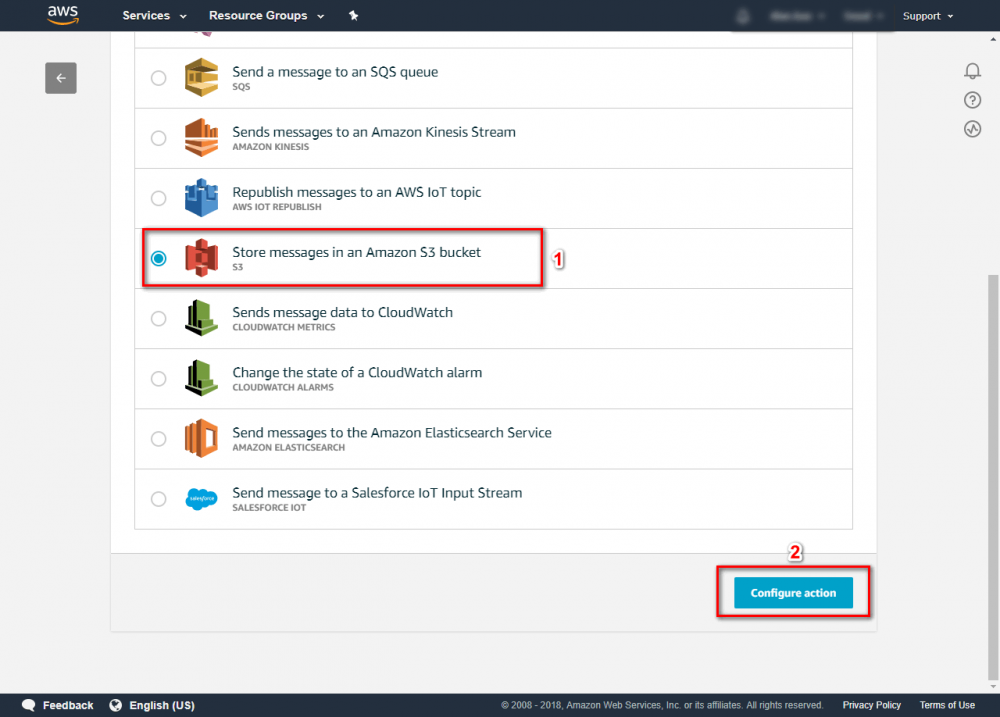
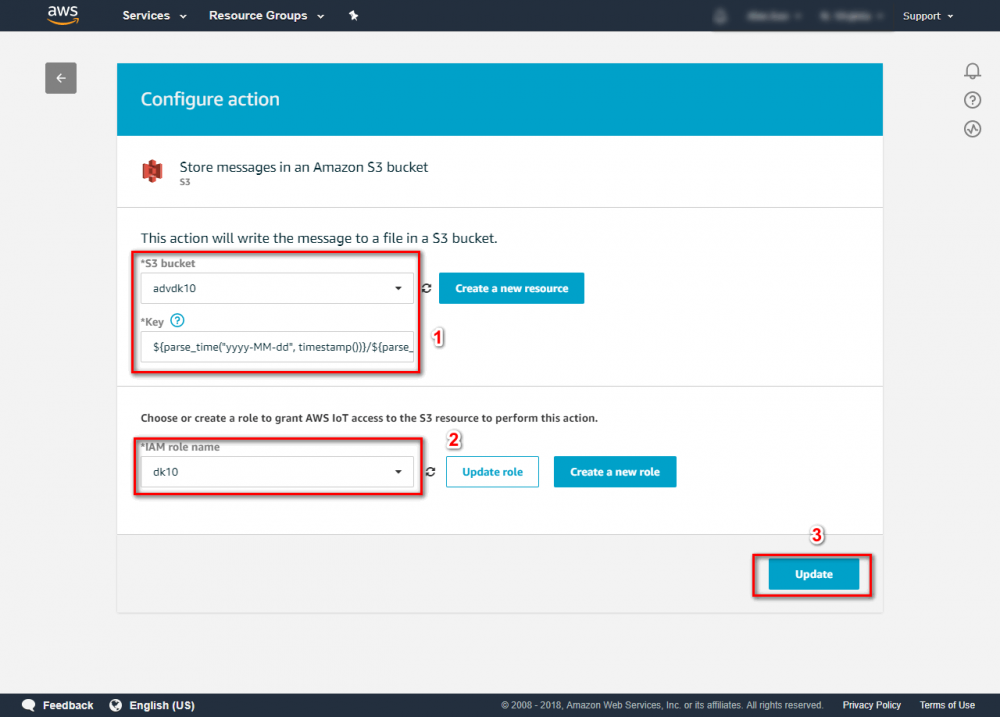
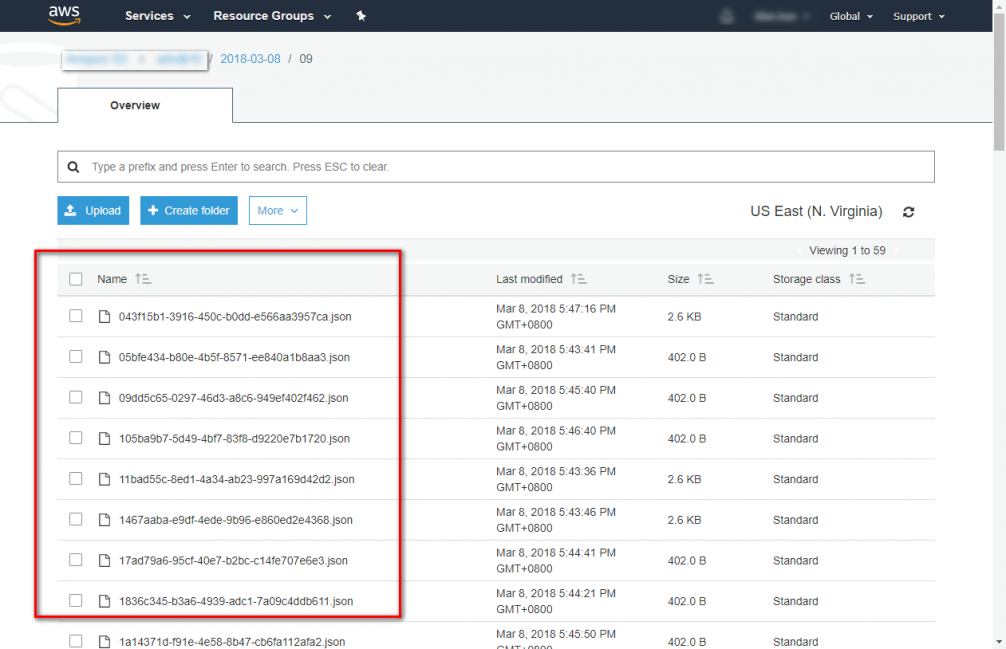
Step 4. Click Add action to store message in S3 bucket. Select “Store message in an Amazon S3 bucket”→click “configure action” more rule engine information can be found atStep 5. In configure action. You need to choose a S3 bucket. If you don’t have any one, you can click “Create a new resource” to create one. In this case, we store data to json format and assort by data and hour. You can use SQL wildcard parse_time () and timestamp() to assort store folder and using newuuid() as filename.
${parse_time("yyyy-MM-dd", timestamp())}/${parse_time("HH", timestamp())}/${newuuid()}.json more AWS IoT SQL Reference information can be fount at
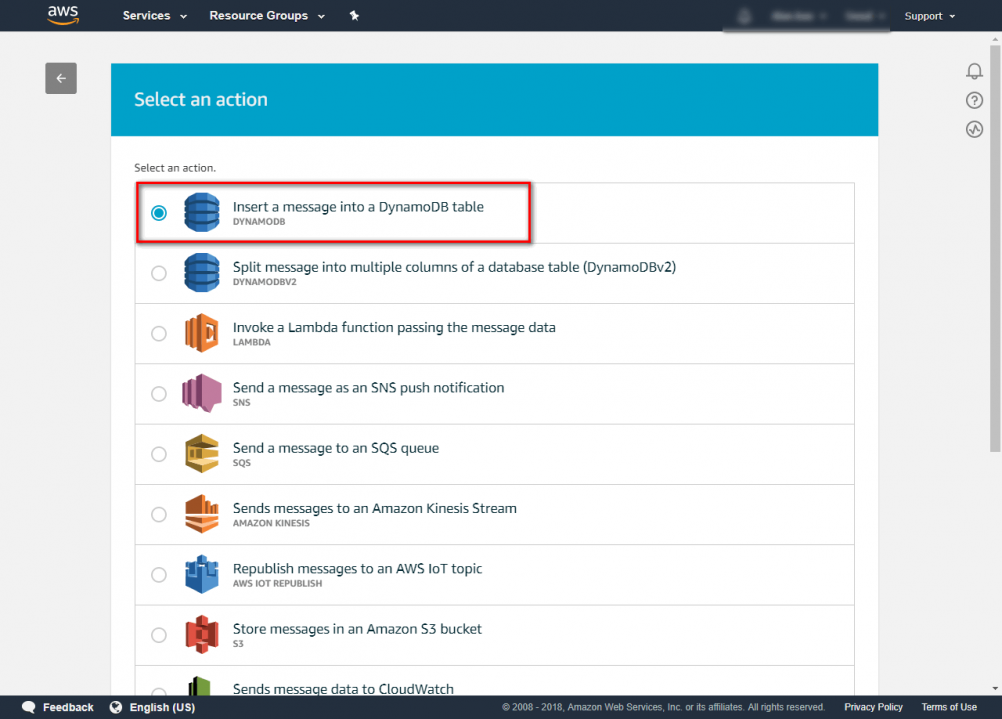
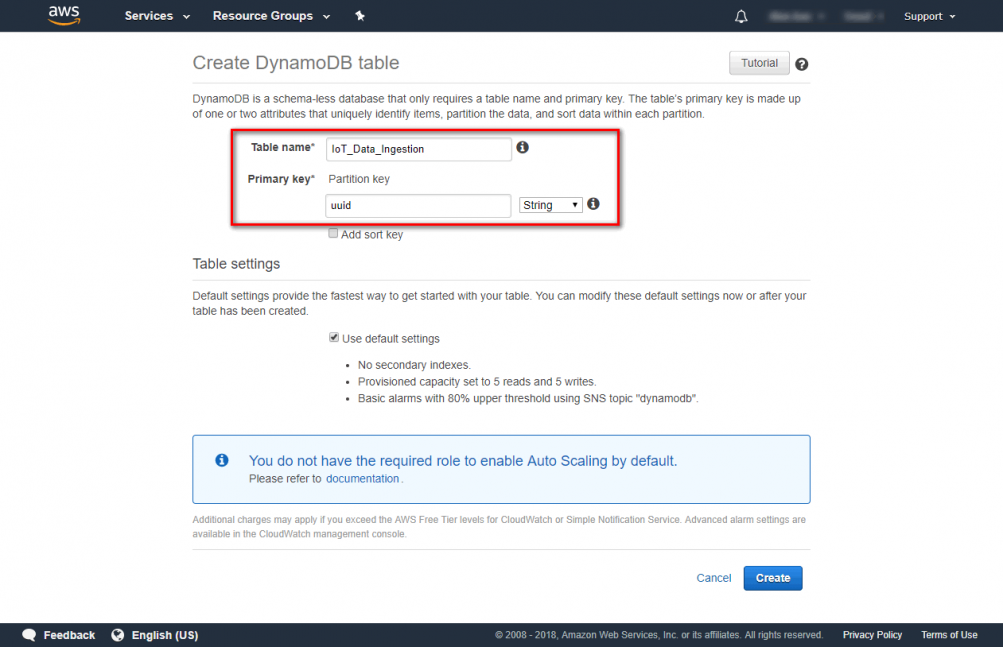
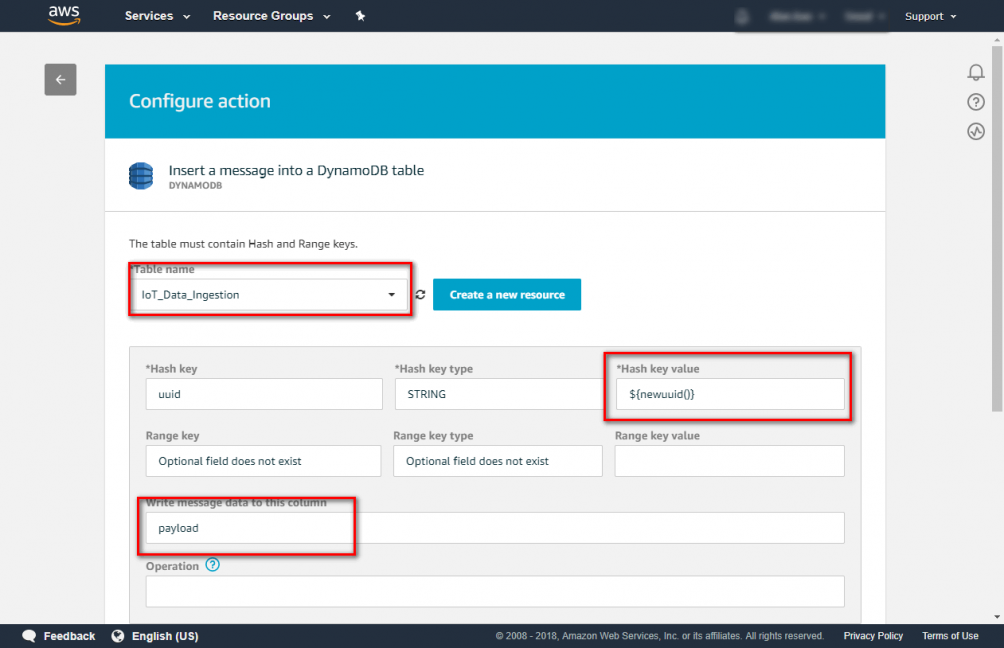
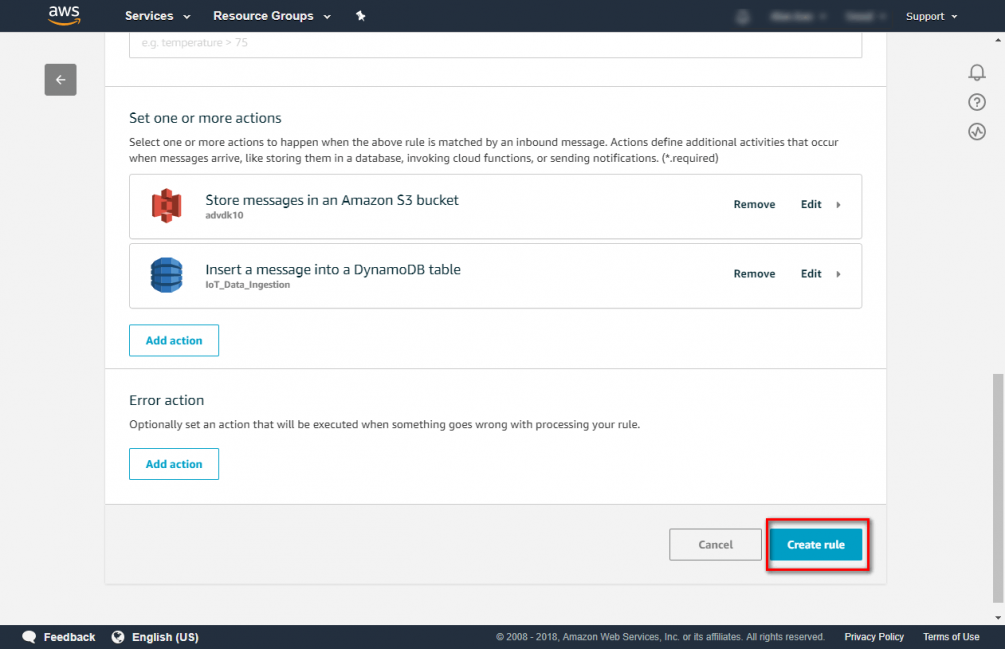
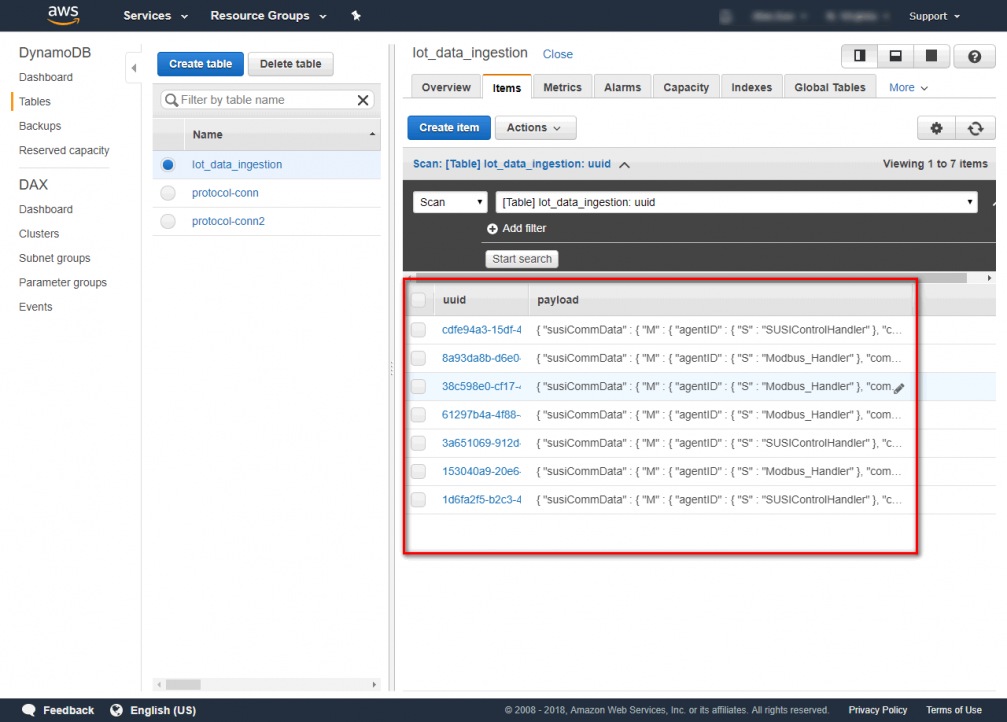
you need to choose a role which has permission can access AWS S3. After setting click update. Step 6. Click “add action” to connect DynamoDB Step 7. Select “Insert a message into a DynamoDB Table”→click “configure action” Step 8. Choose a DynamoDB table. If don't have DynamoDB table, you can click “Create a new resource” to create a table. In this case. We create a DynamoDB table which called ”IoT_Data_Ingestion” and it’s primary key is “uuid”. Step 9. Choose “IoT_Data_Ingestion” and enter Hash key value and Write message data to this column. Hash key value ${newuuid()} Write message data to this column payload you need to choose a role which has permission can access AWS DynamoDB. After setting click update. Step 10. After finishing setting click “create rule” Step 11. Now you can publish your message and check S3 and DynamoDB.