Difference between revisions of "Qt5Creator"
From ESS-WIKI
| Line 144: | Line 144: | ||
#Click debug icon to start debugging. | #Click debug icon to start debugging. | ||
| − | #;[[File: | + | #;[[File:RK3288 Qt debug icon.png]]<br/> |
#Press "Alt+3" to show "Application Output" | #Press "Alt+3" to show "Application Output" | ||
| − | #;;[[File: | + | #;;[[File:RK3288 Qt debug output.png]]<br/> |
#The "Hello" shows up on primary display. | #The "Hello" shows up on primary display. | ||
#;[[File:RK3399 Qt result show.png|RTENOTITLE]] | #;[[File:RK3399 Qt result show.png|RTENOTITLE]] | ||
Revision as of 10:06, 5 November 2020
Contents |
Prerequisites
All operations in this guide are based on Ubuntu 18.04 LTS 64bit only.
First please install Ubuntu 18.04 LTS 64bit* with minimum 2GB memory.
Installing required packages
Please login and perform the following commands:
$ sudo apt-get install build-essential
$ sudo apt-get install qtcreator
$ sudo apt-get install qt5-default
$ sudo apt-get install qt5-doc
$ sudo apt-get install qt5-doc-html qtbase5-doc-html
$ sudo apt-get install qtbase5-examples
Installing cross toolchain
Please download cross compiler toolchain (Password: 0kkn)first. Then execute the following command to unzip the cross compiler tool to the /opt directory
$ sudo tar -zxf rk3399_toolchain_Qt_V5.12.2.tar.gz -C /opt
Working within QtCreator
Starting the QtCreator
$ qtcreator
- The QtCreator's main window shows up.
- Check QtCreator's version by using "Help" -> "About Qt Creator".
Configuring the Cross-Compiler Options
- Bring up the options dialog using "Tools" -> "Options..."
- Select the "Devices" page on the left, and click "Add..."
- Select "Generic Linux Device" and click "Start Wizard".
- Specify proper settings and click "Next>"
- Click "Finish"
- Device test finished successfully. Click "Close".
- Click "Apply"
- Select the "Build & Run" page on the left, switch to "Compilers" tab, drop down "Add" menu and choose "GCC-->C++".
- Name the compiler as "RK G++"
- Click "Browse..." to select "/opt/rk3288_risc/buildroot/output/rockchip_rk3288/host/bin/arm-buildroot-linux-gnueabihf-g++"
- Click "Apply"
- Switch to the "Debuggers" tab
- Click "Add"
- Name the debugger as "RK GDB"
- Click "Browse..." to select "/opt/rk3288_risc/buildroot/output/rockchip_rk3288/host/bin/arm-buildroot-linux-gnueabihf-gdb"
- Click "Apply"
- Switch to the "Qt Versions" tab.
- Check if the "Qt 5.9.4 (host)" is auto detected in "Manual" item ?
- Click "Apply"
- Switch to the "Kits" tab.
- Click "Add".
- Name the kit as "RK toolchain"
- Specify the correct "Device Tpye", "Compiler", "Debugger" and "Qt version"
- Click "Browse..." to select "/opt/rk3288_risc/buildroot/output/rockchip_rk3288/host/arm-buildroot-linux-gnueabihf/sysroot" as sysroot
- Click Apply
- Click OK to finalize the configuration.
- Invoke the options dialog again to make sure the "iMX6 toolchain" is default kit.
Creating the Project
- Bring up "New" dailog using "File" -> "New File or Project..."
- Select "Applications" -> 'Qt Widgets Application"
- Click "Choose..."
- Use "hello_qt" as name
- Create in "/mnt/sda1/work/qt/PJ"
- Click "Next"
- Check "RK3288 toolchain"
- Click "Next".
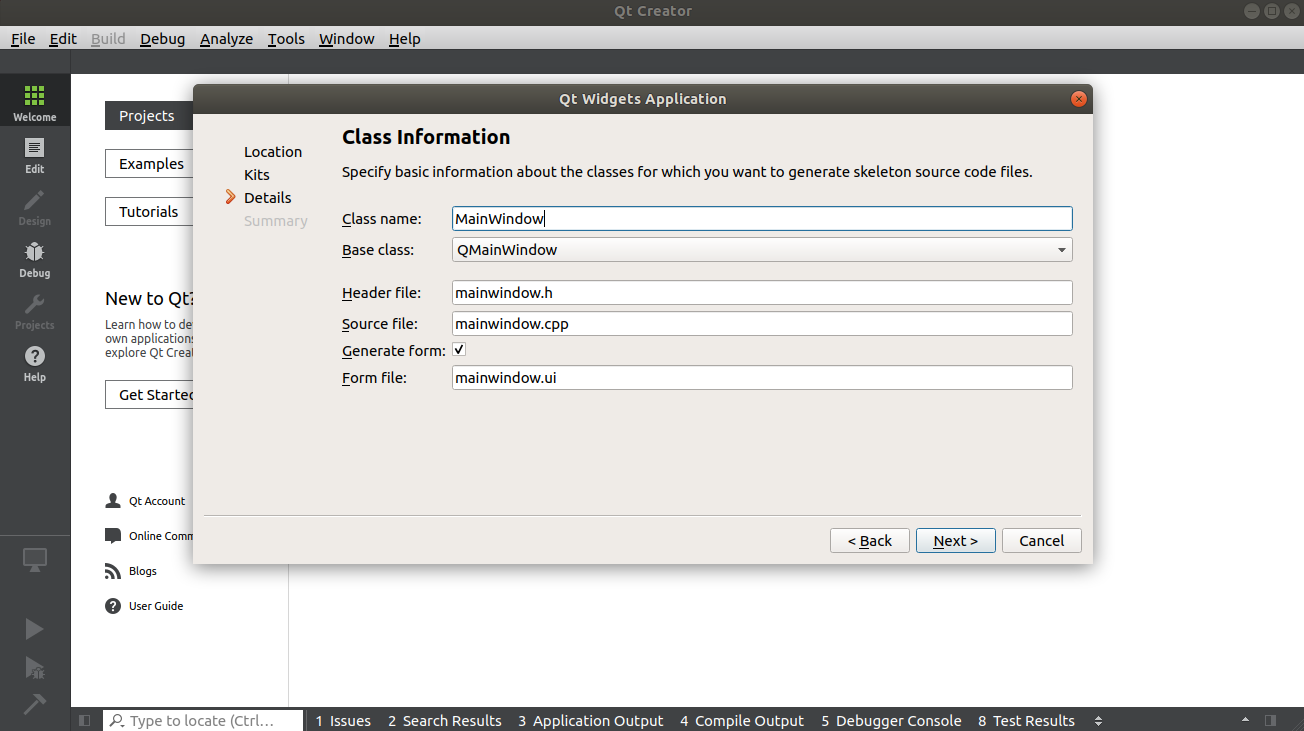
- Use default settings for "Class Information"
- Click "Next"
- Use default settings for "Project Management"
- Click "Finish"
- Double click "hello_qt.pro" to switch to editor window
- In new project it is necessary to add following two lines into qt project file.
- Press "Ctrl+S" to save file.
- Double click "mainwindow.ui" to switch to Design mode
- Drag & drop one Label widget on main form, use property editor on the right side to change text and font size
- Save all project files using "File" -> "Save All"
Building the Project
- Switch to "Projects" mode
- Check if "build configuration" is set to "Debug".
- Check if "Files to deploy" is correct
- Set environment variable DISPLAY in QtCreator -> Projects -> Run -> Run Environment. The value of DISPLAY is obtained from the rk3288. For example, execute instruction echo $DISPLAY on RK3288.
- Switch to "Edit" mode
- Click "Build" using context menu of project "Hello"
- The green "Build" bar means no error occured.
- Press "Alt+4" to show "Compile Output".
Deploying the Application
- Click "Deploy" using context menu of project hello_qt
- The green "Deploy" bar indicates no error occured.


