Difference between revisions of "AIM-Linux/BSP/Qualcomm/RISC QCS Yocto LE1.1 ROM2860"
Darren.huang (talk | contribs) |
Darren.huang (talk | contribs) |
||
| Line 81: | Line 81: | ||
$ ../qirp-build qcom-robotics-full-image</pre> | $ ../qirp-build qcom-robotics-full-image</pre> | ||
| + | | ||
= Recovery & Rescue = | = Recovery & Rescue = | ||
| Line 169: | Line 170: | ||
[[File:ROM-2860 provision file result.PNG|RTENOTITLE]] | [[File:ROM-2860 provision file result.PNG|RTENOTITLE]] | ||
| − | + | | |
=== '''<u>Flash UFS</u>''' === | === '''<u>Flash UFS</u>''' === | ||
| Line 221: | Line 222: | ||
'''14.''' '''UFS boot up : ''' | '''14.''' '''UFS boot up : ''' | ||
| − | '''The SW1 switch to 1-on, 2-on''' | + | '''<span style="background-color:#ffff00;">The SW1 switch to 1-on, 2-on</span>''' |
| − | '''The SW2 switch to 1-off, 2-on | + | '''<span style="background-color:#ffff00;">The SW2 switch to 1-off, 2-on</span>''' |
'''15. Connect debug cable and open the terminal , turn on the power . ''' | '''15. Connect debug cable and open the terminal , turn on the power . ''' | ||
| Line 269: | Line 270: | ||
'''12.''' '''eMMC boot up : ''' | '''12.''' '''eMMC boot up : ''' | ||
| − | '''<span style="background-color:#ffff00;">The SW1 switch to 1-off, 2-on | + | '''<span style="background-color:#ffff00;">The SW1 switch to 1-off, 2-on</span>''' |
| − | '''<span style="background-color:#ffff00;">The SW2 switch to 1-off | + | '''<span style="background-color:#ffff00;">The SW2 switch to 1-off, 2-on </span>''' |
'''13. Connect debug cable and open the terminal , turn on the power . ''' | '''13. Connect debug cable and open the terminal , turn on the power . ''' | ||
| Line 279: | Line 280: | ||
'''15. After type the long in and password , and you also can chek the image information about date , kernel version etc.. ''' | '''15. After type the long in and password , and you also can chek the image information about date , kernel version etc.. ''' | ||
| − | == | + | == == |
| − | |||
| − | |||
| − | |||
| − | |||
| − | |||
| − | |||
| − | |||
| − | |||
| − | |||
| − | |||
| − | |||
| − | |||
| − | |||
| − | |||
| − | |||
| − | |||
| − | |||
| − | |||
| − | |||
| − | |||
| − | |||
| − | |||
| − | |||
| − | |||
| − | |||
| − | |||
| − | |||
| − | |||
| − | |||
| − | |||
| − | |||
| − | |||
| − | |||
| − | |||
| − | |||
| − | |||
| − | |||
| − | |||
| − | |||
| − | |||
| − | |||
| − | |||
| − | |||
| − | |||
| − | |||
| − | |||
| − | |||
| − | |||
| − | |||
| − | |||
| − | |||
| − | |||
Revision as of 07:40, 21 November 2024
Introduction
This document describes how to work with the RISC and Qualcomm LE GA1.1 Board Support Package (BSP) release.
Yocto Version
Yocto 4.0.18
Kernel Version
Kernel 6.6.28
Meta Build ID
QCM6490.LE.1.0-00218-STD.PROD-1
Docker Install and BSP Download
Pull docker images
$ sudo docker pull advrisc/u20.04-qcslbv2:latest
Run docker example
$ mkdir -p /home/bsp/myLinux
$ sudo docker run --privileged -it --name qclinux -v /home/bsp/myLinux:/home/adv/BSP:rw advrisc/u20.04-qcslbv2 /bin/bash
adv@7cc0fa834366:~$ sudo chown adv:adv -R BSP
Download BSP
You need to get the ADV_GIT_TOKEN by contacting the PM or AE of ROM-2860.
$ cd /home/adv/BSP
$ git config --global credential.helper 'store --file ~/.my-credentials'
$ echo "https://AIM-Linux:${ADV_GIT_TOKEN}@dev.azure.com" > ~/.my-credentials
$ repo init -u https://dev.azure.com/AIM-Linux/risc_qcs_linux_le_1.1/_git/manifest -b main -m adv-6.6.28-QLI.1.1-Ver.1.1_robotics-product-sdk-1.1.xml
$ repo sync -c -j12
Get and Unzip the Download Files
LIV11 yocto downloads file:[ downloads.qcs6490.le.1.1.r00041.0.tar ]
$ cd /home/adv/BSP
$ tar -zxvf downloads.qcs6490.le.1.1.r00041.0.tar
Build Instructions
Source env
$ source scripts/env.sh
Build All Images
$ scripts/build_release.sh -all
- Output ufs images: build-qcom-robotics-ros2-humble/tmp-glibc/deploy/images/qcm6490/qcom-robotics-full-image
- Output emmc images: build-qcom-robotics-ros2-humble/tmp-glibc/deploy/images/qcm6490/qcom-robotics-full-image-emmc
Build All Images individually
1. Build ADSP Image
$ scripts/build_release.sh -adsp
2. Build AOP Image
$ scripts/build_release.sh -aop
3. Build CDSP Image
$ scripts/build_release.sh -cdsp
4. Build BOOT(XBL) Image
$ scripts/build_release.sh -boot
5. Build TZ Image
$ scripts/build_release.sh -tz
6. Generate Firmware Prebuilds
$ scripts/build_release.sh -common
7. Build YOCTO Image
$ scripts/build_release.sh -yocto
Build yocto images
$ cd /home/adv/BSP
$ MACHINE=qcm6490 DISTRO=qcom-robotics-ros2-humble source setup-robotics-environment
$ devtool modify qps615
$ ../qirp-build qcom-robotics-full-image
Recovery & Rescue
Using windows PCAT or Qualcomm Download (QDL) tool to flash software images to the device.
Get the official images and unzip
Release image URL: OS Support List(LE1.1 based on Yocto4.0)
Unzip command example:
$ sudo tar -zxvf 2860A1AIM38LIV11030_emmc_2024-11-18.tgz
Enter 9008 download mode
- Connect the Micro USB (EDL) to your host computer.
- Forced Recovery: The SW2 switch to 1-on.
- Flash EMMC: the SW1 switch to 1-off, 2-on
- Flash UFS: the SW1 switch to 1-on, 2-on
- Connect the adapter and power on the device
Use the windows PCAT to flash images
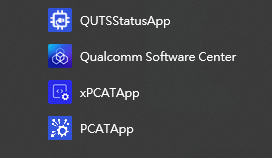
1. Download the Qualcomm Software Center
2. Open the Qualcomm Software Center
3. Search "PCAT" in the search bar
4. Click Qualcomm® Product Configuration Assistant Tool
5. Select Qualcomm® Product Configuration Assistant Tool version
Version: 2.33.2.119
6. Install Qualcomm® Product Configuration Assistant Tool 2.33.2.119
7. Search "QUTS" in the search bar
8. Click the Qualcomm® Unified Tools Services
9. Select Qualcomm® Unified Tools Services version
Version : 1.75.2.9
10. Install Qualcomm® Unified Tools Services 1.75.2.9
11. You will find the new application in your Windows system .
12. Unzip the UFS File and eMMC File
For example :
2860A1AIM37UIV10084_2024-08-08_ufs_debug.tgz
2860A1AIM37UIV10084_2024-08-08_emmc_debug.tgz
13 Connect your device via Micro USB.
USF Provision
2. Add the prog_firehose_ddr.elf and provision_ufs31.xml in UFS folder.
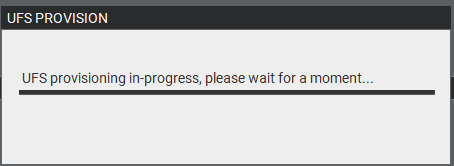
3. Then press "OK" , it will start to do USF Provision.
4. When the Provision finished , you can see the result in message window.
Flash UFS
1. Change the SW1 and SW2
Flash UFS: the SW1 switch to 1-on, 2-on
Forced Recovery : The SW2 switch to 1-on ,2 - on .
2. Turn on the power
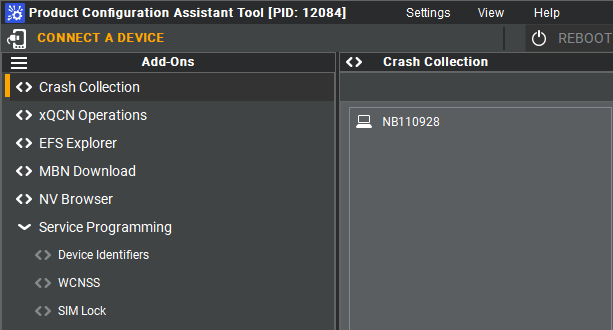
3. Open " PCATApp" Tool
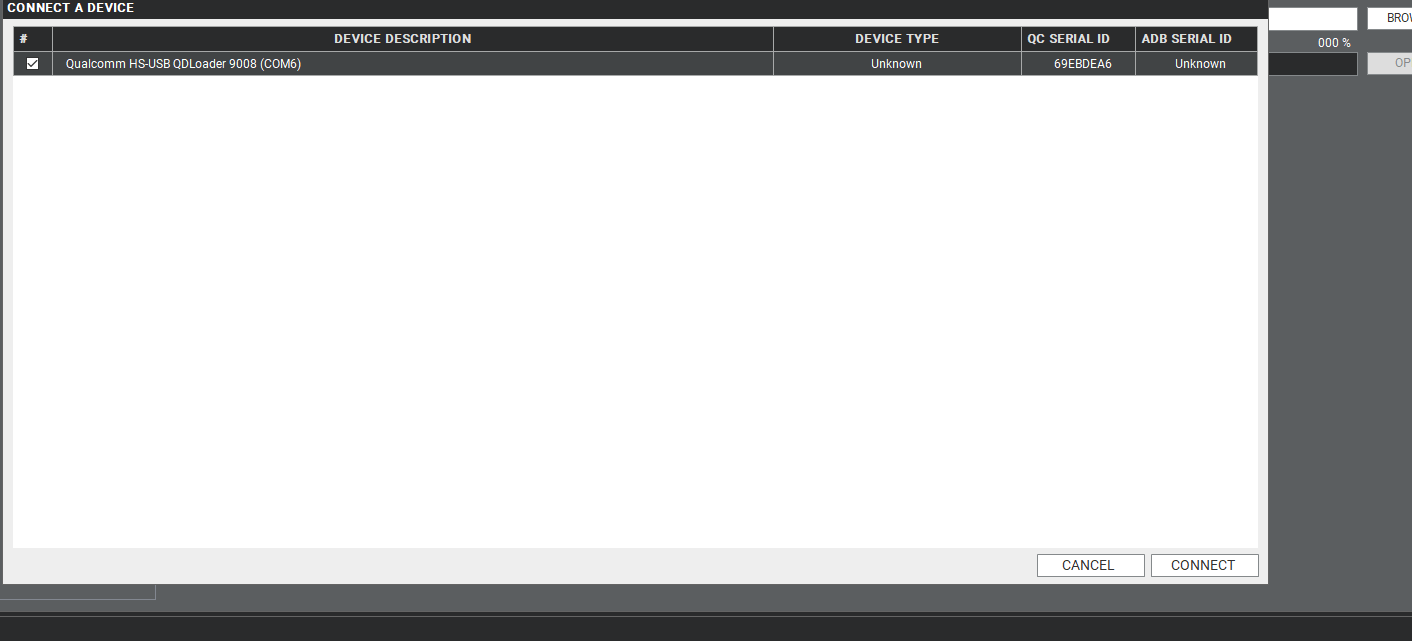
4. Click " Connect A Device"
5. Select "Qualcomm HS-USB QDLoader 9008 (COM6)
6. Click " Connect " device
7. When you connected successfully , it will show "green word" - Qualcomm HS-USB QDLoader 9008 (COM 6)
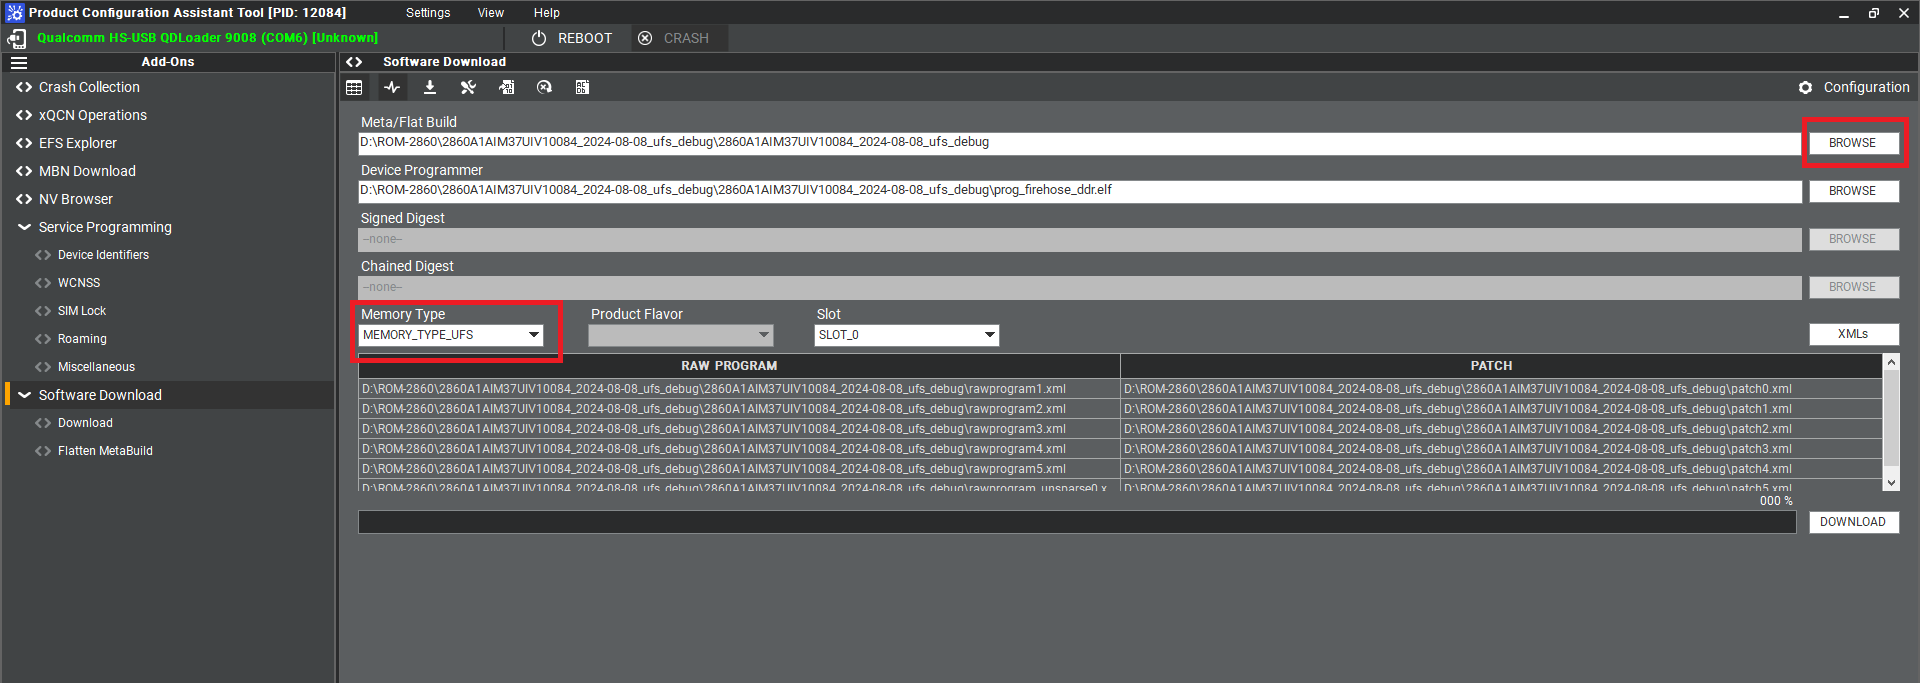
8. Select UFS Folder in PCAT Tool , the Tool will help load Files automatically and Select "MEMORY_TYPE_UFS"
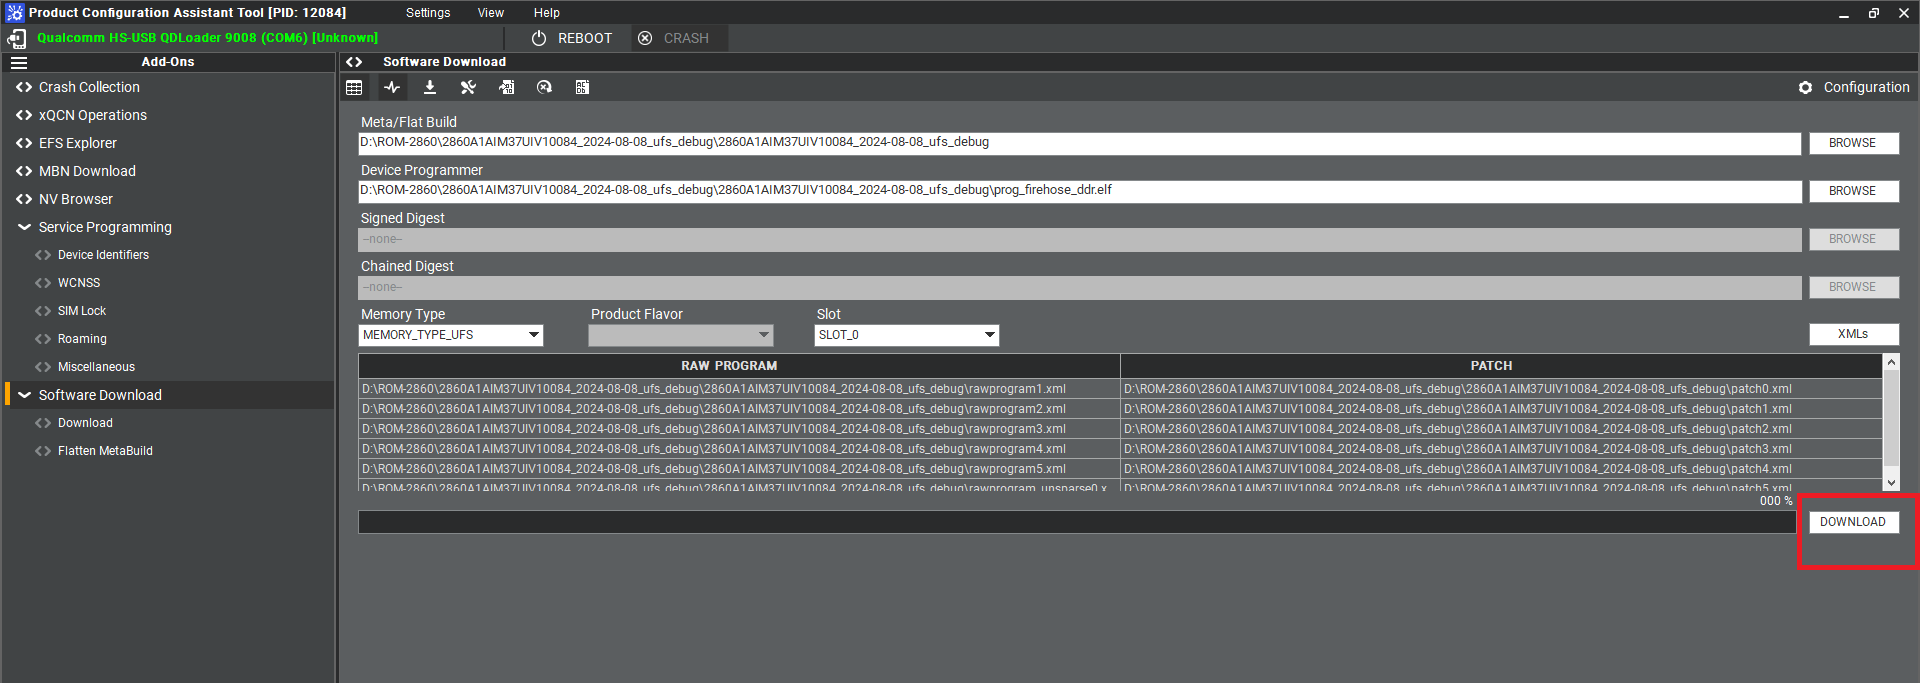
9. Click " Download"
10. UFS Download Status
12. When the UFS installation finished . Close the PCAT tool ,
13. pleaes remove the mirco usb cable, turn off the power
14. UFS boot up :
The SW1 switch to 1-on, 2-on
The SW2 switch to 1-off, 2-on
15. Connect debug cable and open the terminal , turn on the power .
16. When the systme boot up , you need to type " qcm6490 login: root " , " Password: oelinux123"
17. After type the long in and password , and you also can chek the image information about date , kernel version etc..
Flash eMMC
1. Turn off the Power
2. Change the SW1 and SW2
Flash eMMC: The SW1 switch to 1-off, 2-on
Forced Recovery : The SW2 switch to 1-on, 2-on
3. Turn on the power
4. Make sure the device connection status.
5. If the device disconnect with PCAT Tool , please connect it again.
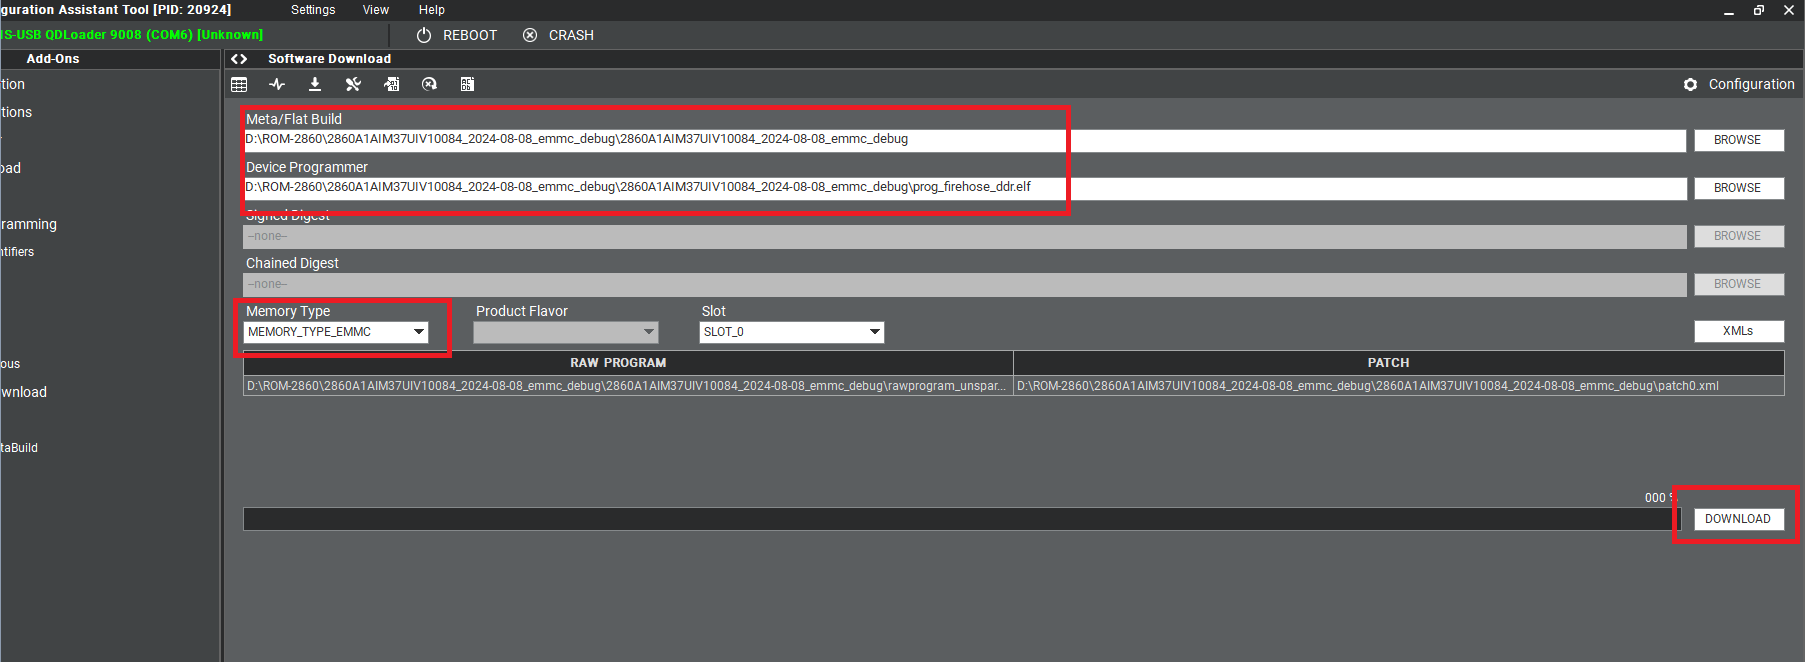
6. Select eMMC Folder.
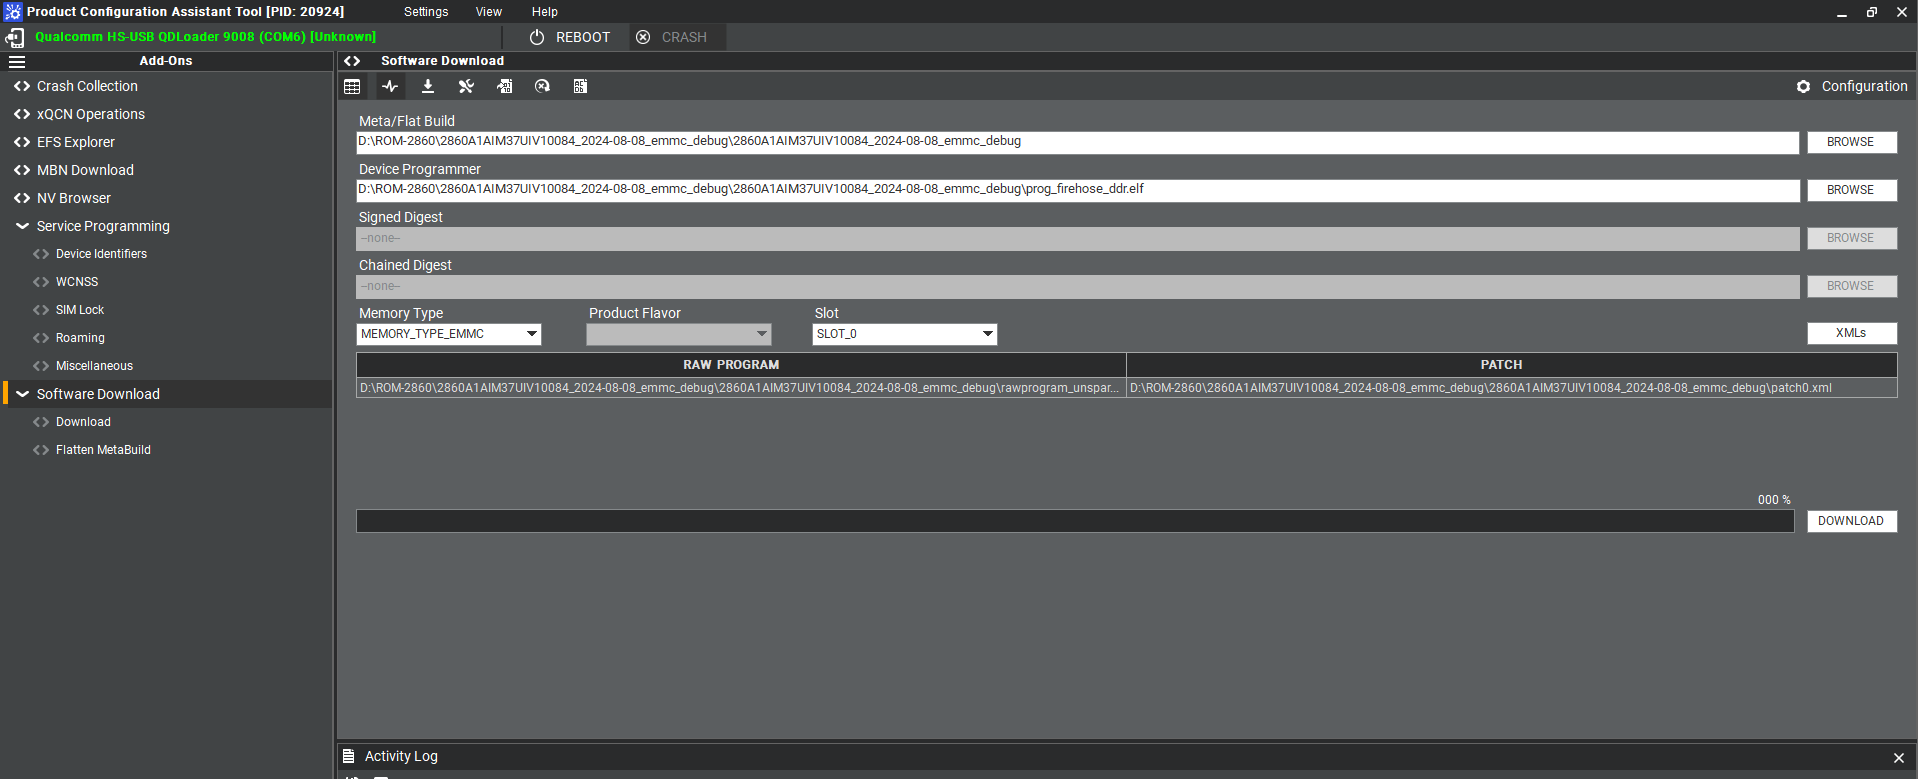 7. Make sure the setting ,then press " Download " button.
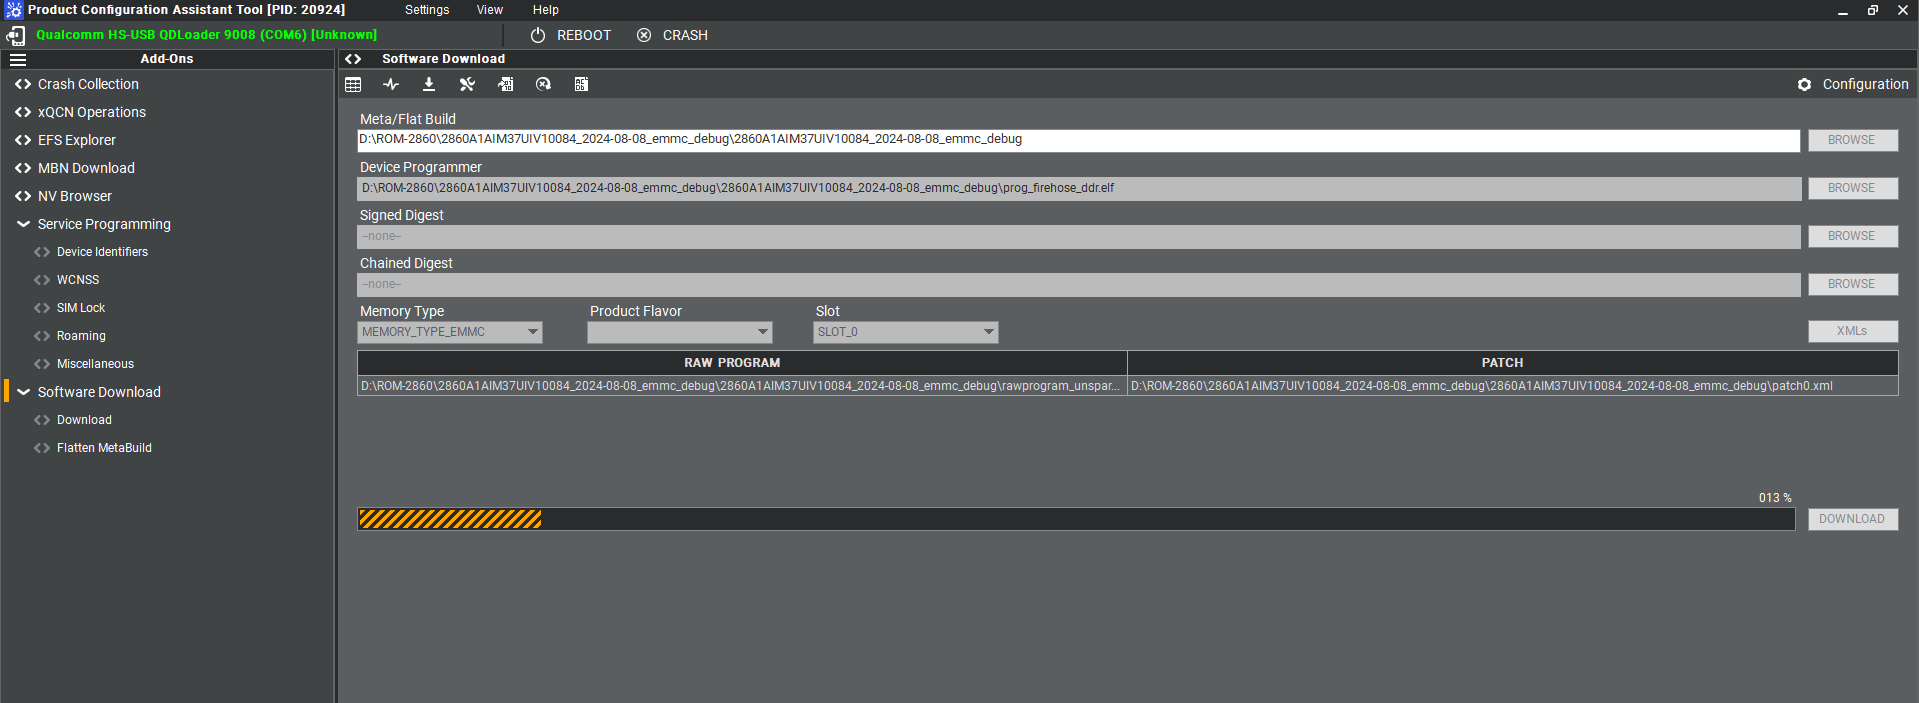
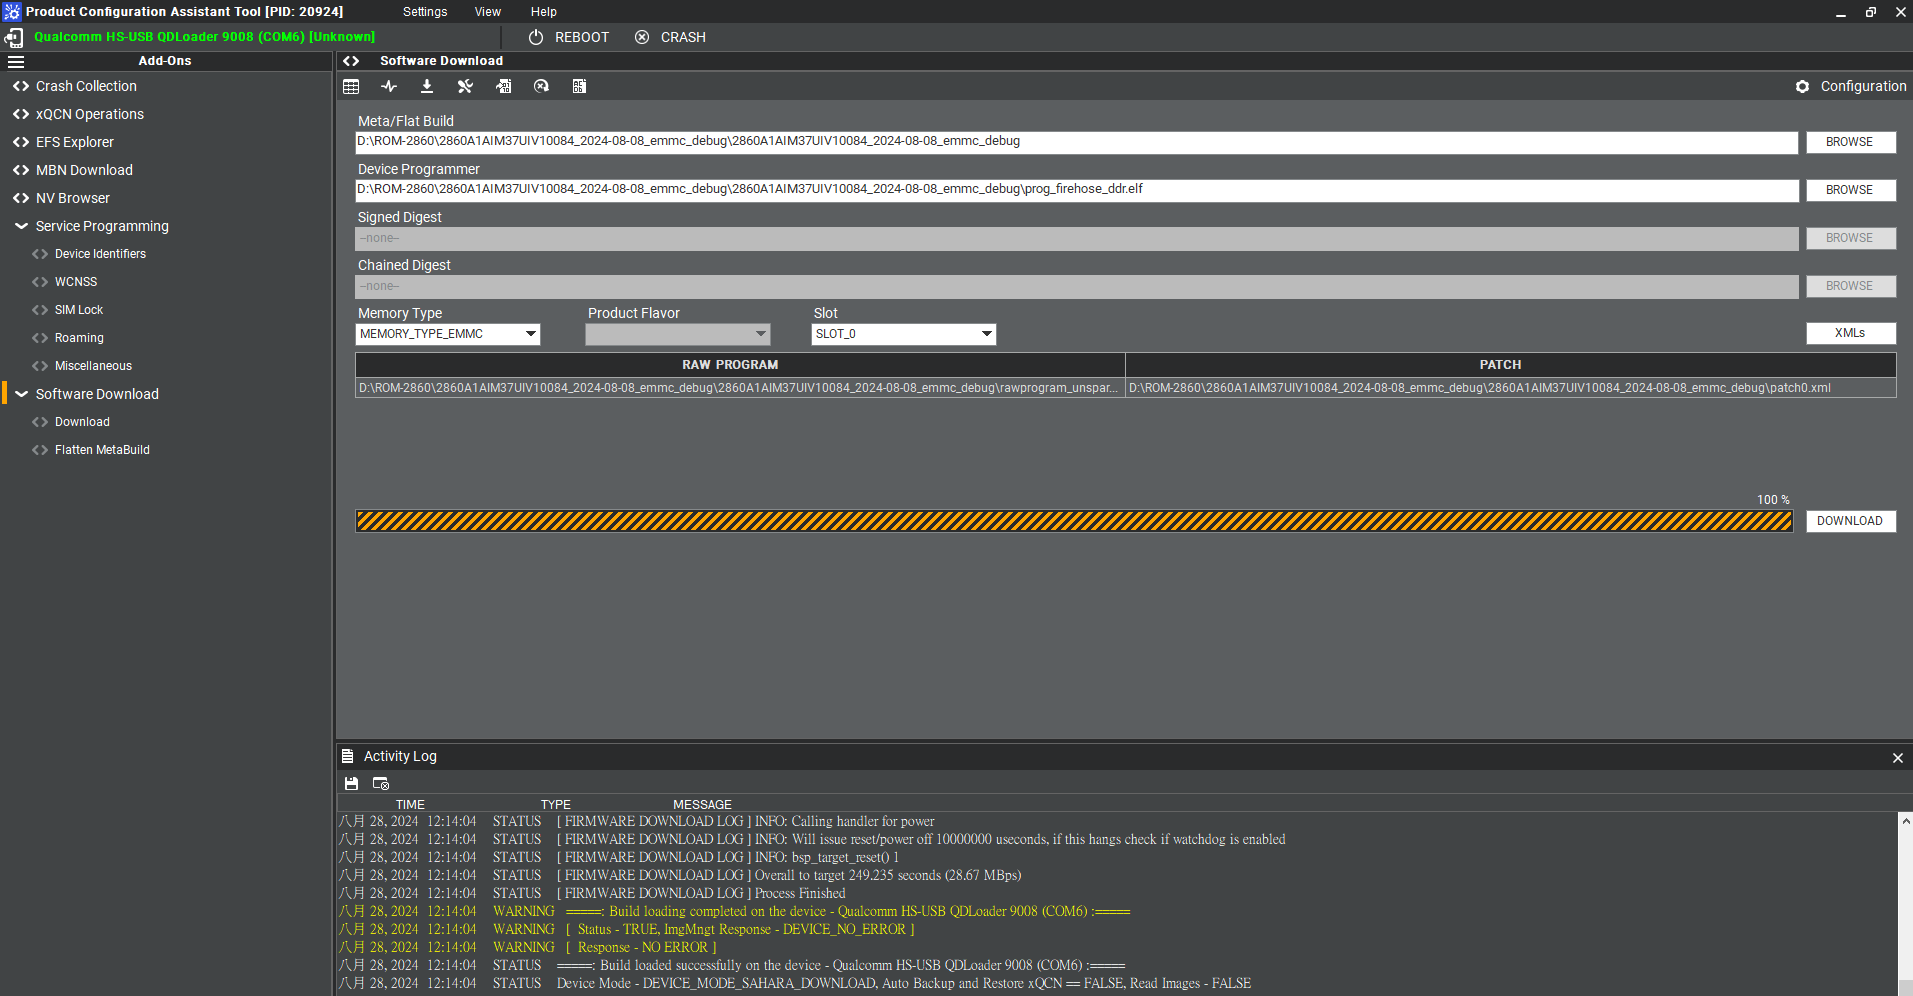
8. eMMC downlaoad status
' 9. eMMC D'onwload compeleted
10. When the eMMC installation finished . Close the PCAT tool ,
11. pleaes remove the mirco usb cable, turn off the power
12. eMMC boot up :
The SW1 switch to 1-off, 2-on
The SW2 switch to 1-off, 2-on
13. Connect debug cable and open the terminal , turn on the power .
14. When the systme boot up , you need to type " qcm6490 login: root " , " Password: oelinux123"
15. After type the long in and password , and you also can chek the image information about date , kernel version etc..


