Difference between revisions of "IoTGateway/BSP/Android/ApplicationDevelopGuide"
| Line 33: | Line 33: | ||
Please refer to Chapter 1.1 "To install JDK". | Please refer to Chapter 1.1 "To install JDK". | ||
| − | == To install Android Studio == | + | === To install Android Studio === |
Please download "android-studio-bundle-145.3276617-windows.exe" from [https://developer.android.com/studio/index.html <u>https://developer.android.com/studio/index.html</u>]. Launch the .exe file you downloaded. Follow the setup wizard to install Android Studio and any necessary SDK tools. The following pictures shows each step of the recommended setup procedure: | Please download "android-studio-bundle-145.3276617-windows.exe" from [https://developer.android.com/studio/index.html <u>https://developer.android.com/studio/index.html</u>]. Launch the .exe file you downloaded. Follow the setup wizard to install Android Studio and any necessary SDK tools. The following pictures shows each step of the recommended setup procedure: | ||
Revision as of 08:46, 6 February 2017
Contents
preparations
Please download "jdk-8u121-windows-x64.exe" from http://www.oracle.com/technetwork/java/javase/downloads/jdk8-downloads-2133151.html.
Launch the .exe file you downloaded . Follow the setup wizard to install JDK .
Then refer to the following step to open system variables window:
Computer -> Properties -> Advanced system settings -> Advanced -> envionment variables.

Create a new system variable JAVA_HOME. The variable value is the location where JDK installed, such as: D:\Program Files\Java\jdk1.8.0_121

Create a new system variable CLASS_PATH. The variable value is: .;%JAVA_HOME%\lib;%JAVA_HOME%\lib\tools.jar;

Edit system variable PATH. Add: %JAVA_HOME%\bin;%JAVA_HOME%\jre\bin;

Build Android Studio development environment
Introduction
This document describes how to build Android Application development environment(Android Studio & Eclipse) for Windows. Android Studio is the official Integrated Development Environment(IDE) for Android app development, based on IntelliJ IDEA . For an introduction to Android Studio, please visit the websit https://developer.android.com/studio/index.html.
To install JDK
Please refer to Chapter 1.1 "To install JDK".
To install Android Studio
Please download "android-studio-bundle-145.3276617-windows.exe" from https://developer.android.com/studio/index.html. Launch the .exe file you downloaded. Follow the setup wizard to install Android Studio and any necessary SDK tools. The following pictures shows each step of the recommended setup procedure:
1 - Click Next to start setup.
2 - Choose components.
3 - Agree with the license.
4 - Set installation location.
Build Eclipse development environment
Install Eclipse
Please download "eclipse-jee-juno-SR2-win32-x86_64.zip" from
After the download is complete, unzip directly to the desired directory, double-click the eclipse icon to use, without additional installation process.
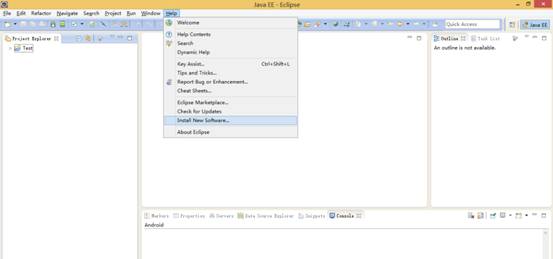
Install Android ADT Plug-in
Follow the setup wizard to install Android ADT plug-in .
The following pictures shows each step of the recommended setup procedure:
- Open eclipse->help->install new software
- Click Add to Add Repository
Name:Android
Location:https://dl-ssl.google.com/android/eclipse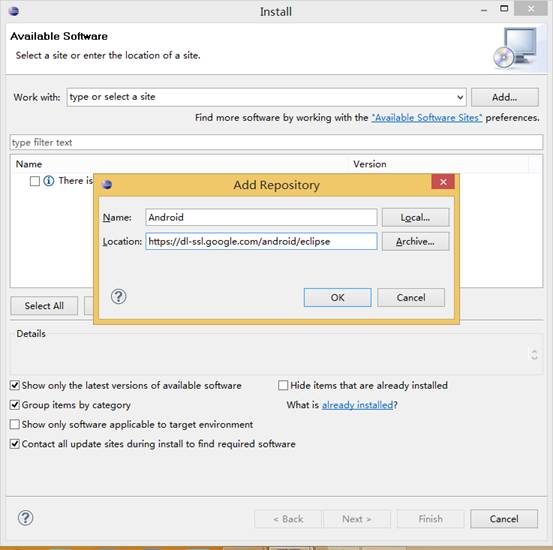
- Choose Developer Tools.
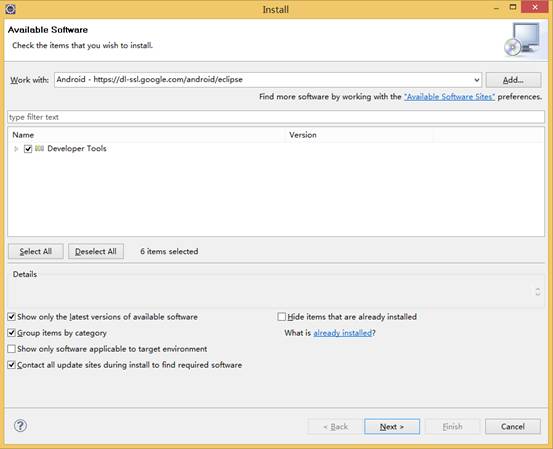
- Click Next.
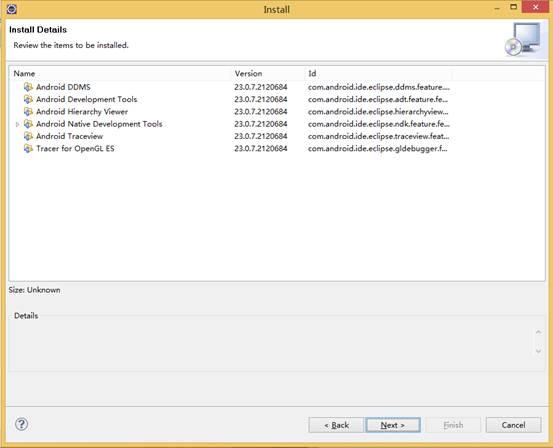
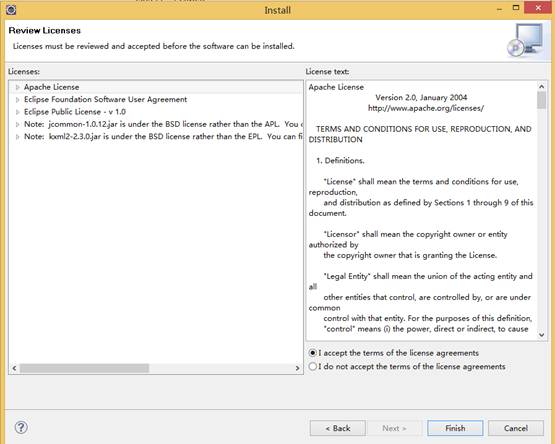
- Agree with the license.
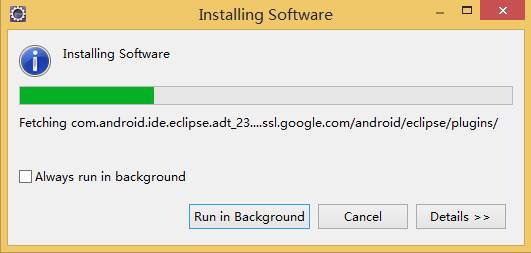
- Installing ADT plug-in.
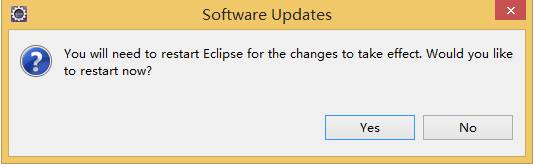
- Install finished and Restart Eclipse.


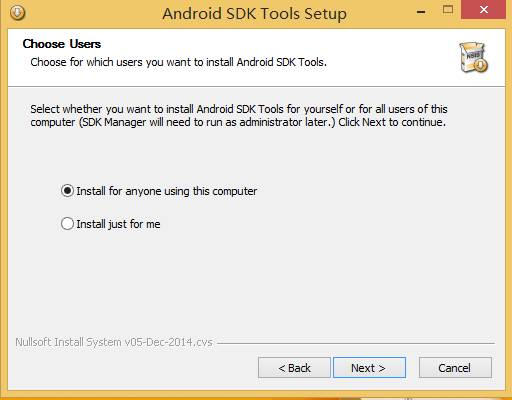
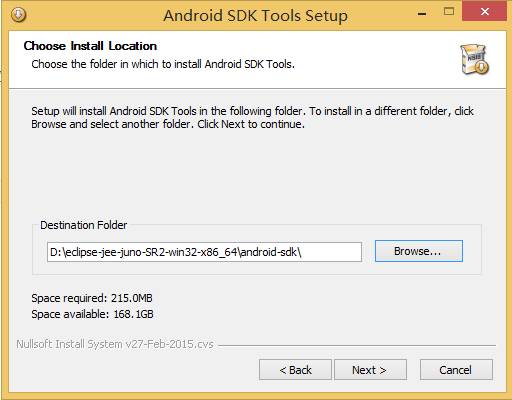
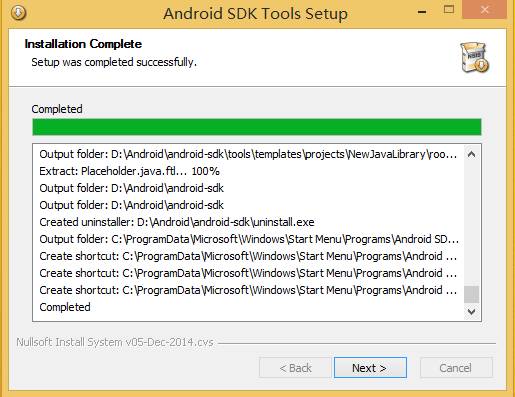
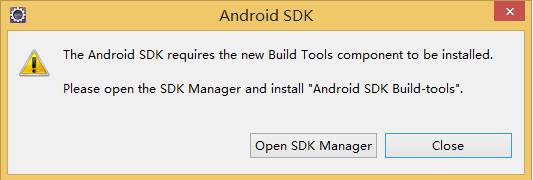
Install SDK
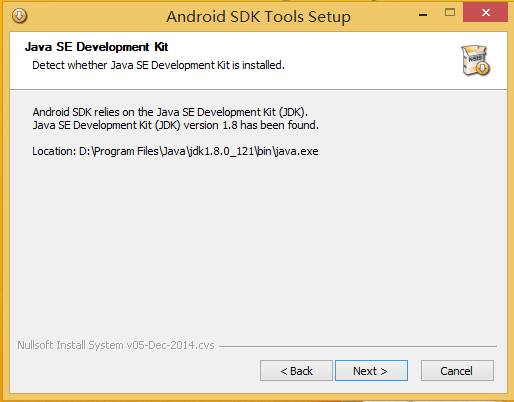
Please download " installer_r24.1.2-windows.exe " from https://dl.google.com/android/installer_r24.1.2-windows.exe. Launch the .exe file you downloaded . Follow the setup wizard to install necessary SDK tools.
The following pictures shows each step of the recommended setup procedure:
- Click Next to start setup.
- Choose Users.
- Set installation location.
- Installing Android SDK Tool.
- Install SDK Tool finushed.
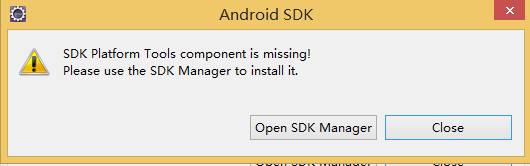
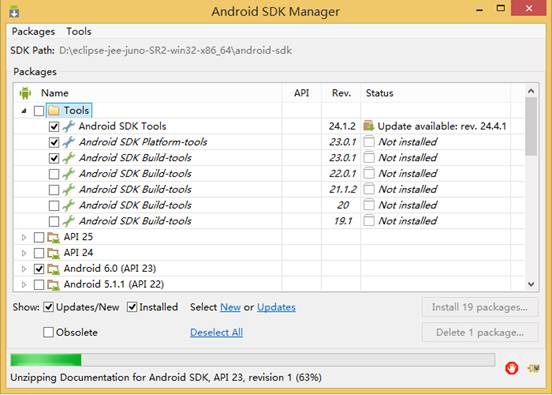
- Open SDK Manager.
- Choose the necessary components,Then click Install to installing SDK components.
- Install finushed.
- Open eclipse->Window->preferences.
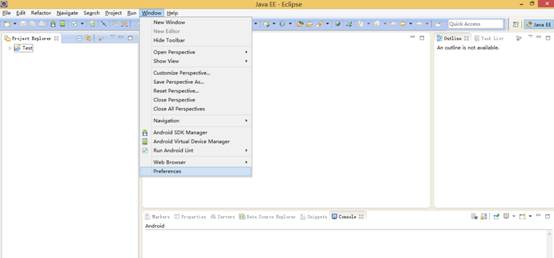
- Click Android and Browse to Set SDK Location.
SDK Location: Fill in the path of your SDK installation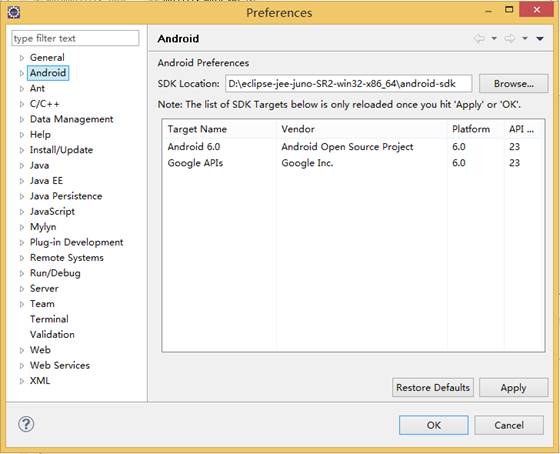


ADB Tool
ADB Environment Configuartion
Add platform-tools path
Computer -> Properties -> Advanced system settings -> Advanced -> enviornment variables
Edit System Variable path. Add The variable value is the location where SDK installed, Such as:
D:\eclipse-jee-juno-SR2-win32-x86_64\android-sdk\platform-tools;
- Restart the computer.
- Verification.
Open cmd.exe and Execute the adb command.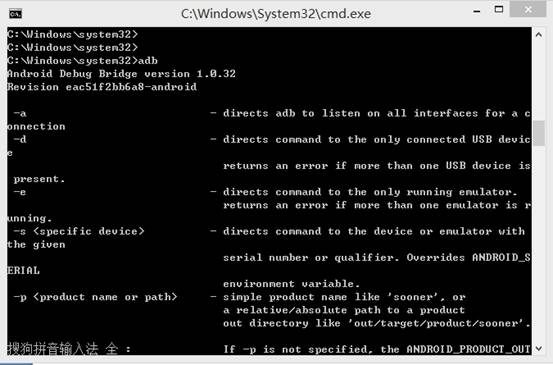

How to use Android ADB
ADB debugging needs to ensure that the device is in developer mode
Use otg to connect.
- View the device

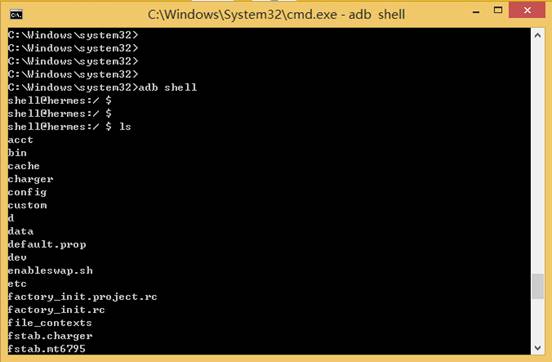
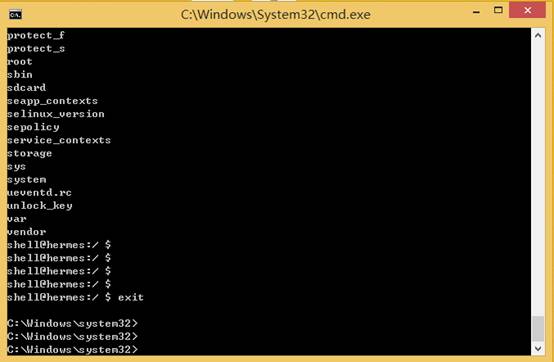
- Enter the shell terminal and execute the shell command
- Exit the shell command


Use the LAN to connect.
- Restart devices service
Network debugging must ensure that debugging machine and equipment in the same local area network. First use the otg link device to execute the following command and then disconnect the otg link. - connect devices
- Enter the shell terminal and execute the shell command
- Exit the shell command
- Disconnect the link
For get more information about ADB, please visit the official user guide http://adbshell.com/.