Difference between revisions of "IoTGateway/BSP/Linux/iMX6/Eclipse Plug-in"
From ESS-WIKI
(→Building the Project) |
|||
| Line 93: | Line 93: | ||
==Building the Project== | ==Building the Project== | ||
| + | Select "Build Project" from the "Project" menu. The console should update and you can note the cross-compiler you are using. | ||
| + | [[File:2015-01-27_171739.png]] | ||
| + | |||
==Deploying and Running the Application== | ==Deploying and Running the Application== | ||
==Deploying and Debugging the Application== | ==Deploying and Debugging the Application== | ||
Revision as of 04:33, 10 March 2016
Yocto User Guide - Eclipse Plug-in for iMX6 series
Prerequisites
Installing cross toolchain
Please use bitbake command to build one toolchain installer or get a pre-built one.
Qt4 SDK
Please perform following command to make toolchain installer.
$ bitbake fsl-image-x11 -c populate-sdk
Please change working directory to where installer located and perform the following command.
$ sudo ./poky-eglibc-x86_64-fsl-image-x11-cortexa9hf-vfp-neon-toolchain-qt4-1.5.3.sh
Qt5 SDK
Please perform following command to make toolchain installer.
$ bitbake fsl-image-x11-qt5 -c populate-sdk
Please change working directory to where installer located and perform the following command.
$ sudo ./poky-eglibc-x86_64-fsl-image-x11-qt5-cortexa9hf-vfp-neon-toolchain-1.5.3.sh
Working with Eclipse
Installing the Eclipse IDE
Please download "eclipse-standard-kepler-R-linux-gtk-x86_64.tar.gz" manually, put it to directory ~/FILES/ and perform the following commands:
$ cd ~/
$ tar xvf ~/FILES/eclipse-standard-kepler-R-linux-gtk-x86_64.tar.gz
Starting the Eclipse IDE
$ source /opt/poky/1.5.3/environment-setup-cortexa9hf-vfp-neon-poky-linux-gnueabi
$ ~/eclipse/eclipse
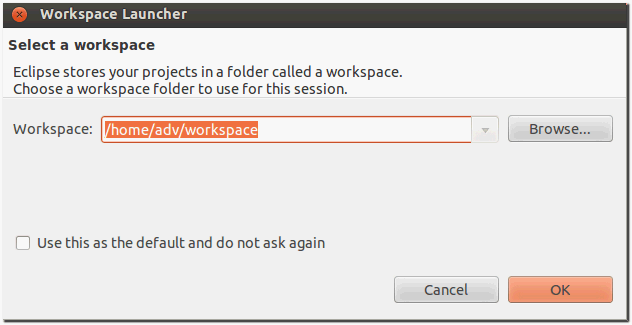
- select your workspace location
- Make sure you are in your Workbench and select "Install New Software" from the "Help" pull-down menu.
- Select "Kepler - http://download.eclipse.org/releases/kepler" from the "Work with:" pull-down menu.
- Expand the box next to "Linux Tools" and select the LTTng - Linux Tracing Toolkit boxes.
- Expand the box next to "Mobile and Device Development" and select the following boxes:
- Expand the box next to "Programming Languages" and select the following boxes:
- Complete the installation and restart the Eclipse IDE.
Installing the Pre-built Plug-in
- Start up the Eclipse IDE.
- In Eclipse, select "Install New Software" from the "Help" menu.
- Click "Add..." in the "Work with:" area.
- Enter "http://downloads.yoctoproject.org/releases/eclipse-plugin/1.5.4/kepler" in the URL field and provide a meaningful name in the "Name" field.
- Click "OK" to have the entry added to the "Work with:" drop-down list.
- Check the boxes next to following items:
- Complete the remaining software installation steps and then restart the Eclipse IDE to finish the installation of the plug-in.
- Click OK to continue when following dialog shows up.
Configuring the Cross-Compiler Options
- Choose "Preferences" from the "Windows" menu to display the Preferences dialog.
- Click "Yocto Project ADT"
- Specify corret "Toolchain Root Location" & "Sysroot Location".
Creating the Project
- Select "Project" from the "File -> New" menu.
- Expand "C/C++".
- Double click "C Project" to create the project.
- Expand "Yocto Project ADT Autotools Project".
- Select "Hello World ANSI C Autotools Project".
- Put a name in the "Project name:" field. Do not use hyphens as part of the name.
- Click "Next".
- Add information in the Author and Copyright notice fields.
- Be sure the License field is correct.
- Click "Finish".
- If the "open perspective" prompt appears, click "Yes" to open the C/C++ perspective.
- The left-hand navigation pane shows your project. You can display your source by double clicking the project's source file.
Building the Project
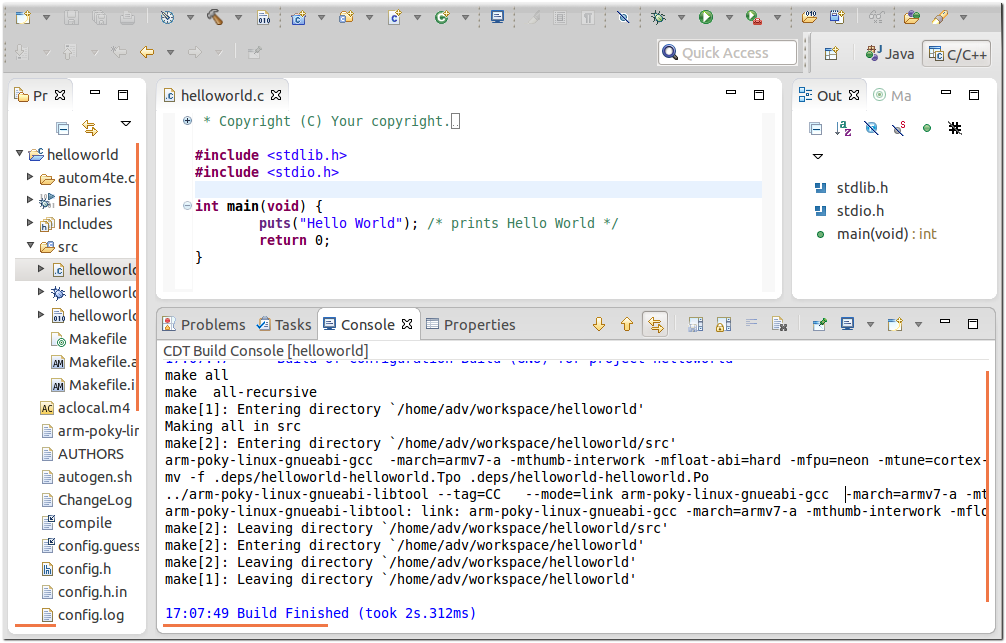
Select "Build Project" from the "Project" menu. The console should update and you can note the cross-compiler you are using.

Deploying and Running the Application
Deploying and Debugging the Application


