Difference between revisions of "EPD-130 User Manual"
From ESS-WIKI
Erick.huang (talk | contribs) |
Erick.huang (talk | contribs) |
||
| Line 43: | Line 43: | ||
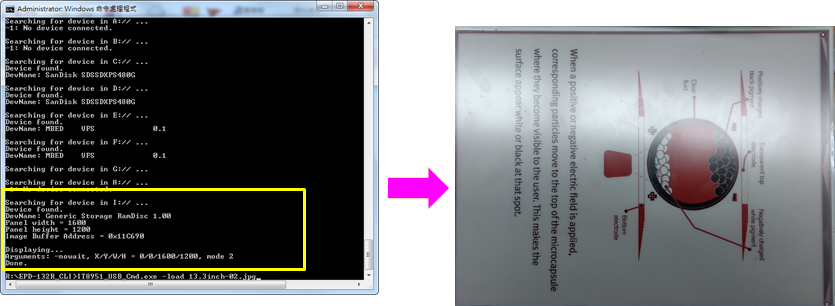
*Click "IT8951_UpdateImage2.bat" to update "13.3inch-02.bmp" to EPD. | *Click "IT8951_UpdateImage2.bat" to update "13.3inch-02.bmp" to EPD. | ||
*Open "IT8951_UpdateImage1.bat" and edit "13.3inch-02.bmp" for your image name. | *Open "IT8951_UpdateImage1.bat" and edit "13.3inch-02.bmp" for your image name. | ||
| − | |||
*</li> | *</li> | ||
| + | |||
| + | The image will not be saved in flash. | ||
[[File:EPD-132R EVK-USB2 Tool setup v2.png|RTENOTITLE]][[File:EPD-132R EVK-USB2 Refresh image.png|RTENOTITLE]] | [[File:EPD-132R EVK-USB2 Tool setup v2.png|RTENOTITLE]][[File:EPD-132R EVK-USB2 Refresh image.png|RTENOTITLE]] | ||
Revision as of 03:18, 28 September 2018
Contents
EVALUTION KIT OF EPD-130
Components LIST
|
Item |
Description |
|---|---|
| 1 | 13.3” EPAPER |
| 2 | EPD-130 PCBA |
| 3 | cable |
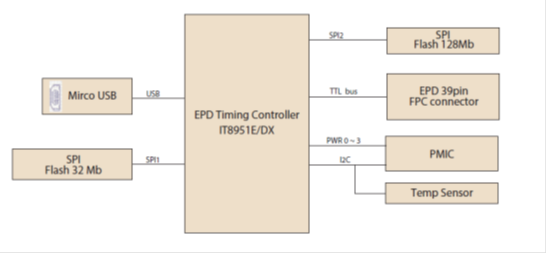
SYSTEM ARCHITECURE
EVALUATION KIT HANDS-ON
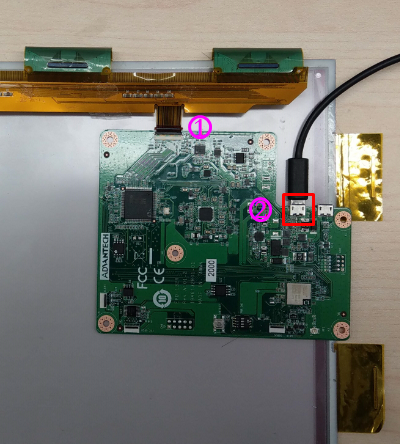
Follow steps and picture below to setup the hardware
- Connected EPD FPC to mainboard
- Connected USB cable to mainboard USB2(CN2)
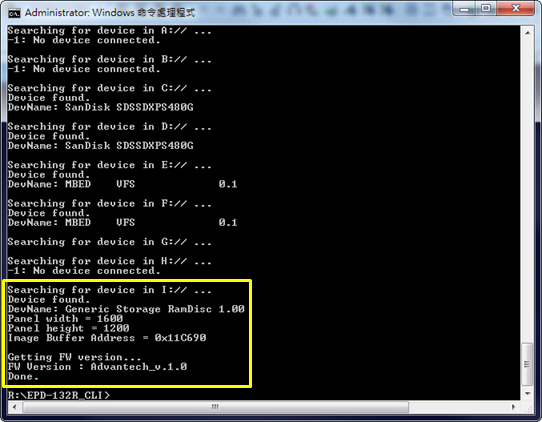
- Download and unzip EPD-132R_CLI_tool
- Click "IT8951_FWVersion.bat" to get EPD panel information


