Difference between revisions of "Advantech Robotic Suite/DeviceOn"
Eric.liang (talk | contribs) (Created page with " = DeviceOn = A surge in market demand for Industrial IoT products has rapidly increased the number of connected devices that are currently deployed and managed acros...") |
(No difference)
|
Revision as of 11:55, 3 February 2023
Contents
DeviceOn
A surge in market demand for Industrial IoT products has rapidly increased the number of connected devices that are currently deployed and managed across different locations. It is essential to effectively manage, monitor, and control thousands of connected devices while ensuring uninterrupted service. Devices must work properly and securely after they have been deployed - without requiring frequent visits from service technicians. Customers require secure access to their devices in order to detect, troubleshoot, and undertake time-critical actions.
More information please refer to DeviceOn
How To
Setup WISE-Agent
For EPC-R3720, execute below command to install prerequisites before install WISE-Agent.
apt-get -y install libmosquittopp1 libmosquitto-dev
Then, follow Edge Installation & Onboarding documentation to install WISE-Agent and setup WISE-Agent for connecting to DeviceOn.
Remote Management
Device Management
After your device onboarding, you could view, edit device basic information, remote control, and retrieve sensor data on your devices. Nine sub items under Device, Device List contain device name, upgrade status, power management and etc. Device Monitoring to give device loading at present. To remote diagnostic and debug through Remote Control. Next, all of plugin sensor data from Device Data. To grouping your device through the Device Group. For batch real-time or schedule control through Task defined. Rule Engine to set a threshold rule for your devices data in real-time.
Device List
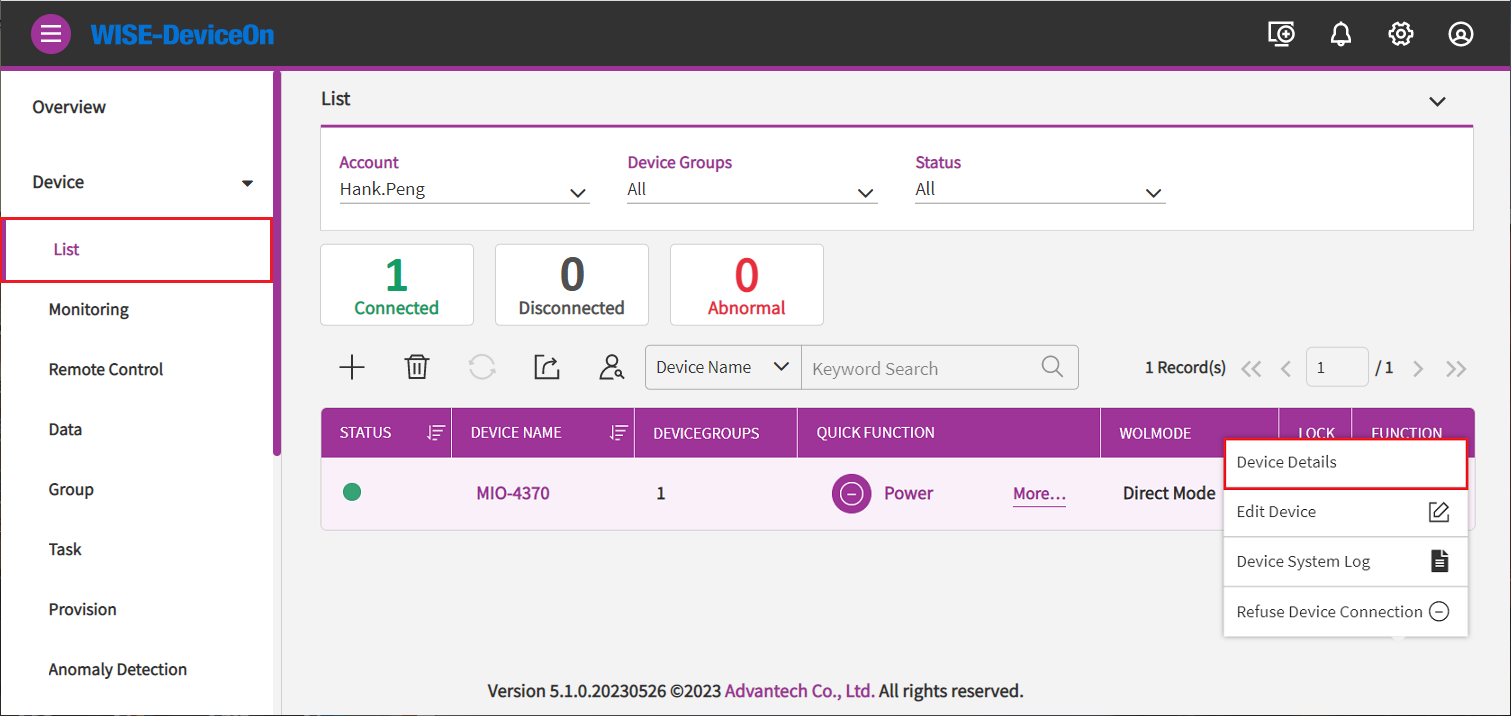
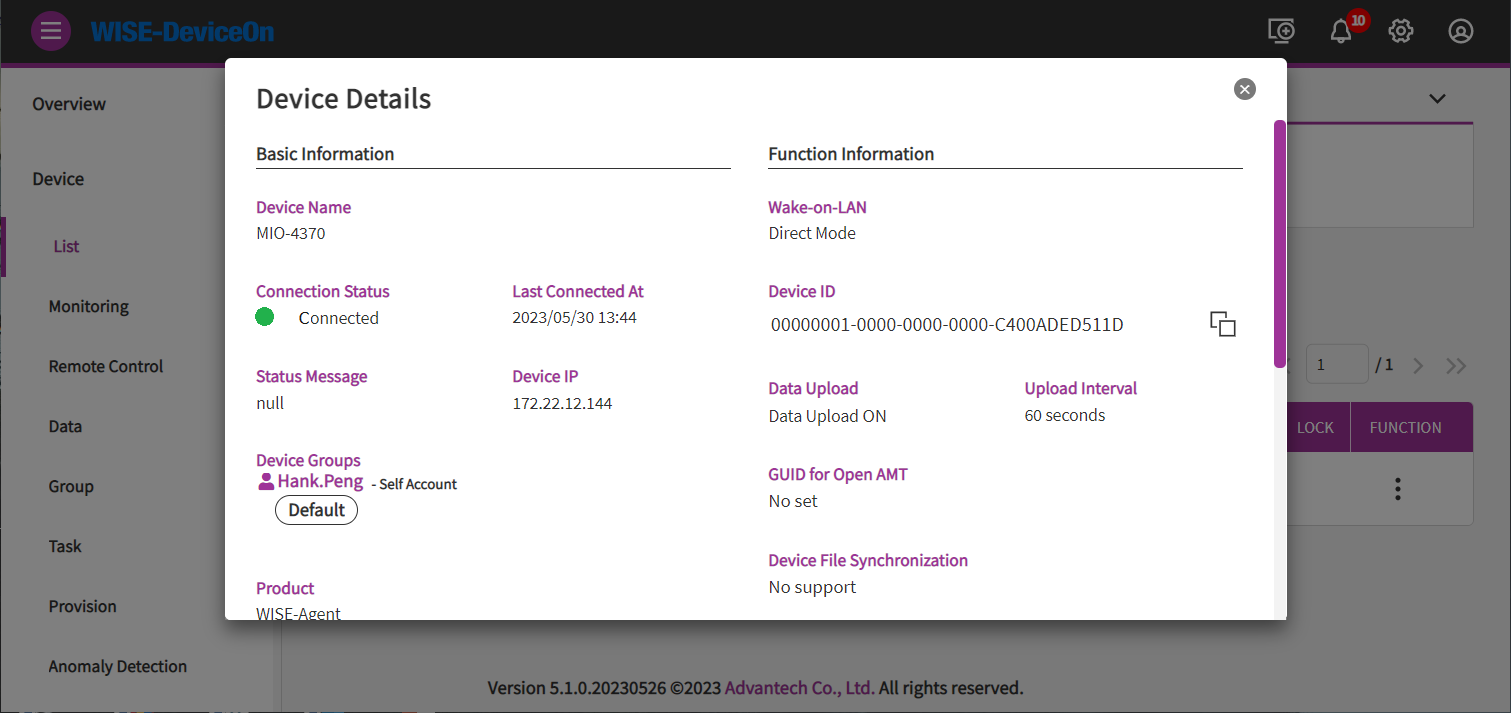
Click on device name or device details to get device information.
You could get the general information such as, device IP, version, MAC, Memory, BIOS, operation system and so on.
Container Management
You can easily set up, deploy, monitor, and manage each container on different devices. For device managers, it can create, manage and set the health of containers within minutes, and provide a variety of container restart strategies. Through the dashboard, you can quickly understand the running status of the container in the managed device. In addition, for container developers, the Azure Container Repository is supported as a public cloud solution, and private cloud uses Harbor as a container repository.
Detailed documentation about Container Management, please refer to DeviceOn Manual - Container Management Section .
Deploy a new ROS 2 Node Container to edge
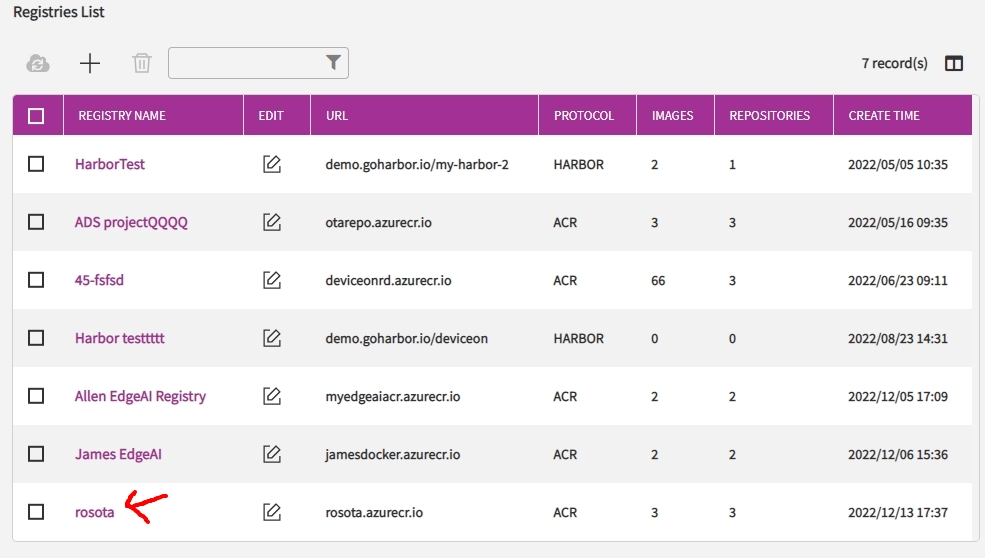
Container of helloworld ROS Node is available in a private Azure Registry. And it is also added into Registries List named rosota in the DeviceOn Portal.
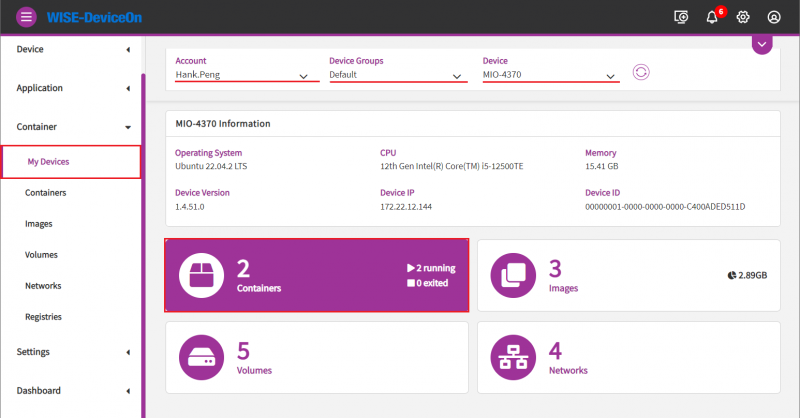
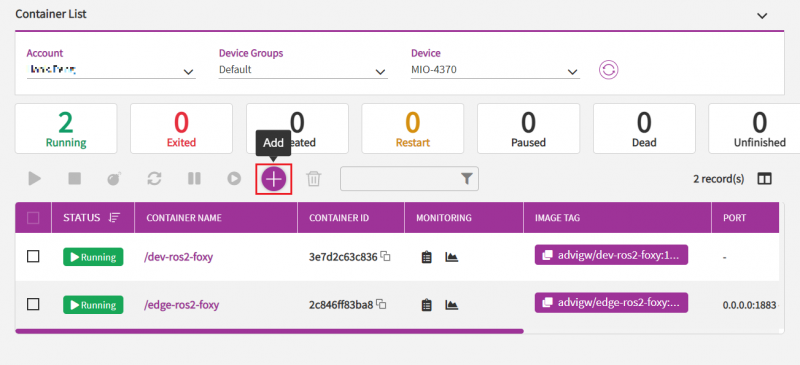
Step1. Go to Container -> My Devices page , choose device for deploy helloworld ros node . Then click Containers icon.
Step2. Click Add icon
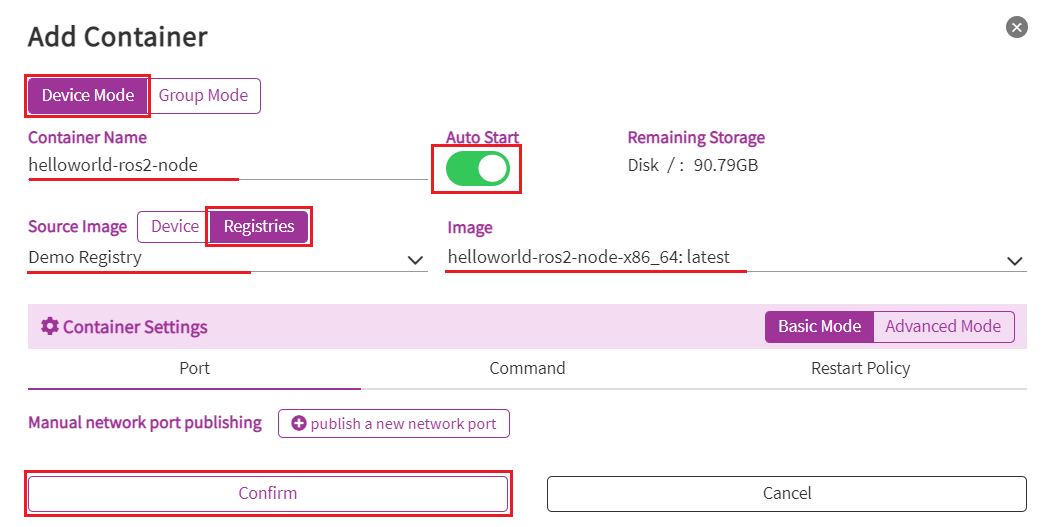
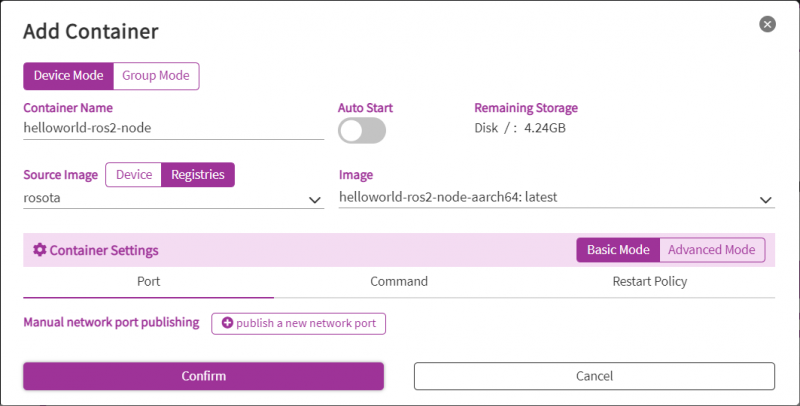
Step3. Source Image choose to Registries , Image choose the helloworld-ros2-node for your platform.
If your platform is x86, choose helloworld-ros2-node-x86_64. If your platform is arm, choose helloworld-ros2-node-aarch64.
And enter a name for Container Name , enable "Auto Start"
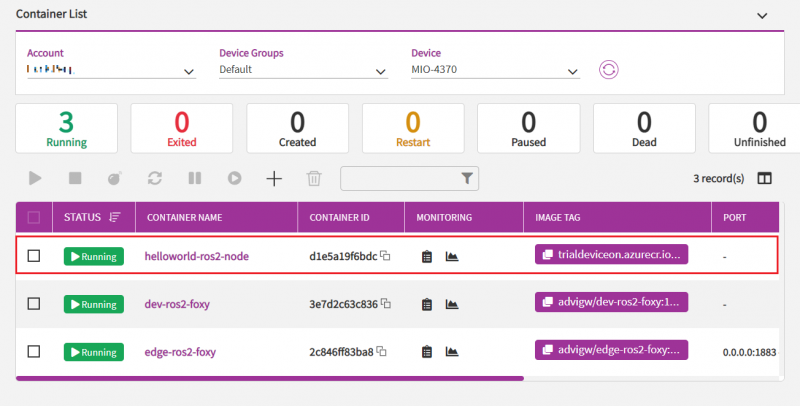
Step4. After click Confirm, the helloworld is going to deploy to the device you choose.
Step5. In edge device , open a terminal to execute below command to verify helloworld ros2 node is working.
Helloworld ros2 node will publish Hello World message continuously.
So, run below command to subscribe the topic for showing the message from helloworld ros2 node.
$ source /opt/ros/foxy/setup.bash
$ ros2 topic echo /topic
data: 'Hello World: 687'
---
data: 'Hello World: 688'
---
data: 'Hello World: 689'
---
data: 'Hello World: 690'
---
data: 'Hello World: 691'
---
data: 'Hello World: 692'
---
data: 'Hello World: 693'
---
