Difference between revisions of "WISE-1530 SDK"
Erick.huang (talk | contribs) |
Erick.huang (talk | contribs) |
||
| Line 147: | Line 147: | ||
Step 2: | Step 2: | ||
| + | |||
| + | [[File:WISE-1530 J-Flash bootloader.png]] | ||
| + | |||
| + | Step 3: | ||
| + | |||
| + | [[File:WISE-1530 J-Flash DCT.png]] | ||
| + | |||
| + | Step 4: | ||
| + | |||
| + | [[File:WISE-1530 J-Flash Application.png]] | ||
| + | |||
| + | Step 5: | ||
| + | |||
| + | [[File:WISE-1530 J-Flash Save-as.png]] | ||
Revision as of 02:57, 3 August 2017
Contents
Setup Development Environment
Preparing for Hardware
The user needs to prepare for hardware as following:
- WISE-1530, WISE-1500 and WISE-ED22.
- 802.11b/g/n (2.4 GHz) Wireless Access Point (AP).
- PC running the Microsoft Windows 7 operating systems
Please refer to the following steps for setup a WISE series of boards before using WISE-1520.
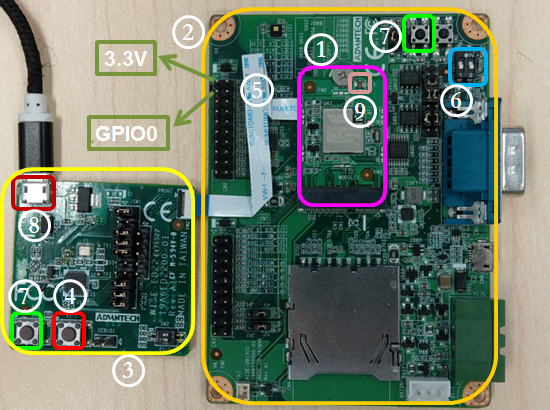
Step01: Please prepare boards as below.
① WISE-1530
② WISE-1500
③ WISE-ED22
④ WISE-ED22 reset button
⑤ CN2 on WISE-1500
⑥ SW3 on WISE-1500
- Pleas check pin1 and pin2 to “OFF” as default.
- Switch pin2 to decide whether running “backup to default” while device
booting. “ON”: enabled, “OFF”: disable
⑦ One reset button on WISE-1500 and the other on WISE-ED22
⑧ Micro USB connector
- Drag-n-drop programming
- Serial port and debugging
- Power supplies for UART1 debug port
⑨ RF connector
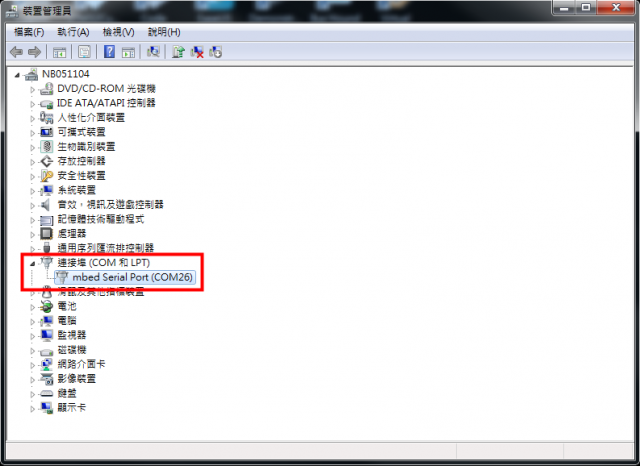
Step02: Connect the WISE-ED22 to PC using micro-USB cable.
- Install Driver ( Download latest driver )
mbedWinSerial_16466.exe Download latest driver] )
- The device will be visible in the Device Manager as below, user can use
serial tools (putty, tera term ...etc.) to key in command.
WICED Studio
The user can refer to the following steps for setup WICED Studio with WISE-1530 SDK.
Windows Install:
- Download WICED-Studio-4.1.1.8-IDE-Installer.exe.zip
- Extract the installer exe from the zip file to temp folder on your computer; do not execute the installer from the zip file
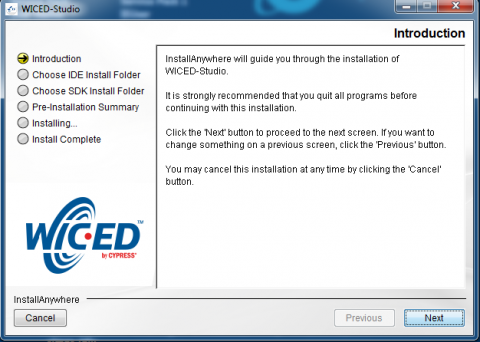
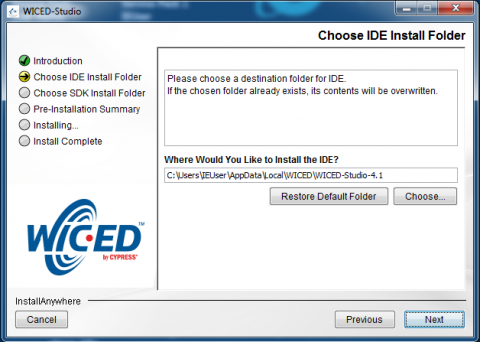
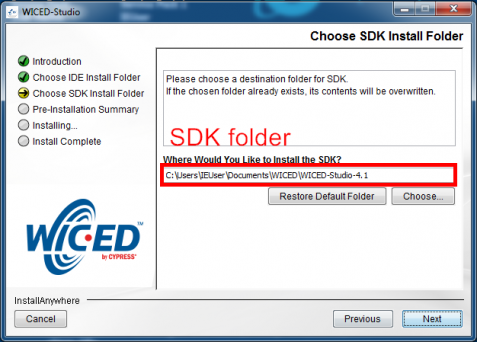
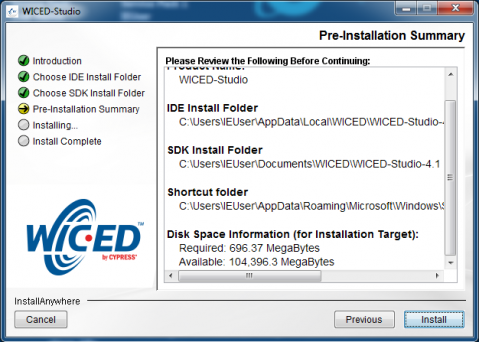
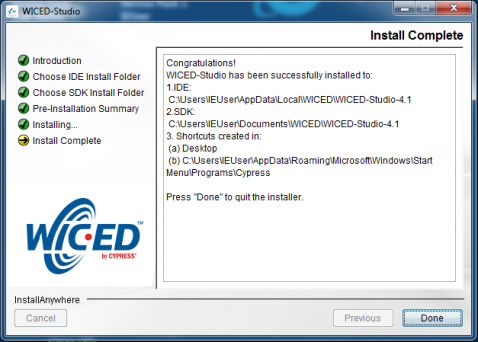
- Double click the installer exe to install WICED Studio as below picture
- After installation in completed, launch WICED Studio IDE from shortcut on desktop
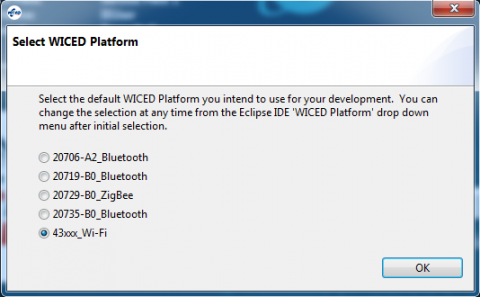
- When you see the Select WICED Platform page, Select the 43xxx_Wi-Fi item
Copy patch file
- Download and unzip WM-BN-BM-22_SDK_4.1.x_platform_patch.zip
- Copy platforms folder to <SDK folder>\43xxx_Wi-Fi\ and select replace
- Copy WICED folder to <SDK folder>\43xxx_Wi-Fi\ and select replace
Build Source File
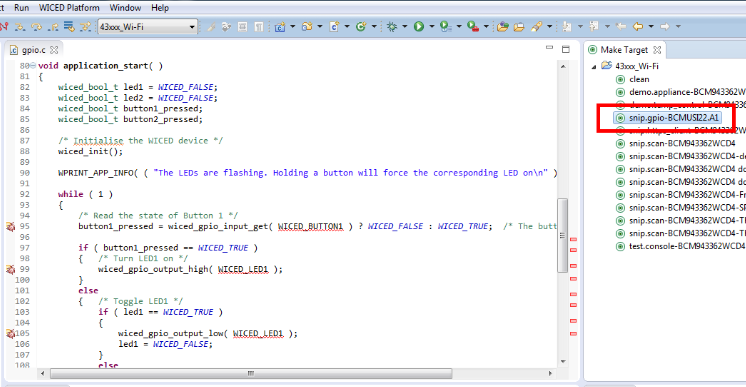
Make a "Make Target" file
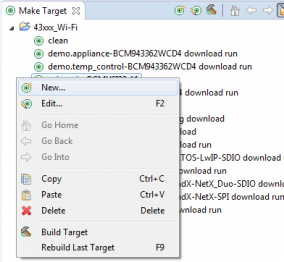
Step1: In Make Target window click mouse right button
Step2: Select New...
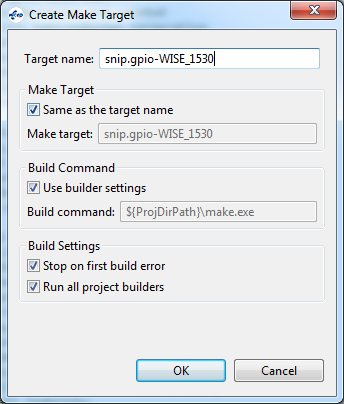
Step3: Type "snip.gpio-BCMUSI22.A1"
Field explanation: snip.gpio-BCMUSI22.A1
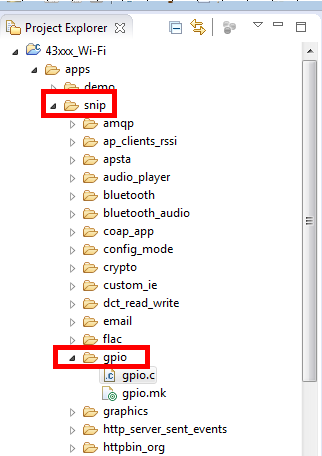
- snip.gpio: application project name
- BCMUSI22: platform name, for WISE-1530 platform don't change this field.
- A1: platform version, for WISE-1530 platform don't change this field.
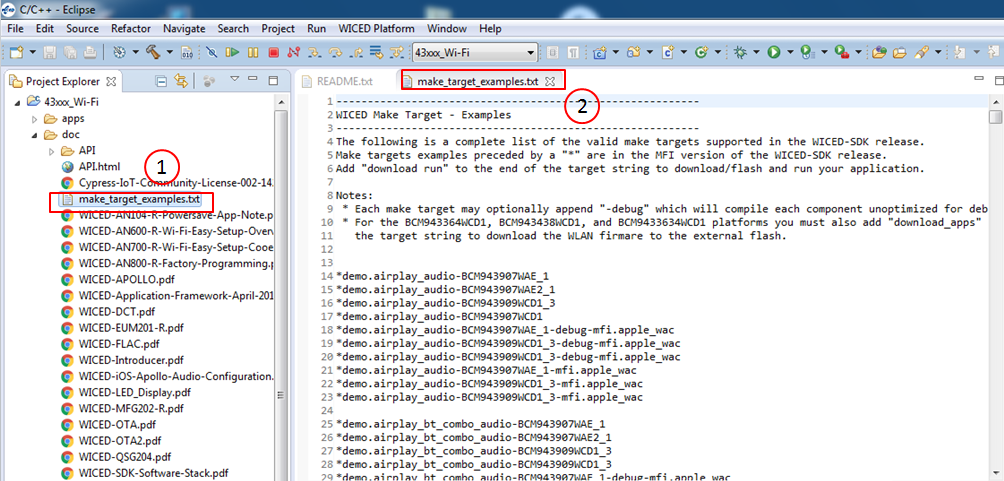
User can refer <SDK folder>\43xxx_Wi-Fi\doc\make_target_examples.txt to get more detail.
Build Project
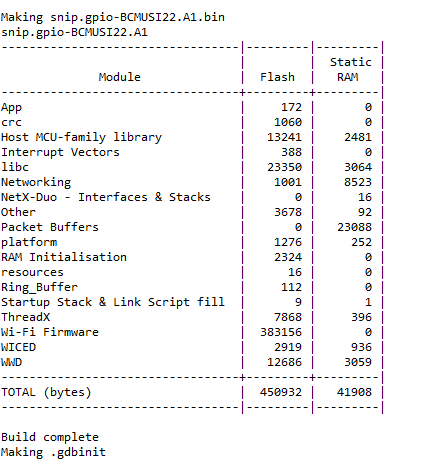
Double click "Make Target" file to build project.
It is build complete when you see below
Generate a Programming File
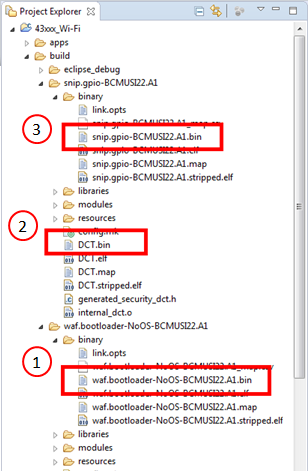
It will generate three bin files in <SDK folder>\43xxx_Wi-Fi\build folder when build complete.
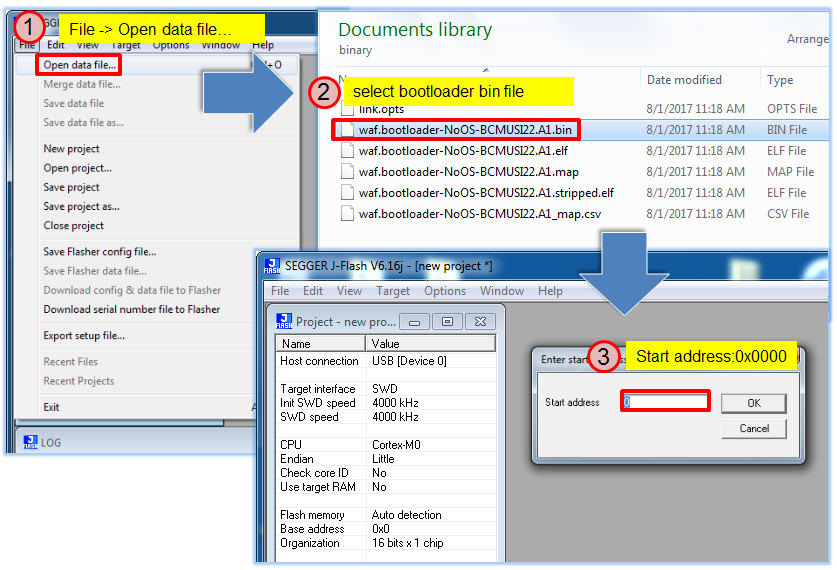
- Bootloader: waf.bootloader-NoOS-BCMUSI22.A1.bin
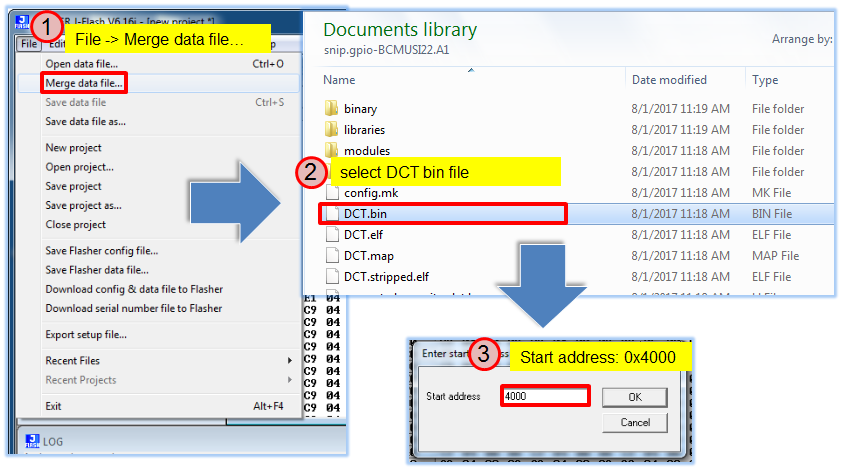
- DCT( Device Configuration Table): DCT.bin:
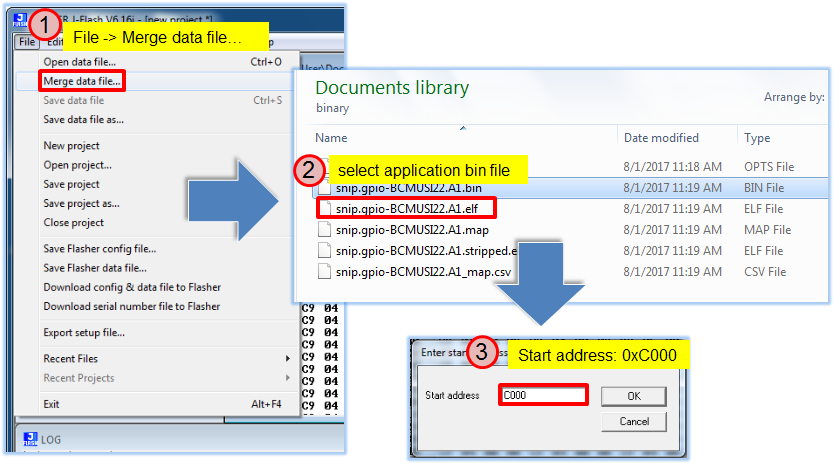
- Application: snip.gpio-BCMUSI22.A1.bin
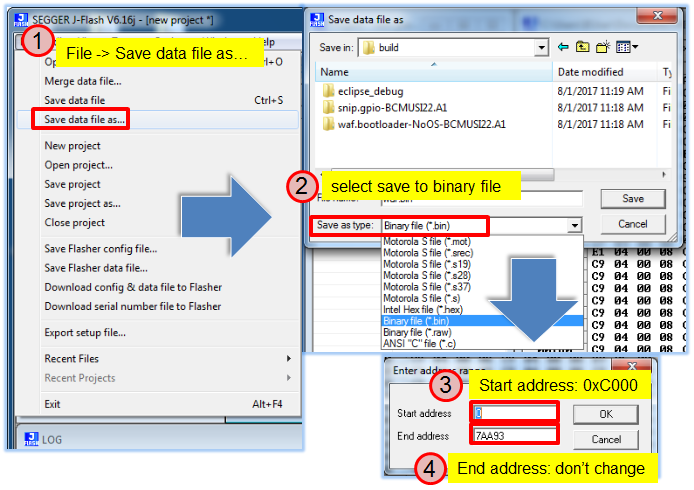
Combine .bin FIles
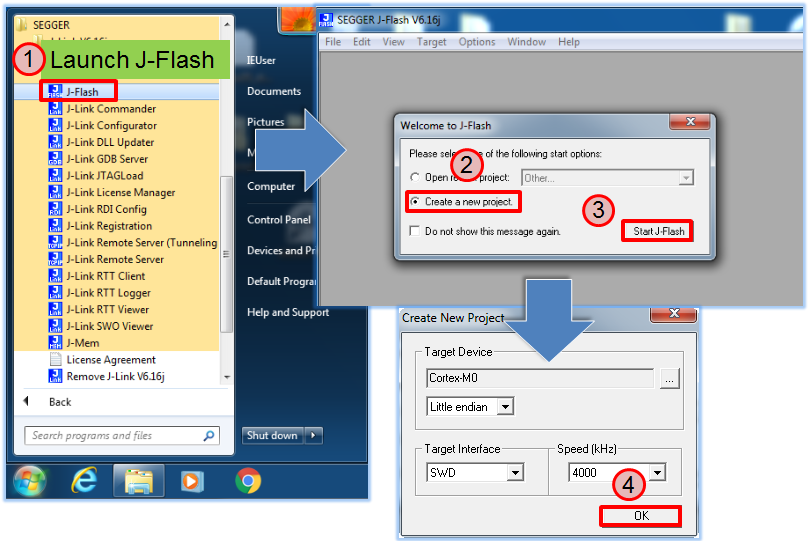
Download and install J-Link software, we need J-Flash tool to combine three bin files for programming.
Setp 1: Launch J-Flash and setup
Step 2:
Step 3:
Step 4:
Step 5:
