SDM850 build instructions
board support package source build
1. Unzip the SDM850 BSP package to D:\BSP
2. Copy ACPI compiler
copy "D:\EWDK\Program Files\Windows Kits\10\Tools\arm64\ACPIVerify\asl.exe" to "WP\src\acpi\rel\10.4\bin\"
3. Modify "WP\src\acpi\rel\10.4\acpi.wp63.proj”
add "<Target Name="Clean"> </Target>" after "<Target Name="Build"> </Target>"
4. Modify “WP\src\tools\rel\10.4\qcbuildwp63.cmd”
Find all "ATTRIB +R" and replace to "ATTRIB -R"
5. Delete or Rename "WP\src\tools\rel\10.4\CrmParallelization.py" to skip this python script
6. Run administrator command shell
A. D:\EWDK>LaunchBuildEnv.cmd
B. D:\>setenv.bat
7. Compilation
A. Build for all : run the following command in WP\src folder after setting environment
.\tools\rel\10.4\qcpackbuild.cmd -p 850 -platform ARM64
B. Build component
.\tools\rel\10.4\qcpackbuild.cmd -p 850 -platform ARM64 -componentsinput %1
C. If ACPI compile fail at first time. Please rebuild it again with below command
.\tools\rel\10.4\qcpackbuild.cmd -p 850 -platform ARM64 -componentsinput acpi
build WD image with adding drivers
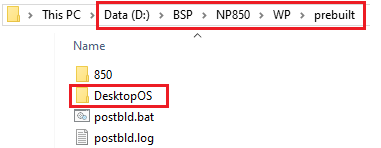
1. Copy D:\DesktopOS into D:\BSP\NP850\prebuilt\
2. Copy folder "WP\src\build\Qualcomm\DISM" to "WP\prebuild\DesktopOS\”
3. Copy folder "WP\src\build\Qualcomm\BCDBoot" to "WP\prebuild\DesktopOS\”
4. Remove some .proj files to avoid building. Or you can rename them to.proj_
createwdtargetsfile_19H1.proj
isogen_thumbdrive_19H1.proj
5. Modify “WP\prebuilt\850\isogen_thumbdrive.proj” fles


