Setting-up Eclipse Plug-in to cross compile for iMX6 series
Prerequisites
All operations in this guide are based on Ubuntu 12.04 LTS 64bit only.
First please install Ubuntu 12.04 LTS 64bit* with minimum 2GB memory.
* ubuntu-12.04.1-desktop-amd64.iso
Installing required packages
Please login and perform the following commands:
$ sudo apt-get install ssh
$ sudo apt-get install ia32-libs libx11-dev:i386 libreadline6-dev:i386 \
libgl1-mesa-glx:i386 zlib1g-dev:i386 uuid-dev:i386 liblzo2-dev:i386 \
libncurses5-dev:i386
$ sudo apt-get install \
bison build-essential ccache dpkg flex gcc g++ gettext intltool \
libarchive-zip-perl libfreetype6-dev libdbus-glib-1-dev liborbit2-dev \
libxml2-dev libx11-dev libgtk2.0-dev liblzo2-2 libtool m4 \
patch rpm tcl uboot-mkimage uuid zlib1g zlib1g-dev \
git gnupg flex bison gperf build-essential  zip \
curl libc6-dev libncurses5-dev x11proto-core-dev libx11-dev:i386 \
libreadline6-dev:i386 libgl1-mesa-glx:i386 libgl1-mesa-dev g++-multilib \
mingw32 tofrodos python-markdown libxml2-utils xsltproc zlib1g-dev:i386 \
gcc-4.6 g++-4.6 cpp-4.6 gcc-4.6-multilib uuid-dev liblzo2-dev \
uboot-mkimage libarchive-zip-perl \
wget git-core unzip texinfo gawk diffstat build-essential chrpath \
sed cvs subversion coreutils texi2html \
docbook-utils python-pysqlite2 help2man make gcc g++ \
desktop-file-utils libgl1-mesa-dev libglu1-mesa-dev mercurial \
autoconf automake groff curl lzop asciidoc xterm
$ sudo apt-get install libncurses5-dev:i386 liblzo2-dev:i386 uuid-dev:i386
$ sudo ln -s /usr/lib/i386-linux-gnu/mesa/libGL.so.1 /usr/lib/i386-linux-gnu/libGL.so
$ tar zcvf ~/usr_lib_i386-linux-gnu_for_Building_Android_KK.tar.gz \
/usr/lib/i386-linux-gnu/{libuuid.a,libuuid.so,liblzo2.so,liblzo2.a}
$ sudo apt-get install uuid-dev liblzo2-dev
$ sudo tar zxvf ~/usr_lib_i386-linux-gnu_for_Building_Android_KK.tar.gz -C /
Installing JDK
Please download "jdk-6u45-linux-x64.bin" manually, put it to directory ~/FILES/ and perform the following commands:
$ cd /usr/lib
$ sudo ~/FILES/jdk-6u45-linux-x64.bin
$ sudo mkdir jvm
$ cd jvm
$ sudo mv ../jdk1.6.0_45 .
$ cd jdk1.6.0_45/
$ sudo update-alternatives --install /usr/bin/java    java    /usr/lib/jvm/jdk1.6.0_45/jre/bin/java    2
$ sudo update-alternatives --install /usr/bin/javac   javac   /usr/lib/jvm/jdk1.6.0_45/bin/javac   2
$ sudo update-alternatives --install /usr/bin/jar     jar     /usr/lib/jvm/jdk1.6.0_45/bin/jar     2
$ sudo update-alternatives --install /usr/bin/javap   javap   /usr/lib/jvm/jdk1.6.0_45/bin/javap   2
$ sudo update-alternatives --install /usr/bin/javadoc javadoc /usr/lib/jvm/jdk1.6.0_45/bin/javadoc 2
$ sudo update-alternatives --config javap
$ sudo update-alternatives --config javadoc
$ sudo update-alternatives --config java
$ sudo update-alternatives --config javac
$ sudo update-alternatives --config jar
$ cd ~/
$ sudo sh -c "echo "JAVA_HOME=/usr/lib/jvm/jdk1.6.0_45" >> /etc/environment"
Installing cross toolchain
Please use bitbake command to build one toolchain installer or get a pre-built one.
Qt4 SDK
- Please perform following command to make toolchain installer.
$ bitbake fsl-image-x11 -c populate-sdk
- Please change working directory to where installer located and perform the following command.
$ sudo ./poky-eglibc-x86_64-fsl-image-x11-cortexa9hf-vfp-neon-toolchain-qt4-1.5.3.sh
Qt5 SDK
- Please perform following command to make toolchain installer.
$ bitbake fsl-image-x11-qt5 -c populate-sdk
- Please change working directory to where installer located and perform the following command.
$ sudo ./poky-eglibc-x86_64-fsl-image-x11-qt5-cortexa9hf-vfp-neon-toolchain-1.5.3.sh
Working with Eclipse
Installing the Eclipse IDE
Please download "eclipse-standard-kepler-R-linux-gtk-x86_64.tar.gz" manually, put it to directory ~/FILES/ and perform the following commands:
$ cd ~/
$ tar xvf ~/FILES/eclipse-standard-kepler-R-linux-gtk-x86_64.tar.gz
Starting the Eclipse IDE
$ source /opt/poky/1.5.3/environment-setup-cortexa9hf-vfp-neon-poky-linux-gnueabi
$ ~/eclipse/eclipse
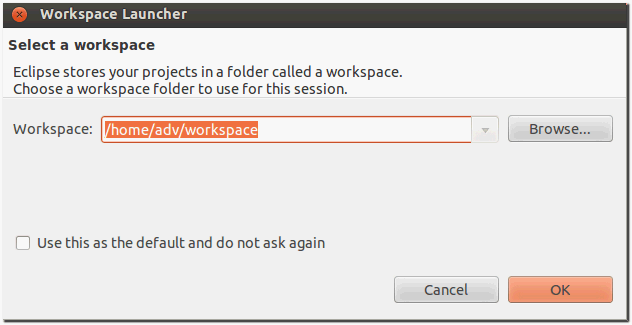
- select your workspace location
- Make sure you are in your Workbench and select "Install New Software" from the "Help" pull-down menu.
- Select "Kepler - http://download.eclipse.org/releases/kepler" from the "Work with:" pull-down menu.
- Expand the box next to "Linux Tools" and select the LTTng - Linux Tracing Toolkit boxes.
- Expand the box next to "Mobile and Device Development" and select the following boxes:
- Expand the box next to "Programming Languages" and select the following boxes:
- Complete the installation and restart the Eclipse IDE.
Installing the Pre-built Plug-in
- Start up the Eclipse IDE.
- In Eclipse, select "Install New Software" from the "Help" menu.
- Click "Add..." in the "Work with:" area.
- Enter "http://downloads.yoctoproject.org/releases/eclipse-plugin/1.5.4/kepler" in the URL field and provide a meaningful name in the "Name" field.
- Click "OK" to have the entry added to the "Work with:" drop-down list.
- Check the boxes next to following items:
- Complete the remaining software installation steps and then restart the Eclipse IDE to finish the installation of the plug-in.
- Click OK to continue when following dialog shows up.
Configuring the Cross-Compiler Options
- Choose "Preferences" from the "Windows" menu to display the Preferences dialog.
- Click "Yocto Project ADT"
- Specify corret "Toolchain Root Location" & "Sysroot Location".
Creating the Project
- Select "Project" from the "File -> New" menu.
- Expand "C/C++".
- Double click "C Project" to create the project.
- Expand "Yocto Project ADT Autotools Project".
- Select "Hello World ANSI C Autotools Project".
- Put a name in the "Project name:" field. Do not use hyphens as part of the name.
- Click "Next".
- Add information in the Author and Copyright notice fields.
- Be sure the License field is correct.
- Click "Finish".
- If the "open perspective" prompt appears, click "Yes" to open the C/C++ perspective.
- The left-hand navigation pane shows your project. You can display your source by double clicking the project's source file.
Building the Project
Select "Build Project" from the "Project" menu. The console should update and you can note the cross-compiler you are using.
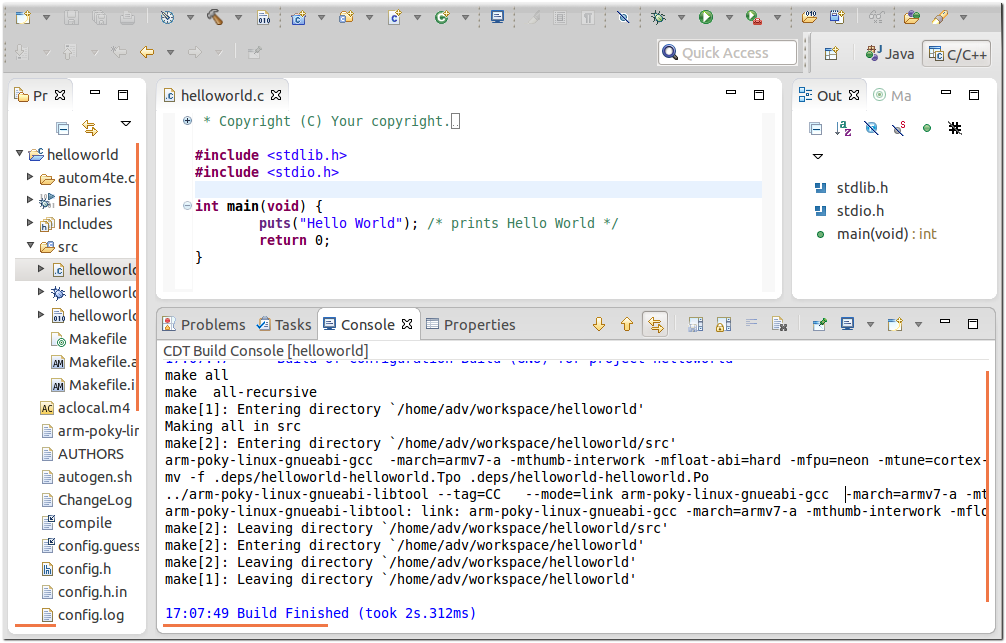
You can also use command, file, to verify the program, helloworld, just compiled in Ubuntu 12.04.

Deploying and Running the Application
- Select "Run Configurations..." from the "Run" menu.
- In the left area, expand "C/C++Remote Application".
- Locate your project and select it to bring up a new tabbed view in the Run Configurations Dialog.
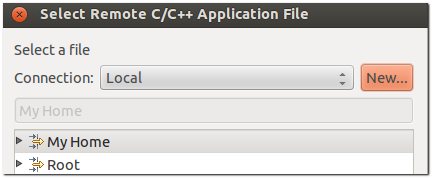
- Create a new connection to the target instance by clicking on "New...".
- Select TCF, and click "Next>".
- Clear out the "host name" field and enter the IP Address of target board.
- Click "Finish" to close the New Connection Dialog.
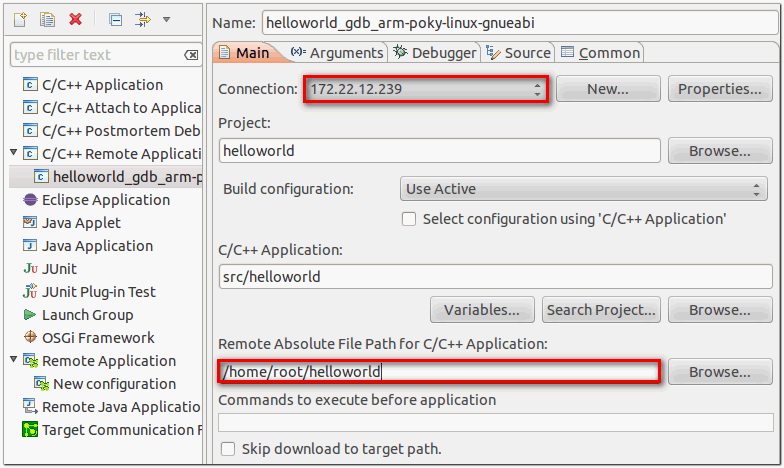
- Choose correct connection earlier created
- Enter the absolute path into which you want to deploy the application. Use the "Remote Absolute File Path for C/C++Application:" field.
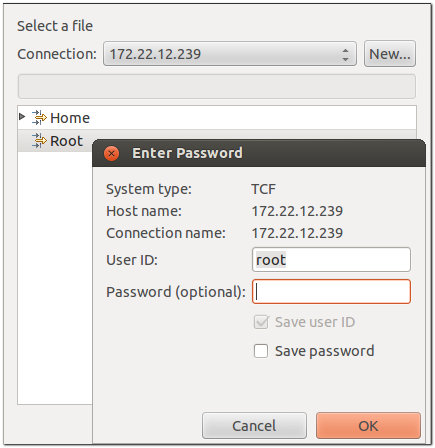
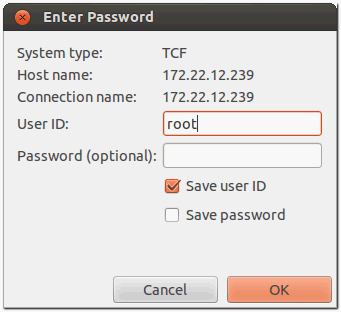
- Click "Run" to bring up a login screen and login.
Deploying and Debugging the Application
- Select "Debug Configurations..." from the "Run" menu.
- In the left area, expand "C/C++Remote Application".
- Locate your project and select it to bring up a new tabbed view in the Debug Configurations Dialog.
- Choose correct connection and enter the absolute path into which you want to deploy the application.
- Click on the "Debugger" tab to see the cross-tool debugger you are using.
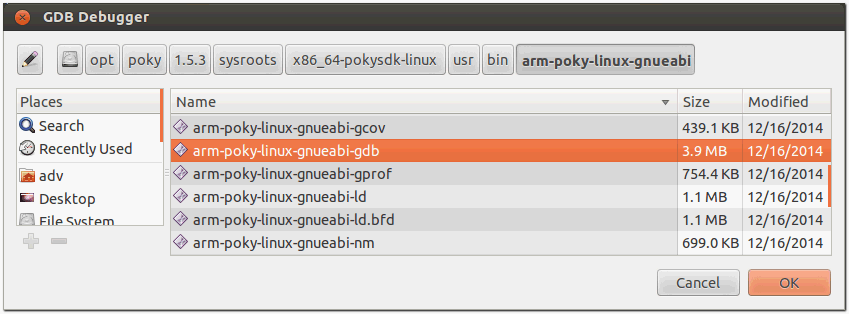
- Click "Browse..." to choose GDB debugger.
- Choose "arm-poky-linux-gnueabi-gdb" located in "/opt/poky/1.5.3/sysroots/x86_64-pokysdk-linux/usr/bin/arm-poky-linux-gnueabi".
- Click "OK
- Click "Debug".
- Login if login screen brings up.
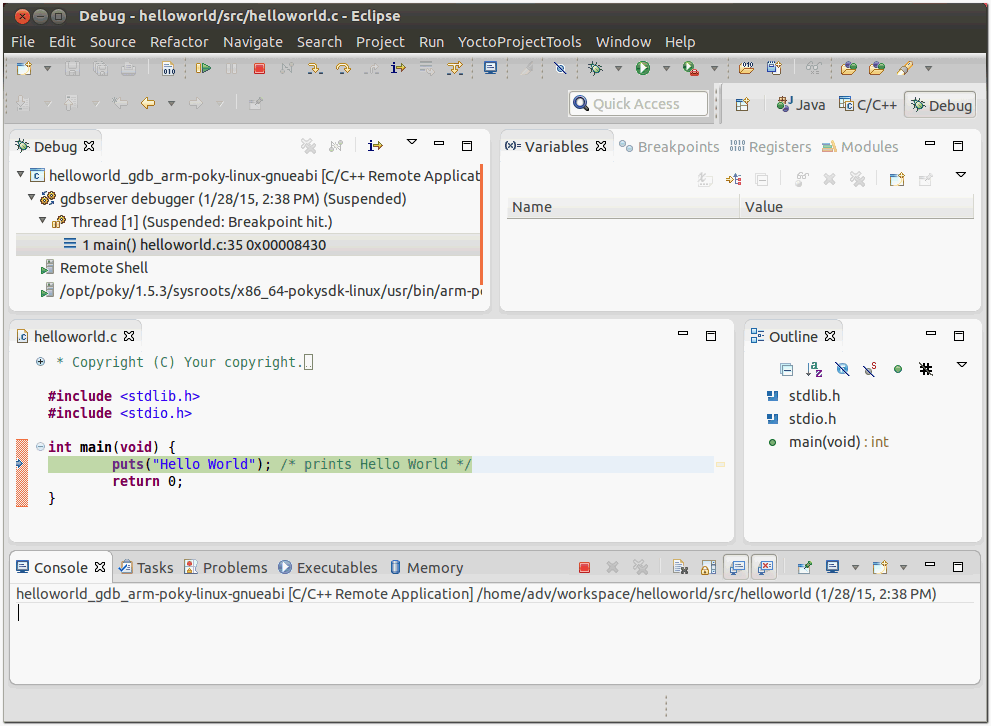
- Accept the debug perspective.
- The debug perspective shows up.
