Difference between revisions of "WISE-1530 SDK"
Erick.huang (talk | contribs) |
Erick.huang (talk | contribs) |
||
| Line 93: | Line 93: | ||
[[File:WICED make target new.png|392x262px|WICED make target new.png]] | [[File:WICED make target new.png|392x262px|WICED make target new.png]] | ||
| − | Step3: Type "snip.gpio- | + | Step3: Type "snip.gpio-WISE_1530" |
[[File:WICED make target input name.png|RTENOTITLE]] | [[File:WICED make target input name.png|RTENOTITLE]] | ||
| − | Field explanation: '''<u>snip.gpio</u>'''-'''<u> | + | Field explanation: '''<u>snip.gpio</u>'''-'''<u>WISE_1530</u>''' |
*snip.gpio: application project name | *snip.gpio: application project name | ||
| − | * | + | *WISE_1530: platform name, for WISE-1530 platform don't change this field |
| − | |||
[[File:WICED make target snip.gpio.png|RTENOTITLE]] | [[File:WICED make target snip.gpio.png|RTENOTITLE]] | ||
Revision as of 07:44, 3 August 2017
Contents
Setup Development Environment
Preparing for Hardware
The user needs to prepare for hardware as following:
- WISE-1530, WISE-1500 and WISE-ED22.
- 802.11b/g/n (2.4 GHz) Wireless Access Point (AP).
- PC running the Microsoft Windows 7 operating systems
Please refer to the following steps for setup a WISE series of boards before using WISE-1520.
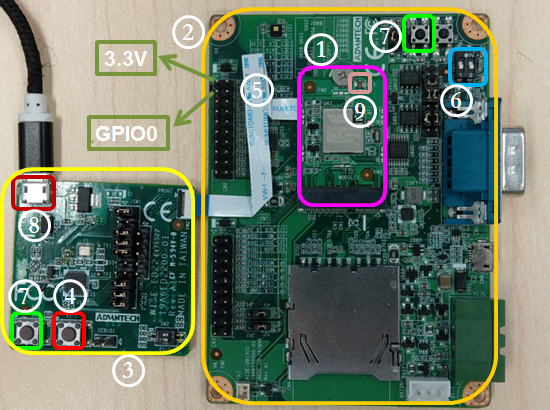
Step01: Please prepare boards as below.
① WISE-1530
② WISE-1500
③ WISE-ED22
④ WISE-ED22 reset button
⑤ CN2 on WISE-1500
⑥ SW3 on WISE-1500
- Pleas check pin1 and pin2 to “OFF” as default.
- Switch pin2 to decide whether running “backup to default” while device
booting. “ON”: enabled, “OFF”: disable
⑦ WISE-1530 reset button, one button on WISE-1500 and the other on WISE-ED22
⑧ Micro USB connector
- Drag-n-drop programming
- Serial port and debugging
- Power supplies for UART1 debug port
⑨ RF connector
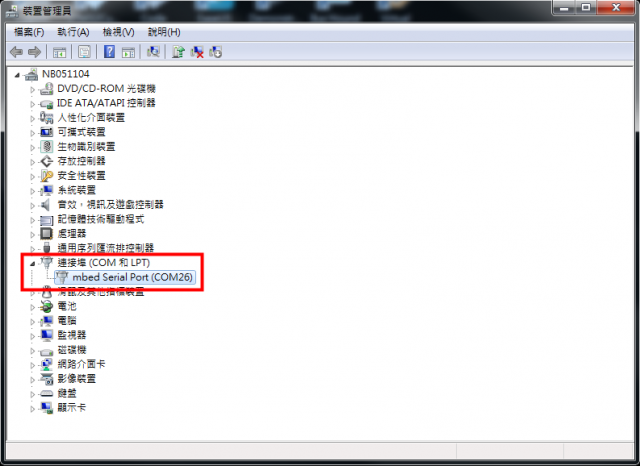
Step02: Connect the WISE-ED22 to PC using micro-USB cable.
- Install Driver ( Download latest driver )
- The device will be visible in the Device Manager as below, user can use serial tools (putty, tera term ...etc.) to key-in command.
WICED Studio
The user can refer to the following steps for setup WICED Studio with WISE-1530 SDK.
Windows Install
- Download WICED-Studio-4.1.1.8-IDE-Installer.exe.zip
- Extract the installer exe from the zip file to temp folder on your computer; do not execute the installer from the zip file
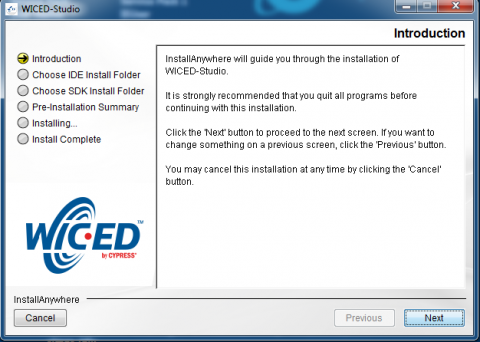
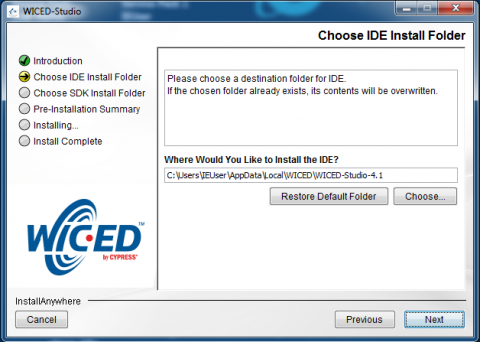
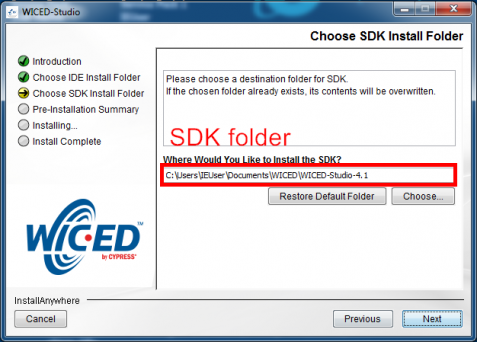
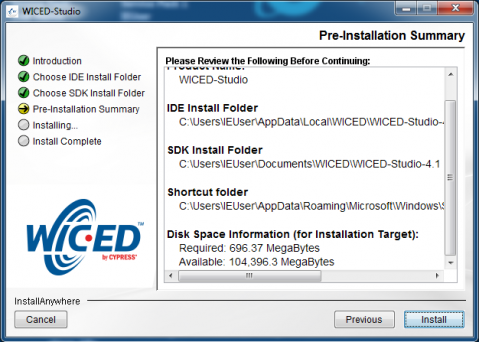
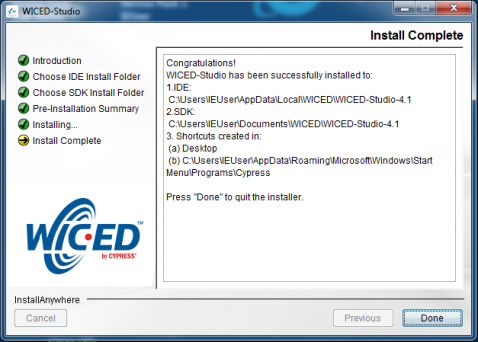
- Double click the installer exe to install WICED Studio as below picture
- After installation in completed, launch WICED Studio IDE from shortcut on desktop
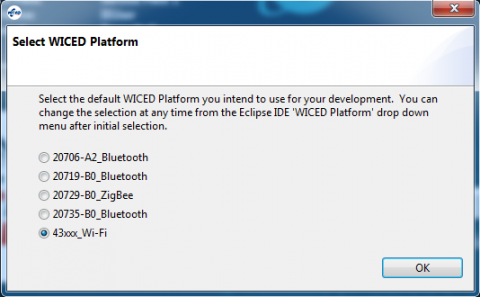
- When you see the Select WICED Platform page, choose the 43xxx_Wi-Fi item. You can change in "WICED Platform" in SDK toolbar also.
Copy patch file
- Download and unzip WISE-1530_SDK_4.1.8_platform_patch.zip
- Copy platforms and WICED folders to <SDK folder>\43xxx_Wi-Fi\ and select replace
Build Source File
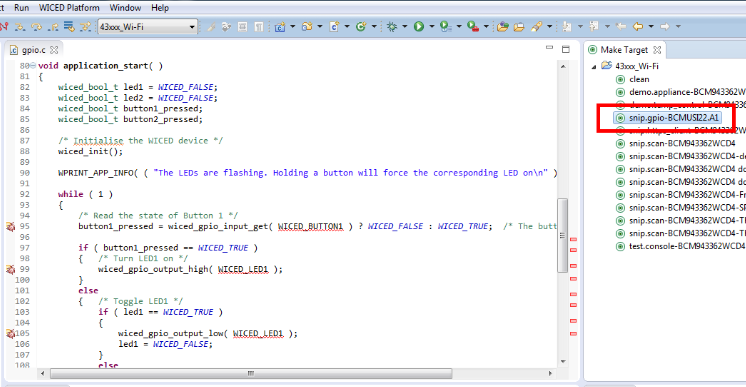
Make a "Make Target" file
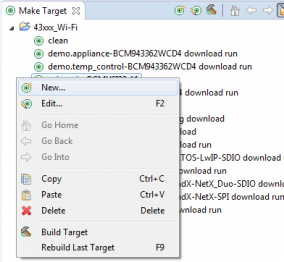
Step1: In Make Target window click mouse right button
Step2: Select New...
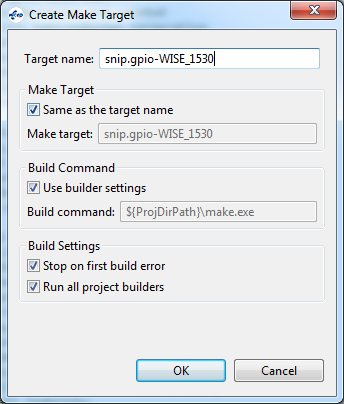
Step3: Type "snip.gpio-WISE_1530"
Field explanation: snip.gpio-WISE_1530
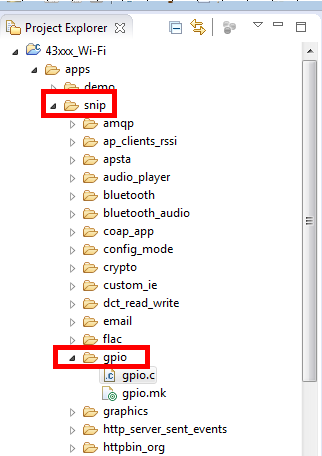
- snip.gpio: application project name
- WISE_1530: platform name, for WISE-1530 platform don't change this field
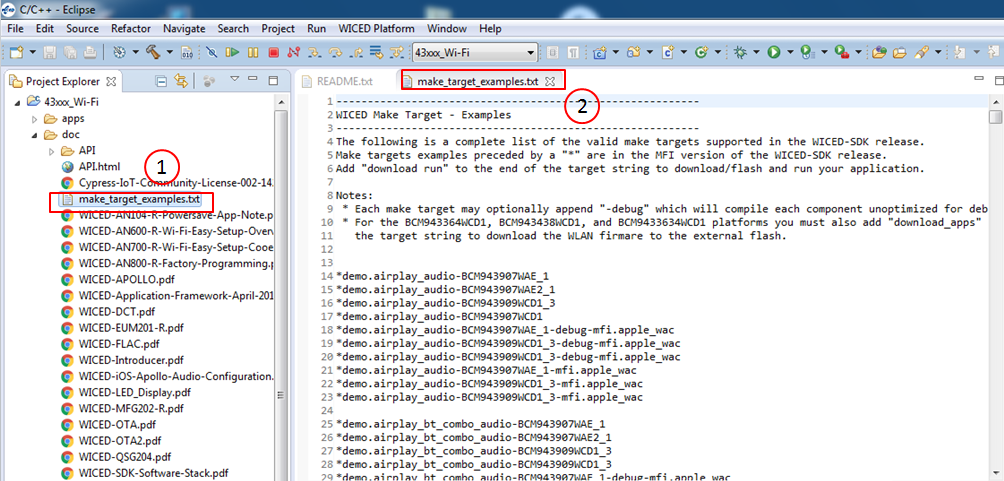
User can refer <SDK folder>\43xxx_Wi-Fi\doc\make_target_examples.txt to get more detail.
Build Project
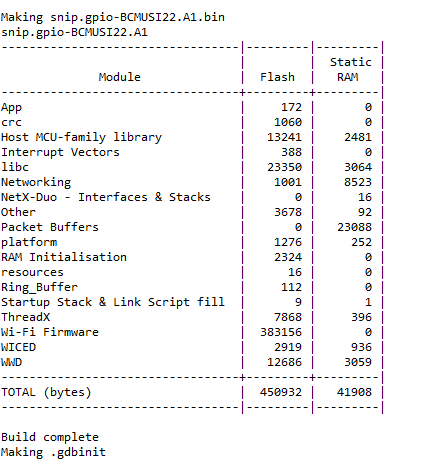
Double click "Make Target" file to build project.
It is build complete when you see below
Generate a Programming File
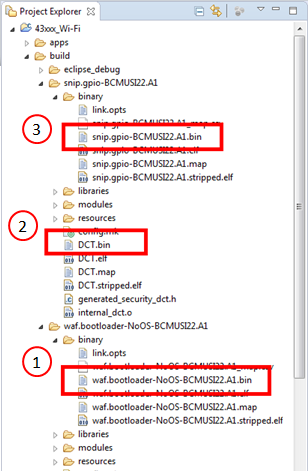
It will generate three bin files in <SDK folder>\43xxx_Wi-Fi\build folder when build complete.
- Bootloader: waf.bootloader-NoOS-BCMUSI22.A1.bin
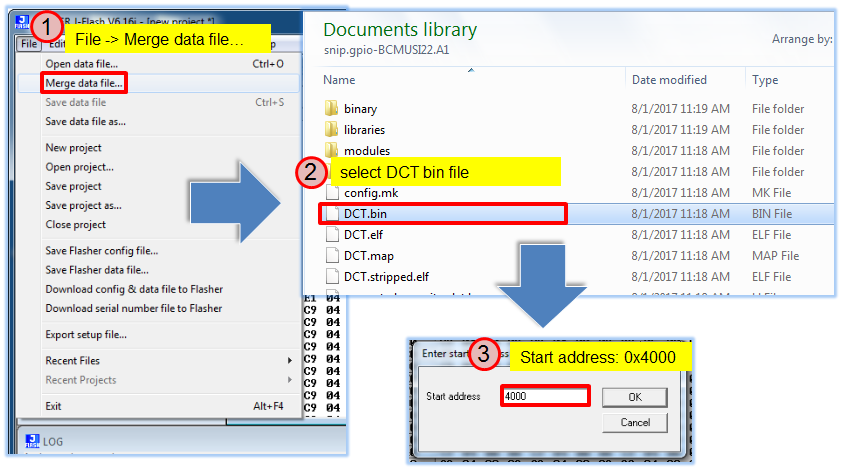
- DCT( Device Configuration Table): DCT.bin:
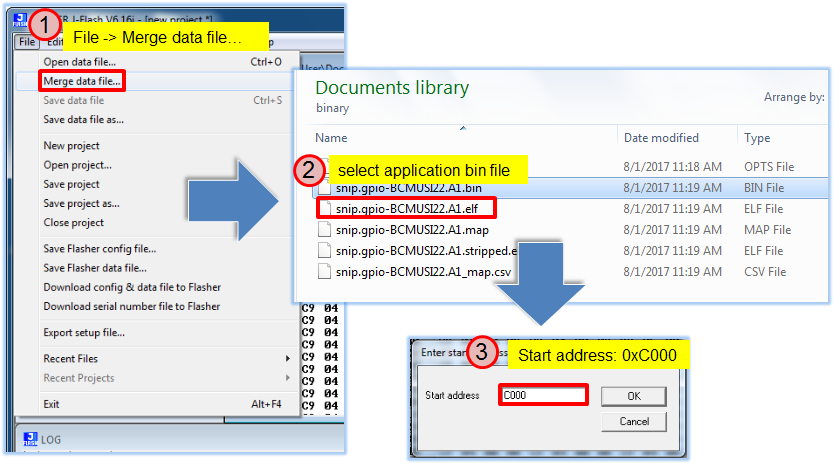
- Application: snip.gpio-BCMUSI22.A1.bin
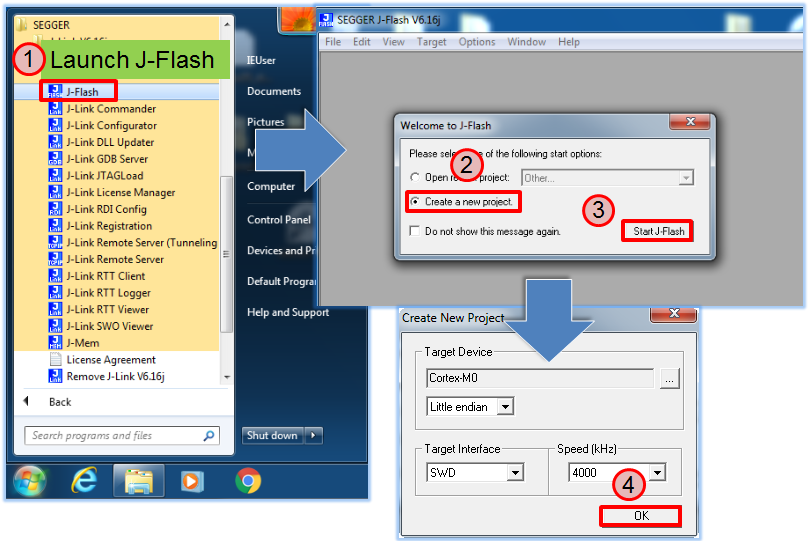
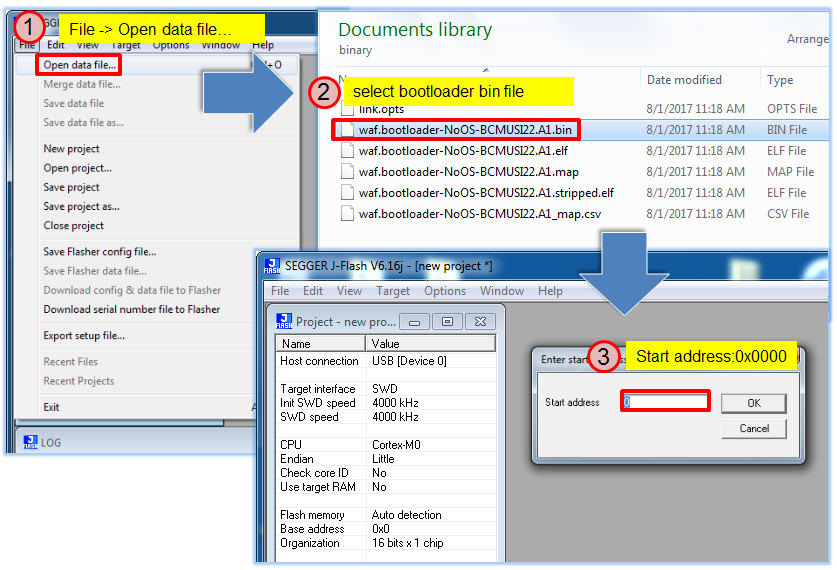
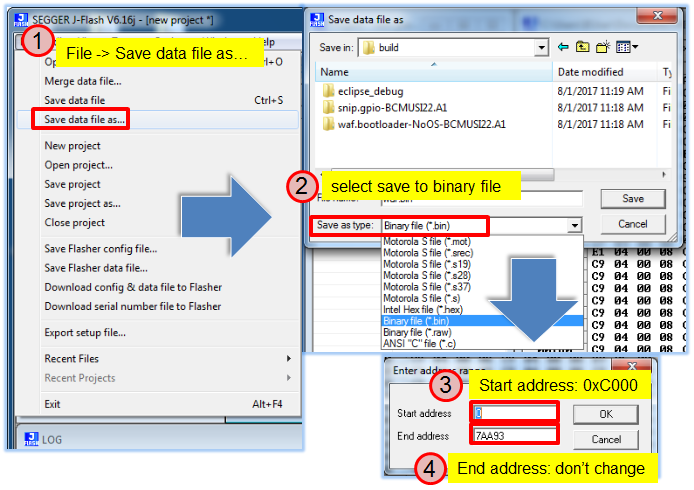
Download and install J-Link software, we need J-Flash tool to combine three bin files for programming.
Launch J-Flash
Open bootloader bin file
Merge DCT bin file
Merge application bin file
Save as a final bin file
Programming
Generate a programming file then use WISE-ED22 to program WISE-1530. User can refer WISE-ED22 Drag-n-drop Programming section.
